Missi Puri ( how to make Masala Puri )

-
Combine flour in a large mixing bowl.
-
Add the spices. Lightly crush the ajwain and kasoori methi and add them to the flour blend. When lightly crushed, they release a distinctively spicy aroma.
-
Add ghee.
-
Rub the ghee into the flour mixture using your hands until it becomes crumbly.
-
To check if the ghee in the recipe is correct, take a little mix in your first and squeeze it tight; if it takes the shape of your fist, that means you are all set. This shows that the ‘Moyen’ (fat content) in the mix is just perfect.
-
Add water to this mix and start kneading the dough. Tip — Add water slowly. Kneading the dough to the desired consistency requires a little skill. Do not add all the water at once. Instead, gradually add until you reach the medium-soft yet slightly stiff texture.
-
Knead a medium soft, non-sticky, and slightly tight/ stiff to the touch dough.
-
Cover the dough with a kitchen towel and leave it for 30 minutes.
-
After that, add a tablespoon of oil to the rested dough.
-
Give the dough a final knead.
-
Divide the dough into equal parts.
-
Roll each of them into a small ball.
-
Gently press them in between your palms to flatten them.
-
A simple yet helpful hack — Apply a little oil to the rolling pin and the dough ball to prevent it from sticking to the rolling pin. This will simplify the rolling process, and you can roll the pooris like a pro!
-
Keep the missi masala pooris medium thick when rolling.
-
Heat oil in a heavy-bottomed pan. Drop a small piece of dough in the oil to check if the oil is perfectly hot. If it floats to the surface gradually, the oil is ideal for frying.
-
Fry 1-2 puris at one time. Do not overcrowd the kadai and fry them in batches.
-
Give the puris enough space in the kadai to puff up and become crispy.Tip — Maintain oil temperature. To get perfectly fried pooris, ensure the oil is at the right temperature. For the beautiful golden crispy pooris, fry the pooris in medium-hot oil. If the oil is too hot, the pooris will get burnt. If the oil is not hot enough, the pooris will soak up the oil and become soggy.
-
Once the pooris have puffed up and attained the beautiful golden color, remove them from the oil.
-
Drain the fried pooris on the paper napkin. This is an essential step in removing excess oil from the pooris.
-
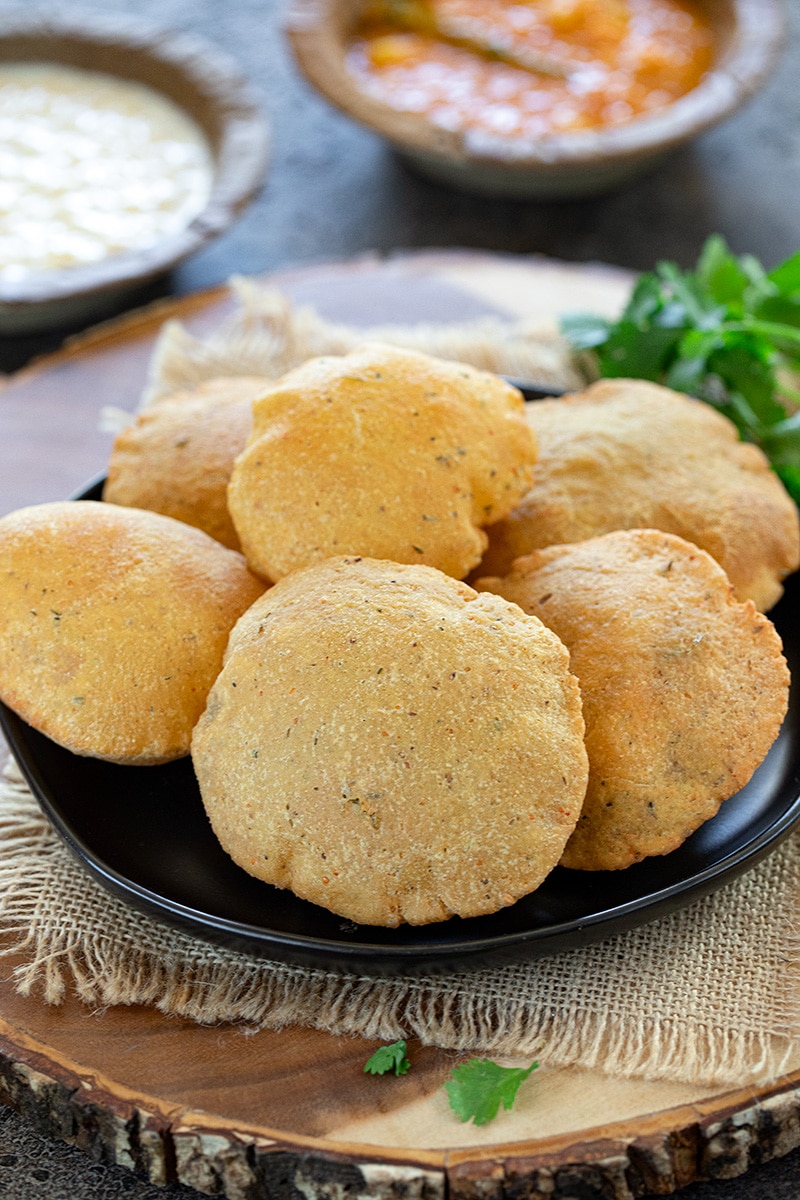
Enjoy missi puris with raitas or aloo ki sabzi.
Frequently Asked Questions
Can I store the leftover Missi Pooris?
You can store the cooked/ fried missi pooris in an air-tight container for 2 days at room temperature.
What can I do with the leftover poori dough?
The leftover poori dough stays well in the fridge for 3- 4 days when stored in an air-tight container.
When needed, remove the container from the refrigerator and let it sit on the counter for 15 minutes. You can now roll them into missi pooris or missi roti/ parathas and serve!
Can I freeze the Missi Puri dough?
Absolutely! This is a freezer-friendly recipe, and the dough can be stored in the freezer for up to 2 months. Pack the dough in an air-tight container and slide it in the freezer. When ready to cook, thaw it overnight in the fridge.
Next day, remove it from the refrigerator and let it rest on the counter for 15 mins. You can then roll them into pooris or rotis/ parathas.
Calories: 81kcal | Carbohydrates: 13g | Protein: 2g | Fat: 2g | Saturated Fat: 1g | Polyunsaturated Fat: 0.2g | Monounsaturated Fat: 1g | Cholesterol: 4mg | Sodium: 3mg | Potassium: 48mg | Fiber: 1g | Sugar: 0.4g | Vitamin A: 17IU | Vitamin C: 0.04mg | Calcium: 6mg | Iron: 1mg


