Carnivore Beef Bone Broth – The Carnivore Dad
Recently, I found myself interested in bone broth. I wanted a warm drink to replace coffee and that led to bone broth. This wholesome drink is delicious, and it’s rich in protein and collagen. I won’t bore you with additional nutritional facts. You can easily search Google for all the potential and verified benefits of drinking bone broth.
Initially, I went with store bought broths. I tried several, but soon realized that store bought brands are expensive and nearly all have added ingredients that may not be beneficial to people on the Carnivore WOE. Don’t get me wrong, store bought broths are fine in a pinch, I just wouldn’t drink store bought broths every day.
I decided to make my own, and started looking for a great carnivore recipe. I immediately ran into an issue because most recipes had added ingredients that I didn’t want. These additions included vegetables, extra spices, even wine. These issues led me to experimenting with my own version of these recipes.
While this recipe is easy to make, it can be a bit time consuming.
Ingredients:
- 2-3 pounds of beef bones, cut into 2-4 inch sections (organic marrow bones are preferred)
- 1 pound of pealed chicken feet (they contain glucosamine, chondroitin, collagen, and trace minerals)
- 1 teaspoon of Apple Cider Vinegar (optional and not carnivore but won’t cause an issue due to the limited amount)
- 2-3 teaspoons Sea Salt
- Ice ( I normally use half my automatic ice maker tray)
Cooking tools/utensils:
- 1 large cooking pot (big enough to hold the beef bones and chicken feet, covered in water)
- Kitchen scissors
- Teaspoon
- Baking sheet
- Pressure cooker / Instapot / Ninja Foodi
- Jars/containers with lids (up to 10 depending on the jar size and amount of broth made)
- Soup ladle or coffee cup
Instructions:
- Blanch bones and feet by adding them to a large cooking pot and covering them with cold water.
- Close the lid and bring water to a boil.
- Reduce heat to medium high and boil for 20 minutes.
- Heat the oven to 450 F.
- Remove bones and feet from heat and skim the foam layer off the top. This can be discarded.
- Discard the water by pouring the bones and feet through a large strainer.
- Rinse the bones and feet with water.
- Separate the beef bones and pat them dry.
- Place the beef bones on the baking sheet and bake at 450 for 20 minutes. While the bones are cooking, clean both the strainer and cooking pot. You’ll need them again later.
- Turn the beef bones over and bake for an additional 15-20 minutes. Steps 9 and 10 can lead to smoke in the house. You can do these steps on an outside grill.
- While the beef bones are in the oven, cut the toenails off the chicken feet and discard the nails.
- Remove the beef bones from the oven. The longer you crisp the bones, the darker the bone broth will be.
- Add both beef bones and chicken feet to the Pressure cooker / Instapot / Ninja Foodi.
- Add Sea salt and Apple Cider Vinegar.
- Fill the Pressure cooker / Instapot / Ninja Foodi with water so that the bones and feet are covered.
- Lock the lid and cook on high for 2-3 hours. Cooking for a longer period of time will improve the flavor.
- After the cooking time is done, rapid release the pressure.
- Pour the bone broth through the strainer into your cooking pot. This will help keep solid items (pieces of meat or bone) out of your broth.
- Add about half your ice to the pot to cool it rapidly. It doesn’t impact the taste.
- Sample your bone broth and see how good it is! Just be careful because it is still very hot!
- Distribute the broth to the canning jars using a soup ladle or coffee cup. I recommend filling the jar so that you leave some space at the top for expansion during freezing.
- Close the jars with the lids. If they are still very warm to the touch, I recommend you fill your sink with ice water and submerge the sealed jars. The goal is to cool the broth as rapidly as possible. Bacteria can form if you let the broth cool slowly.
- Dry the jars and freeze the bone broth that you wont be drinking within the next 5-7 days.
You’ll know you did everything right by the look and consistency. When it is cooled off, it will coagulate like jelly, with a white fat film on top. You can throw the fat film away or heat it with your broth and drink it. Don’t worry about the jelly like consistency though, when you warm up a cup, it will revert back to liquid form.
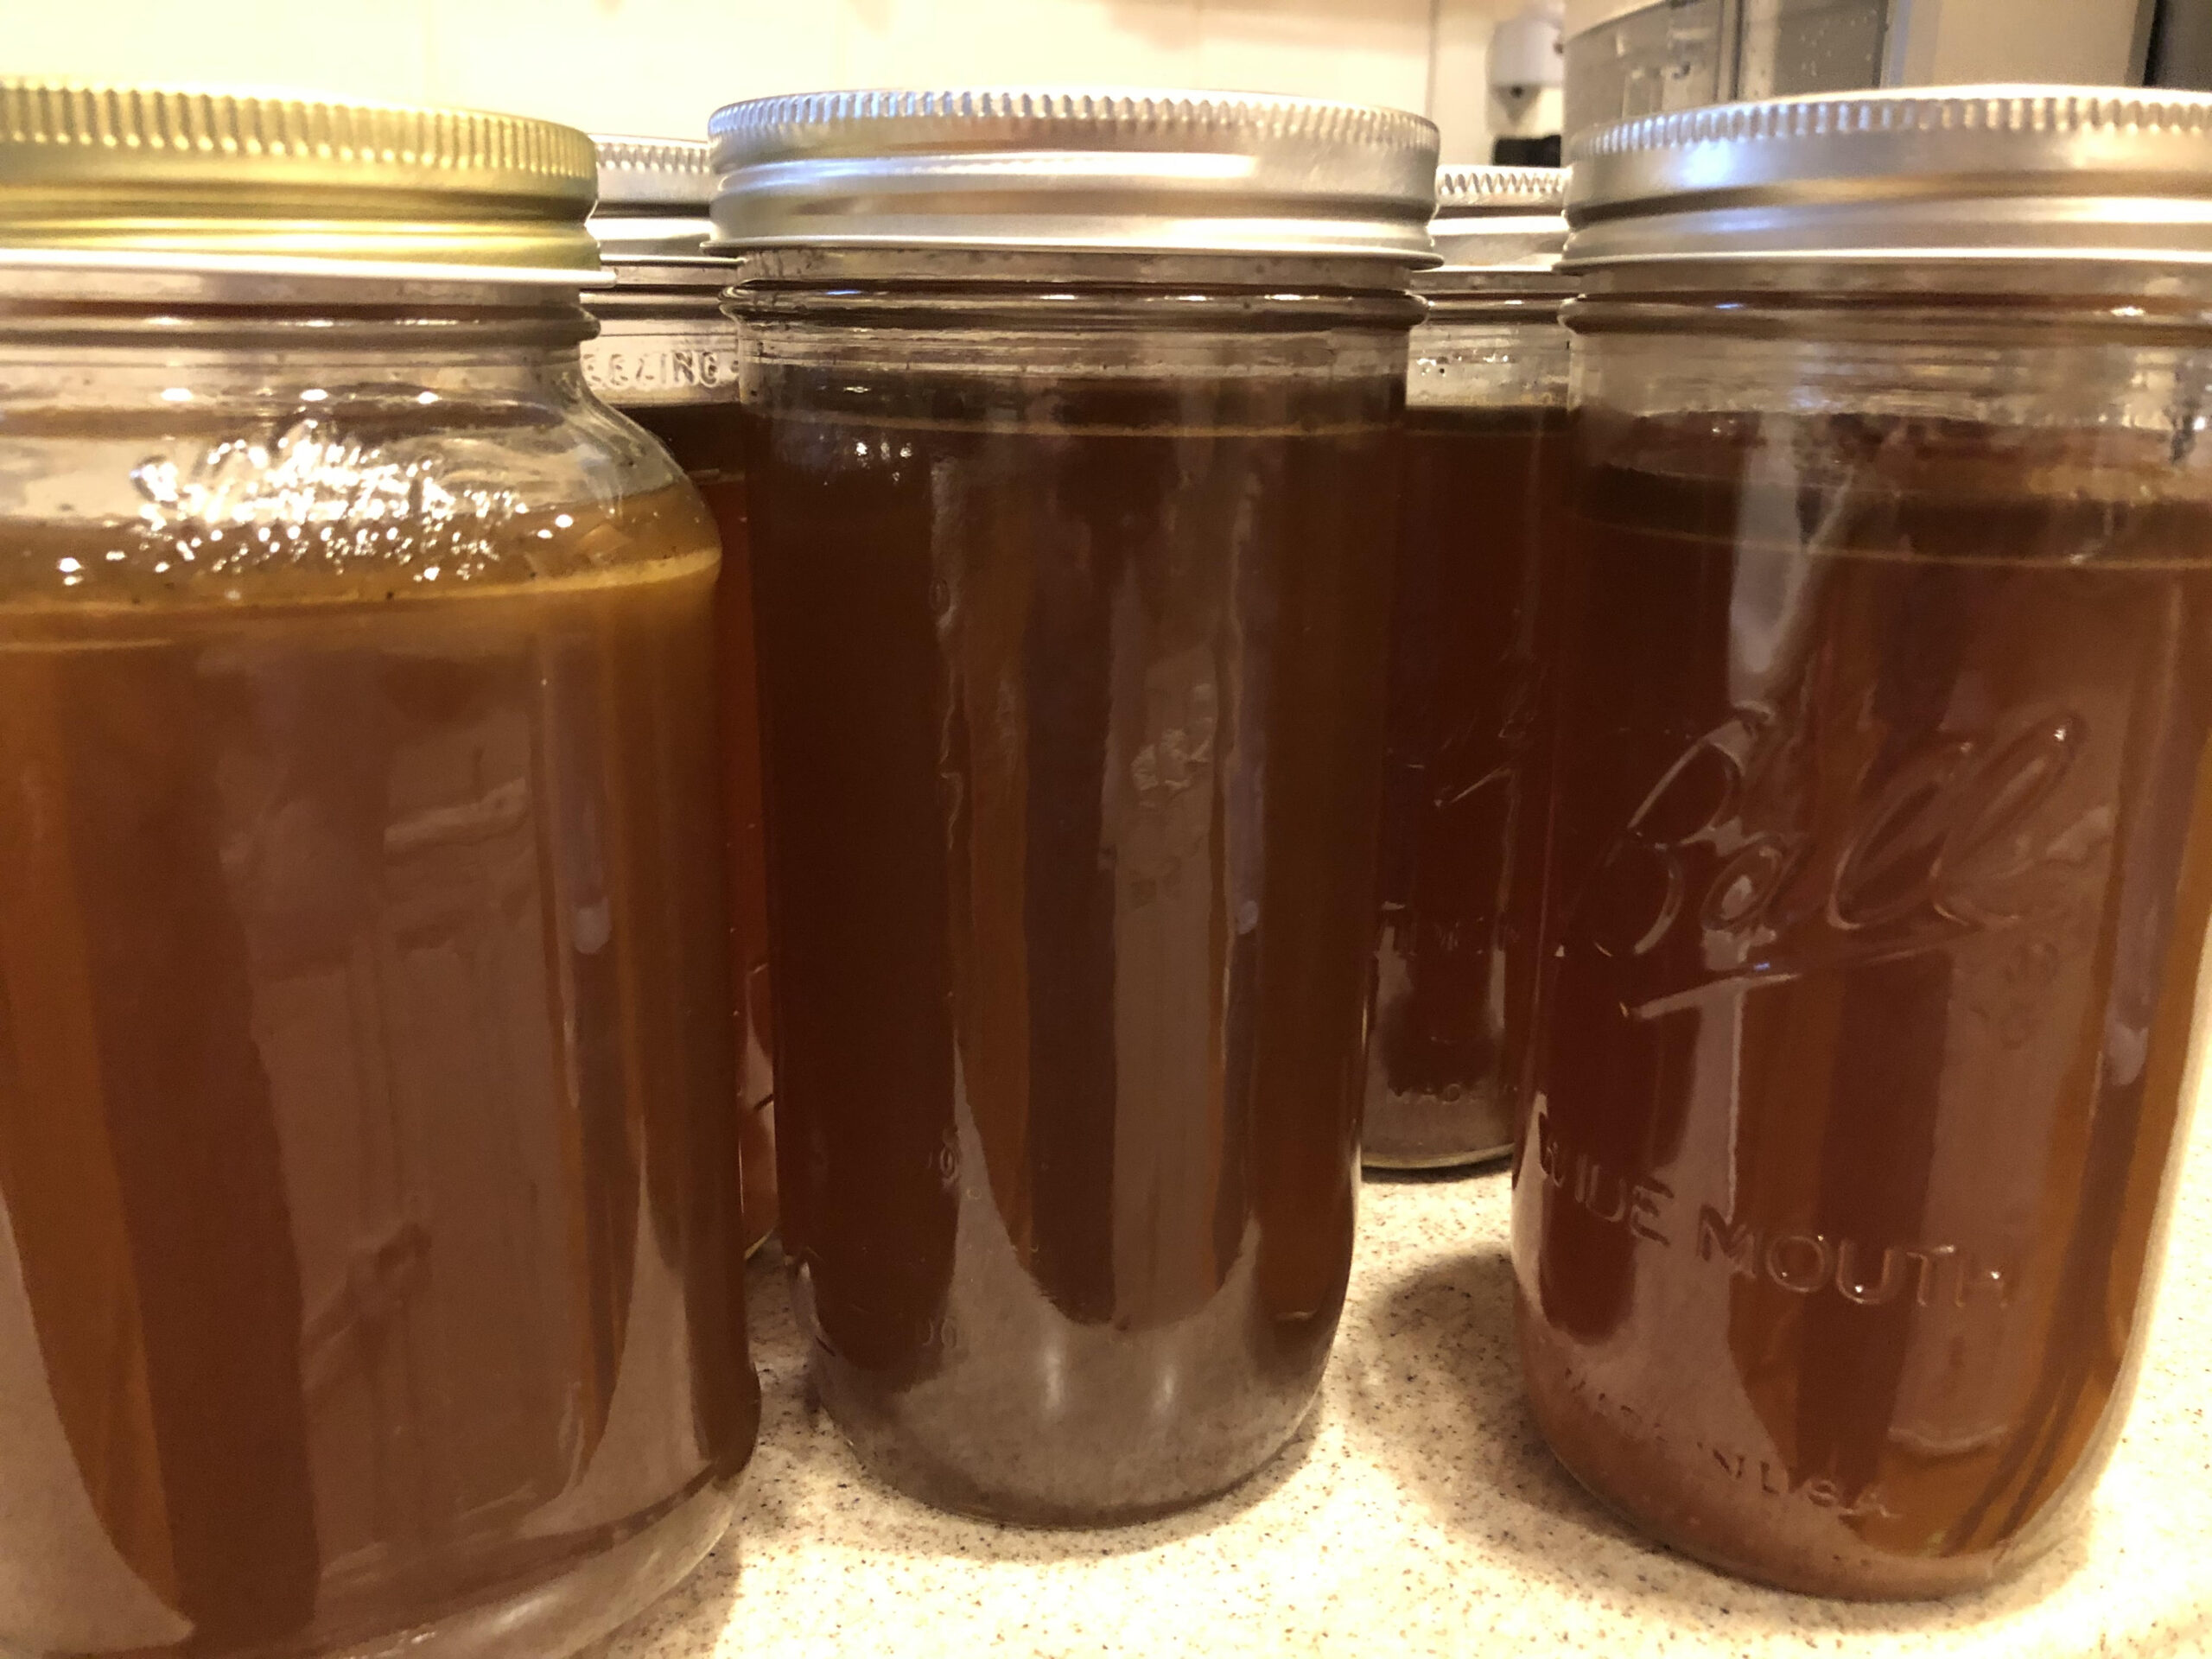
Here is my last batch. I really went all out on crisping the beef bones and the result was a much darker broth.

Tips for success:
- Don’t skip the blanching step. This removes impurities and gets the bones ready for cooking,
- Roast the bones! This helps to add flavor to the broth.
- Cook for longer times. I prefer 3 hours because it improves the flavor. You can experiment for a time that works for you.
- Cool the broth rapidly. You certainly don’t want bacteria growing in your broth!
- Understand that this process with take some time. BUT, it is well worth the effort because you control what’s in the pot and how it tastes!
- The chicken feet can be air fried and eaten after you make your broth. You can find several online recipes for doing this.