Are you ready to level up your customer engagement with an online survey in WordPress?
Understanding your customers’ needs and experiences is vital for any successful business. Gathering customer feedback through a survey is a smart way to gauge satisfaction and pinpoint areas for improvement.
In this guide, we’ll walk you through creating a comprehensive customer satisfaction survey in WordPress. So, let’s dive into how you can easily set up a survey on your site and start collecting valuable insights from your customers!
Why Customer Satisfaction Surveys Matter for Your Business

As a business owner, you know how important it is to keep your customers happy.
But how do you know if they are really satisfied? That’s where customer satisfaction surveys come into play.
A customer satisfaction survey is a way to ask your customers what they think about your product or service. You can find out what they like, what they don’t like, and what they think could be better. This information is valuable because it helps you understand your customers better and make changes that can improve your business.
Let’s talk about why these surveys are so important.
First, they help you measure how happy your customers are. This is important because happy customers usually convert into loyal shoppers. They might even refer their friends to your products, which can bring in even more customers.
Furthermore, customer satisfaction surveys can help you make your product or service better. When customers tell you what they don’t like, you can work to fix those things. This can improve your product or service, making even more customers happy and building a brand reputation in the long run.
So, if you really want to grow your business revenue and build a strong relationship with your customers, which is really important for any business, a custromer satisfaction survey is a must.
But how can you create a customer satisfaction survey in WordPress? Let’s find out.
How to Create a Customer Satisfaction Survey in WordPress
Creating a customer satisfaction survey is really simple. Just follow the below steps and you’re good to go:
Step 1: Install UserFeedback

Start by installing UserFeedback, a versatile WordPress plugin perfect for creating customer satisfaction surveys.
It offers an easy setup and a wide range of survey form templates, allowing you to tailor your survey to your specific needs.
With options like custom branding and comment boxes, UserFeedback is ideal for collecting meaningful customer feedback.
Choose any plan from the pricing page that suits your business needs. Once you’ve selected your plan, follow the installation guide to set up UserFeedback on your WordPress site.
Step 2: Activate Survey Template Addons
After installing UserFeedback, activate the necessary addons for your survey.
In your WordPress dashboard, go to UserFeedback and select Addons.
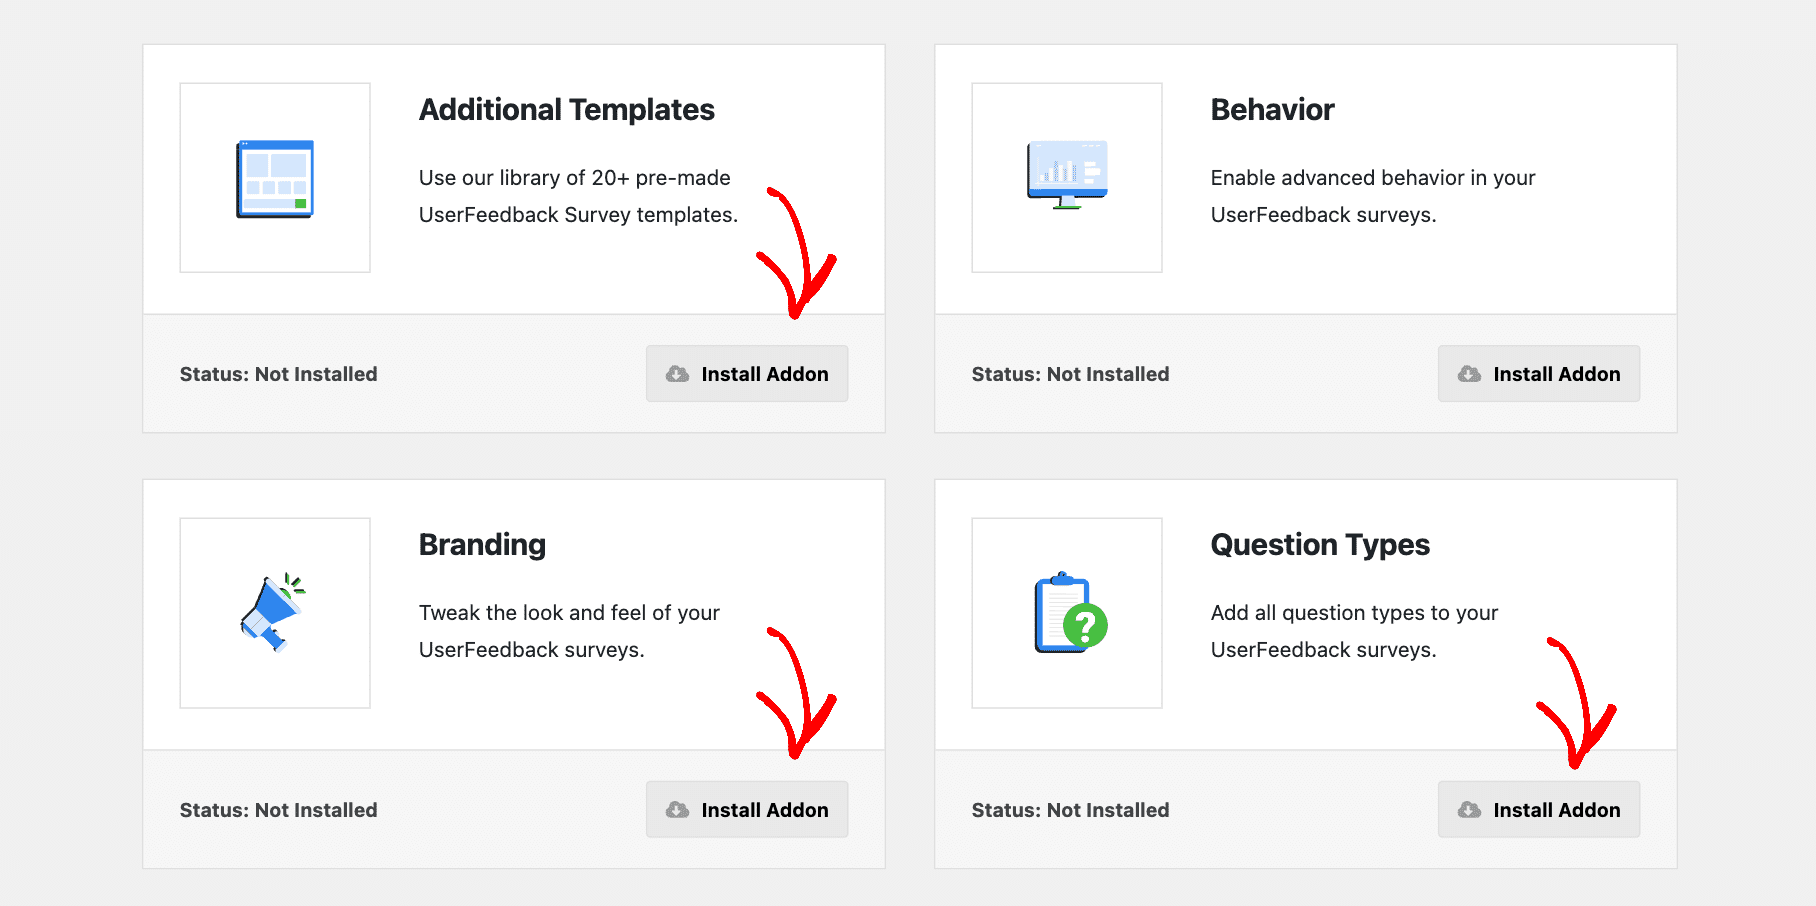
Here, install and activate the Additional Templates and Question Types addons. These addons provide access to the customer satisfaction survey template and various question types.
Also, activate the Branding addon to customize the look of your survey.
For more comprehensive customization options, consider installing all available addons, guided by the detailed instructions provided in the UserFeedback addons installation guide.
Step 3: Create a New Customer Satisfaction Survey
Now, navigate to UserFeedback and then Surveys in your WordPress admin.
Click Create New to start designing your survey. UserFeedback offers a variety of feedback templates.

Select the B2B Satisfaction Survey (PRO) template, which provides an editable base for your customer satisfaction survey.
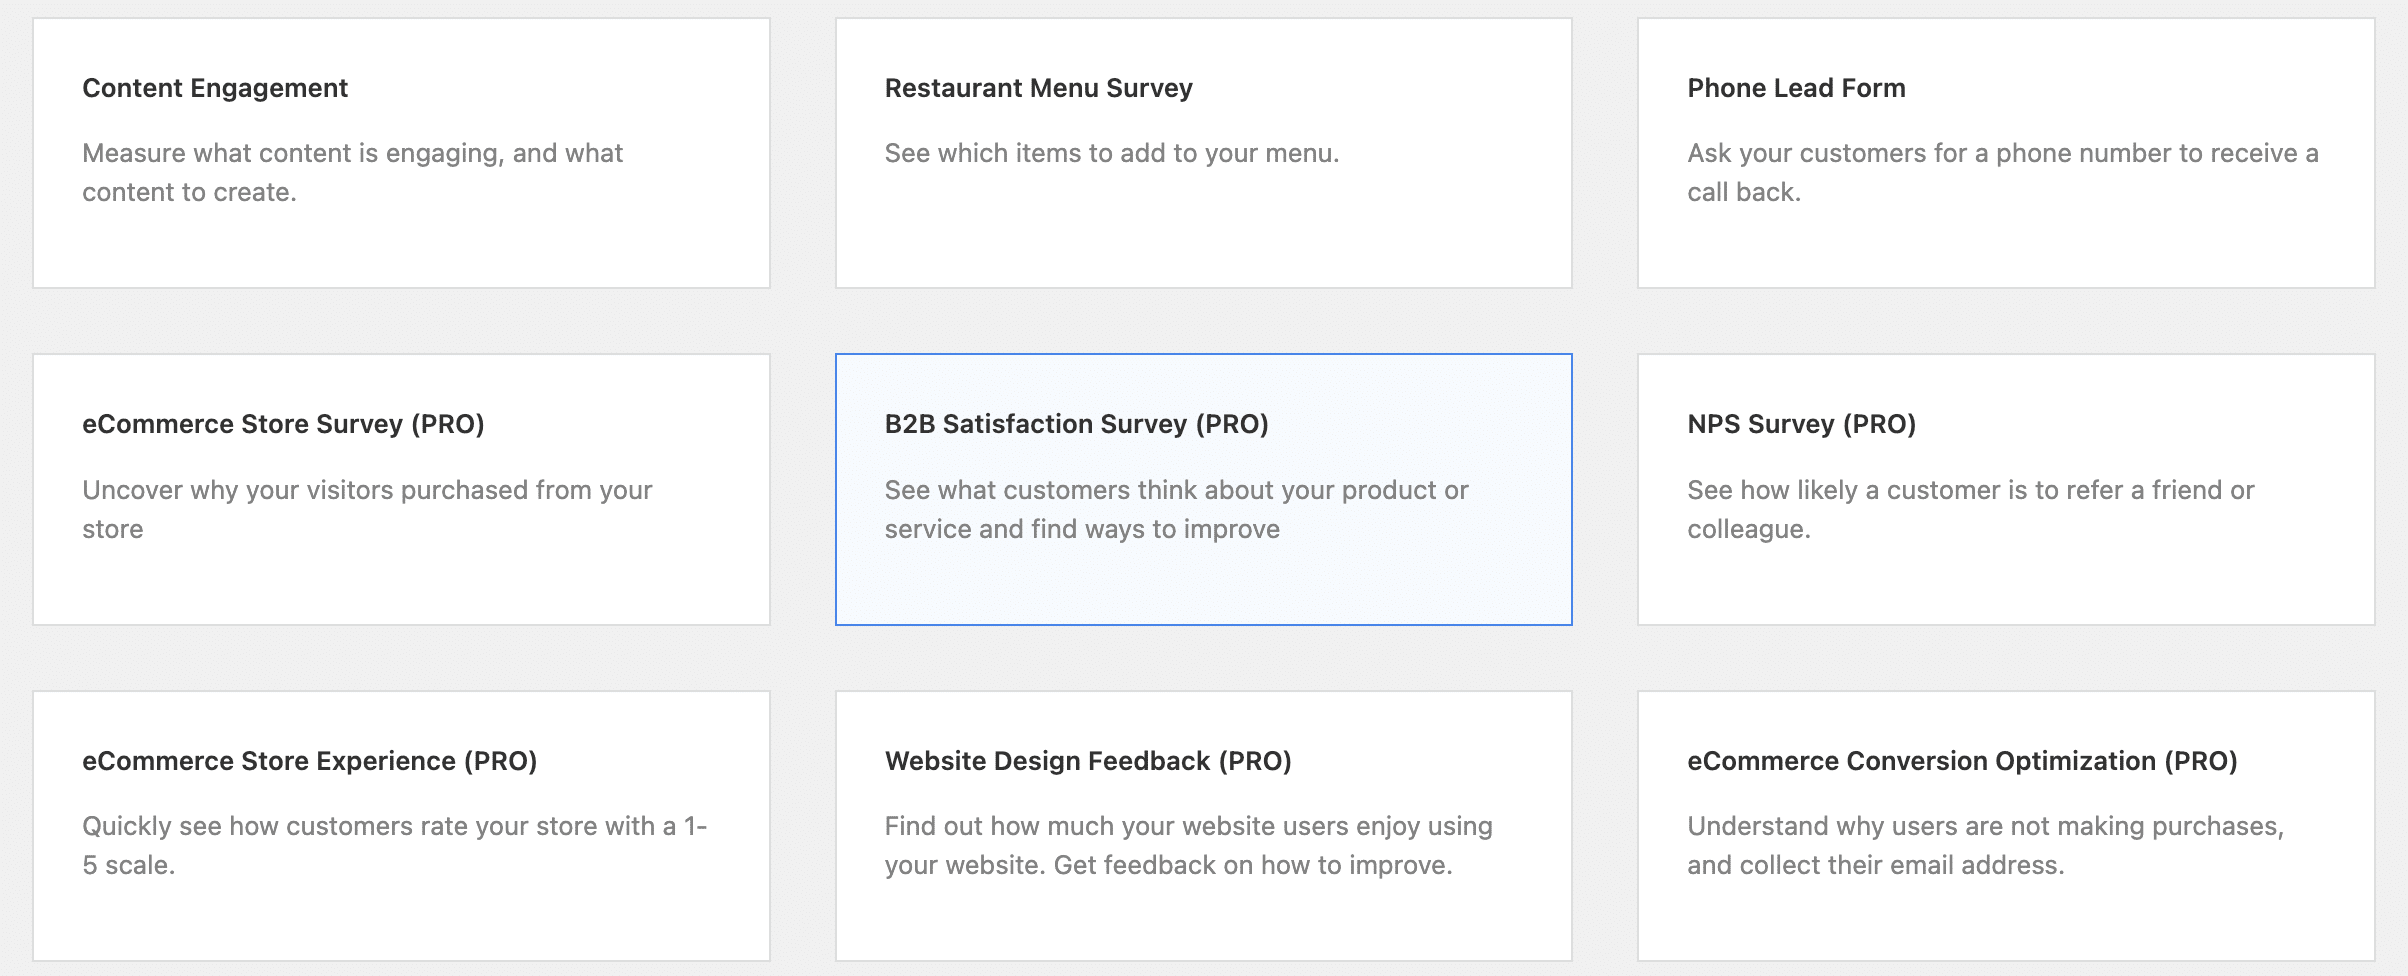
This step is crucial for laying the groundwork for your survey’s structure and content.
Step 4: Edit Your Satisfaction Survey Template
Personalize your survey by clicking the pencil icon to change its name. This name is for internal reference only and won’t be visible to your customers.

Next, modify the first question by expanding the star rating question and editing its title.
Customize it to reflect your product/service and the insights you’re seeking.

Make this question mandatory for a better response rate and decide on enabling a comment box based on your needs.
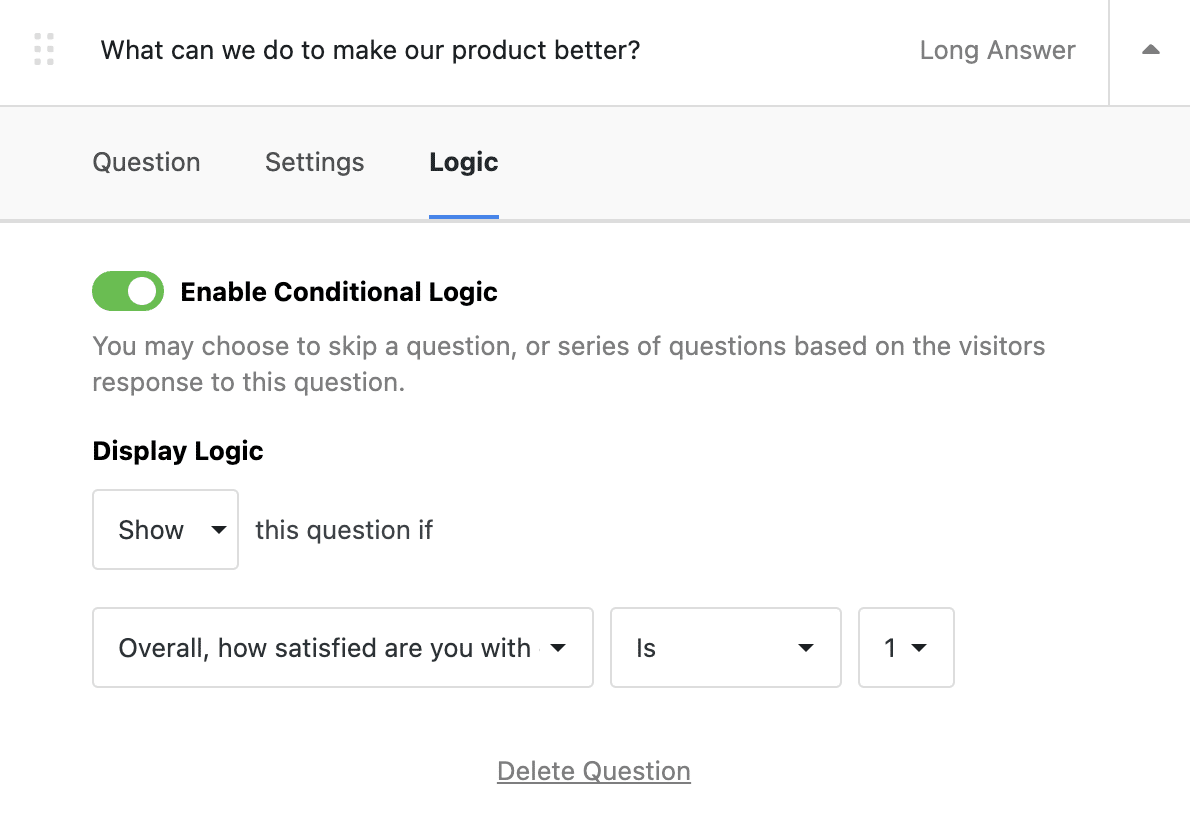
Follow similar steps for the Long Answer question. Utilize the conditional logic feature, especially beneficial if you have the Pro license, to show or hide this question based on previous answers.
Feel free to add more questions to gather additional insights, using different types of questions like scale questions or multiple-choice.
Step 5: Add a Thank You Message to Your Customer Survey
After setting up your questions, add a custom thank you message that will display once customers complete the survey.
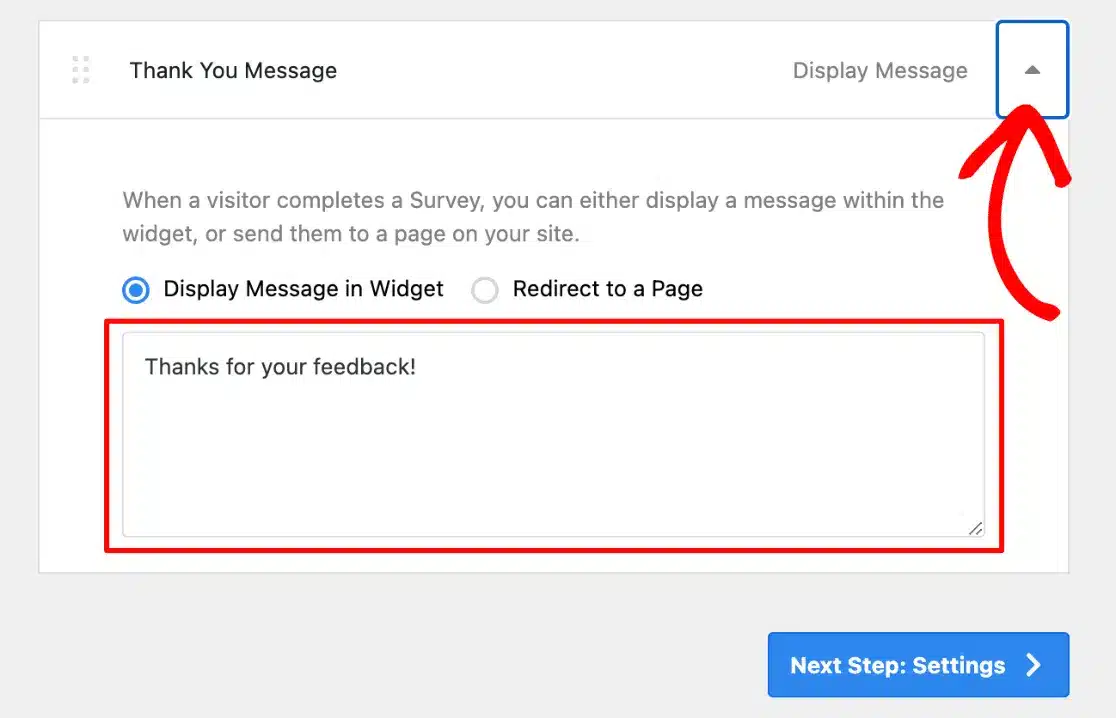
This gesture enhances the user experience and shows appreciation for their feedback.
If you’re using the Pro license, consider using the Redirect to a Page option to guide customers to other relevant areas of your site, like promotions or review pages.
Step 6: Customize Your Survey Design
Customize the survey’s design to align with your brand’s look and feel.

Preview your survey and adjust the color scheme, widget color, text color, and button color.
Add your logo and choose the widget’s position on the screen for optimal visibility.
Use the UserFeedback admin settings guide for detailed customization instructions.
Step 7: Manage Settings for Your Customer Satisfaction Survey
Under Settings, enable Google Analytics tracking to integrate with MonsterInsights for comprehensive user response tracking.

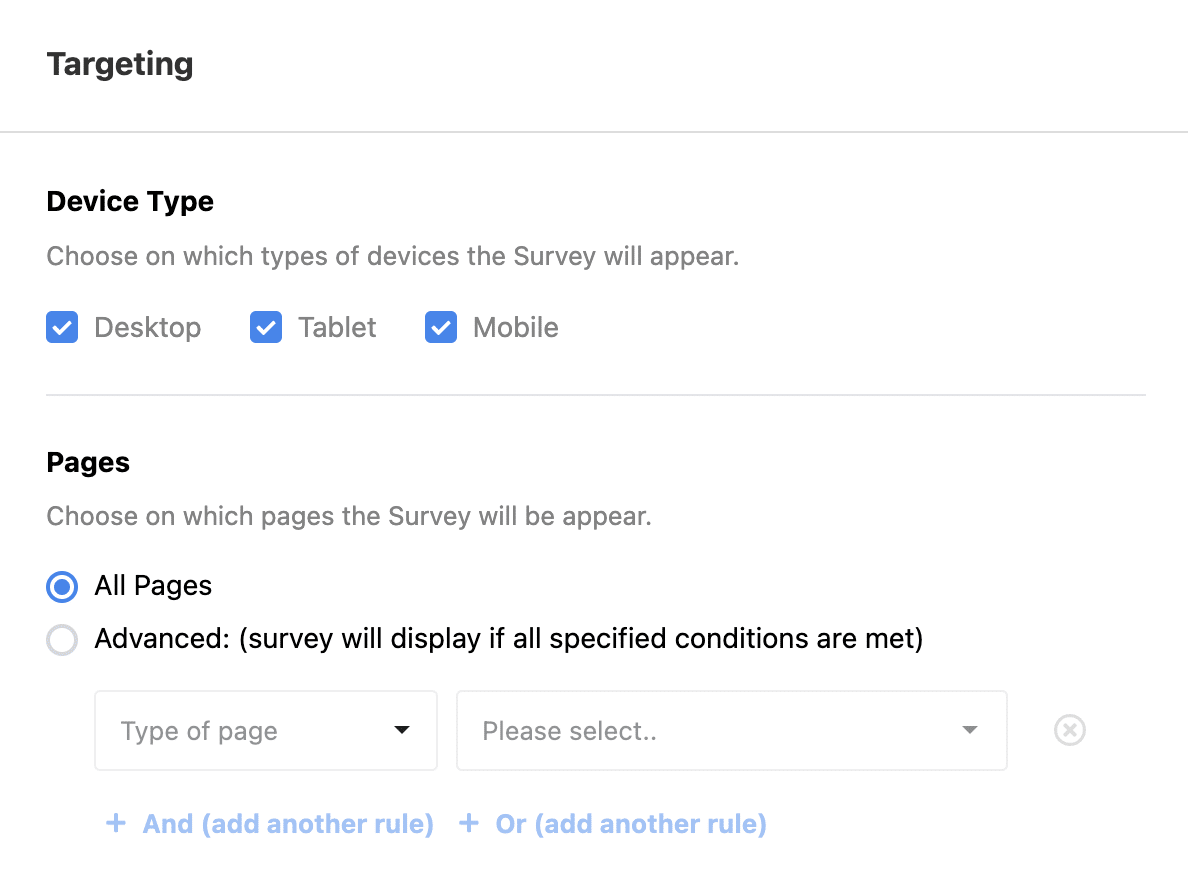
Use the Targeting feature to select specific device types and customize where your survey appears on your site. This is great for targeting different customer segments.
Customize the display timing, frequency, and duration of your survey under the Behavior section.
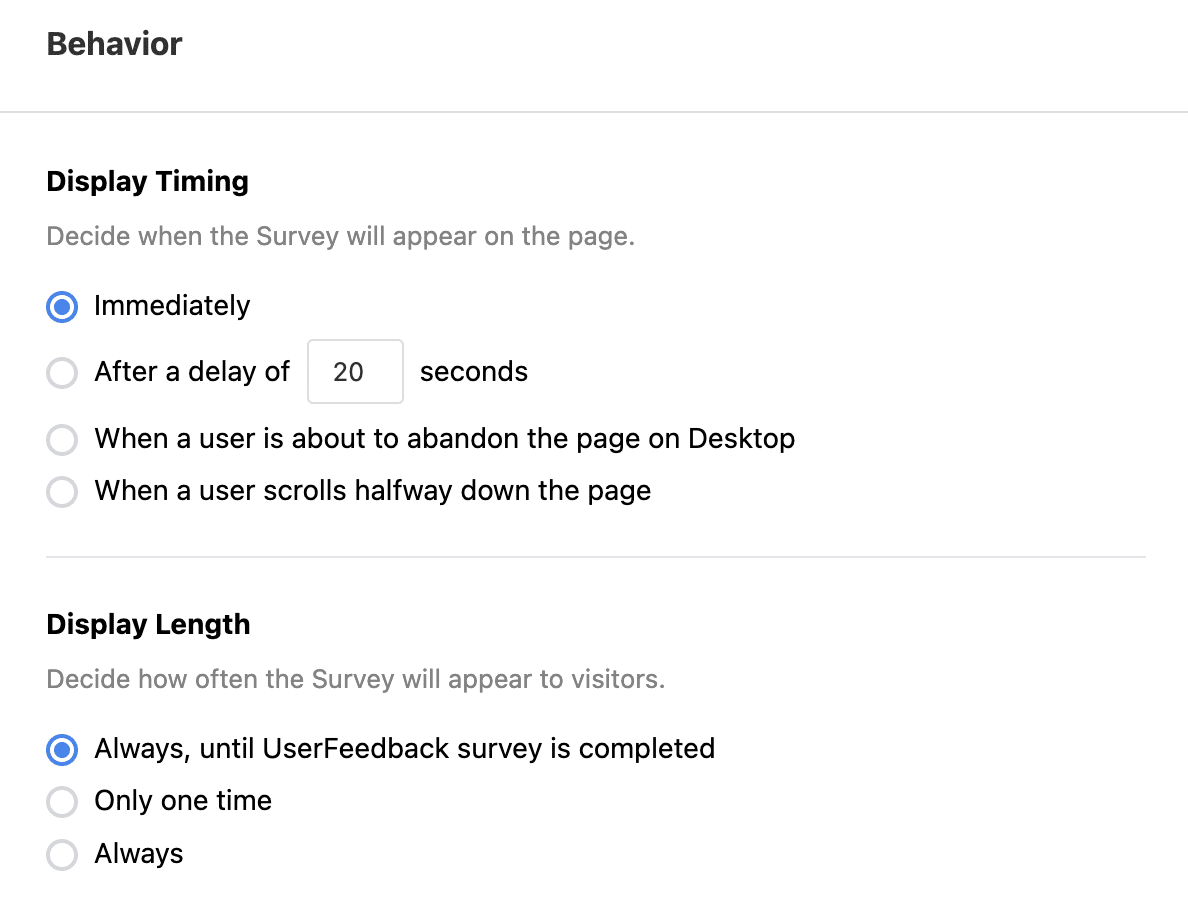
Decide whether to start the survey minimized or open, based on your design preference and engagement strategy.
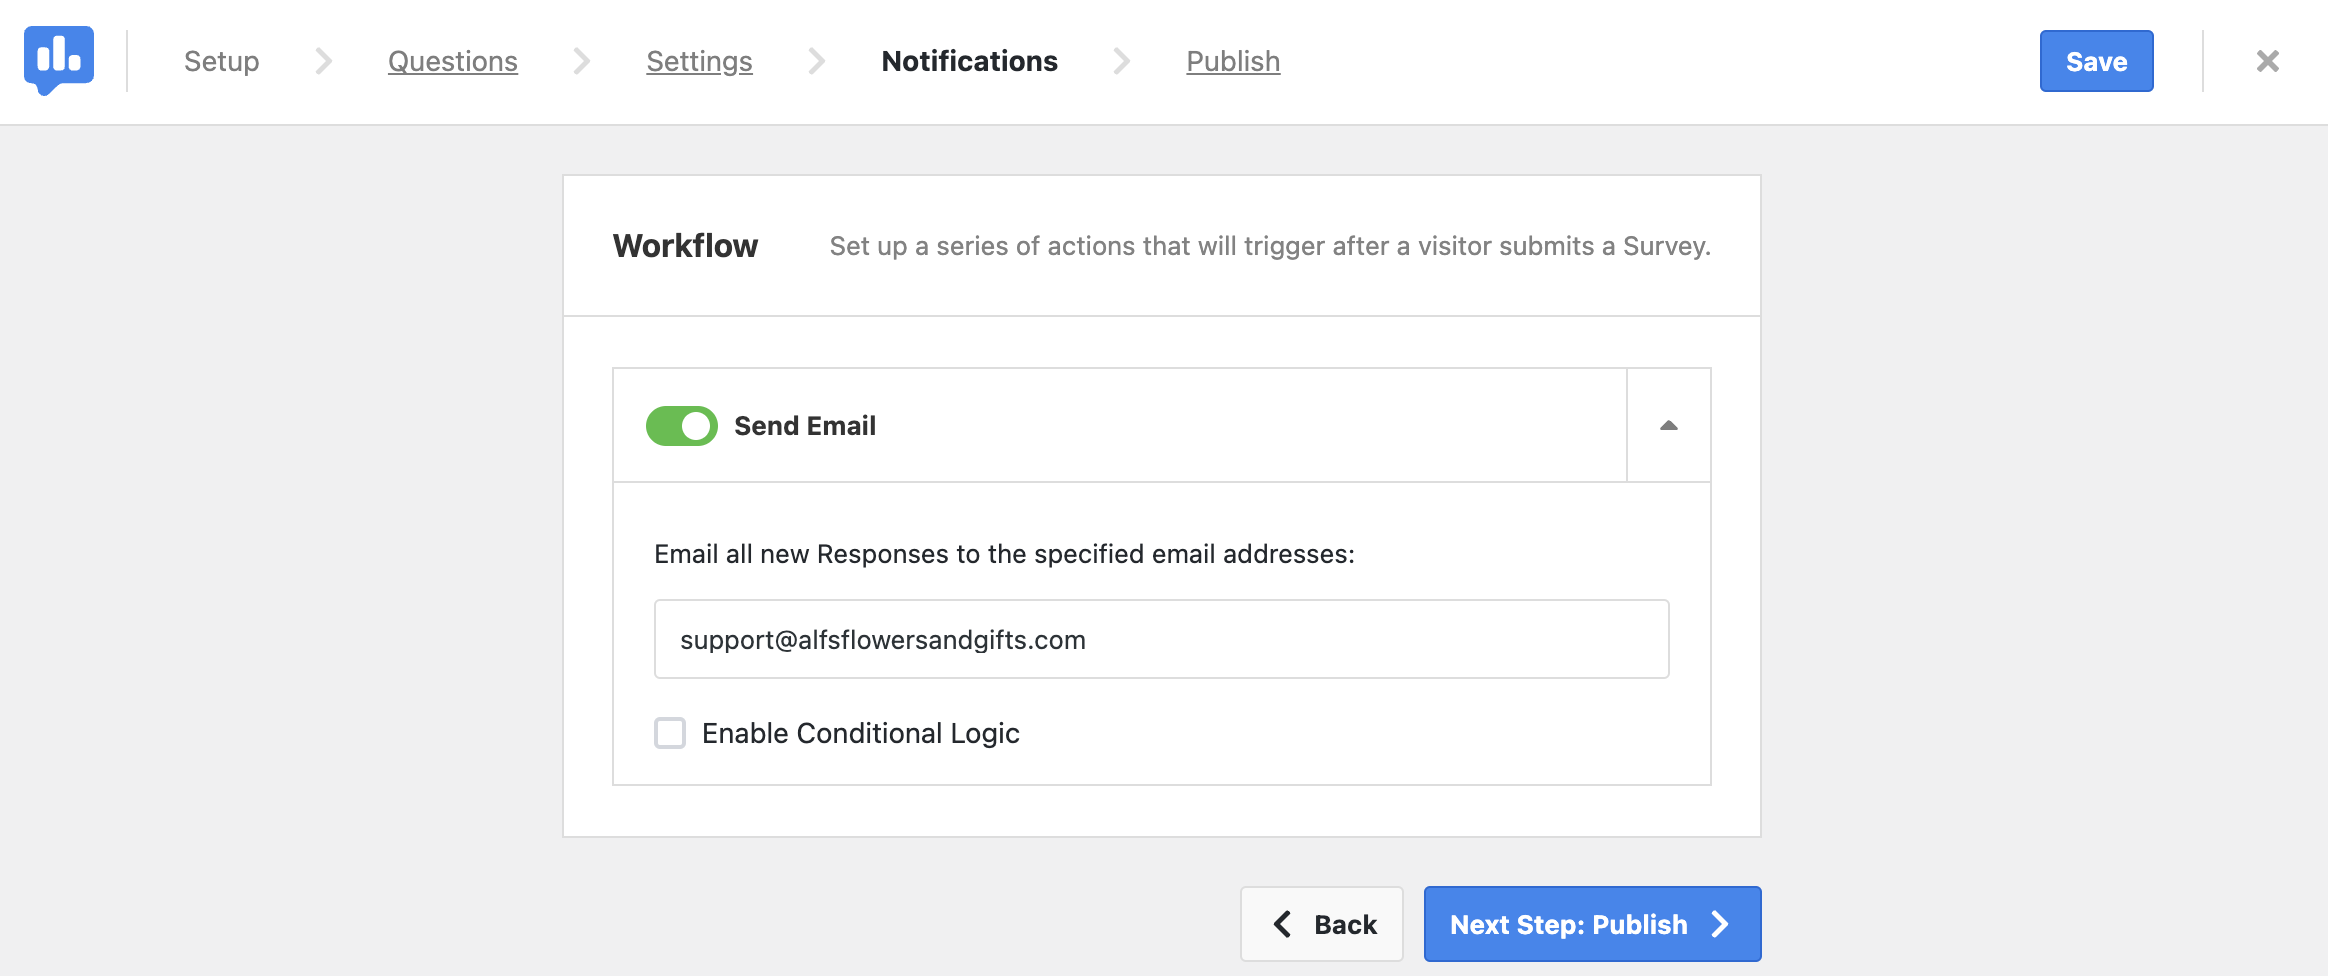
Step 8: Edit Your Notifications for Customer Responses
Choose if you want to receive email notifications for survey responses.
You can turn on or off the email notification option and set the preferred email address.
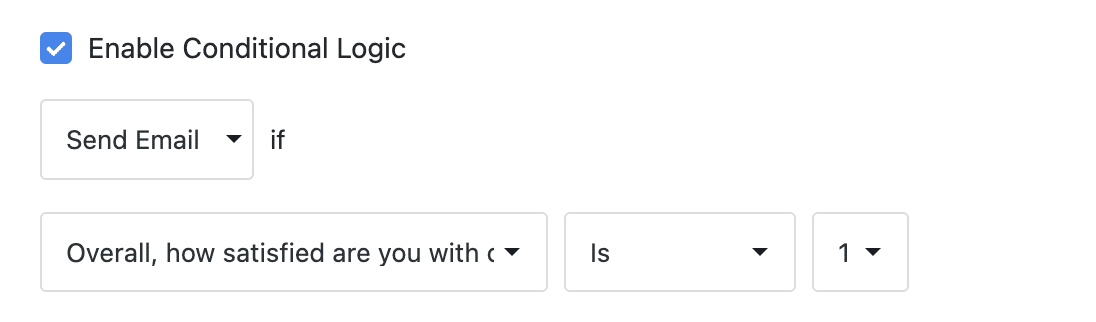
If you have the Pro license, you can customize the criteria for triggering email notifications, like receiving an email when the customer satisfaction rating is below a certain threshold.
Step 9: Publish Your Customer Satisfaction Survey Online
Finally, review the summary of your survey settings and proceed to the Publish section.
Ensure the Publish button is active or set a specific date and time for your survey to go live, especially beneficial with the Pro license.
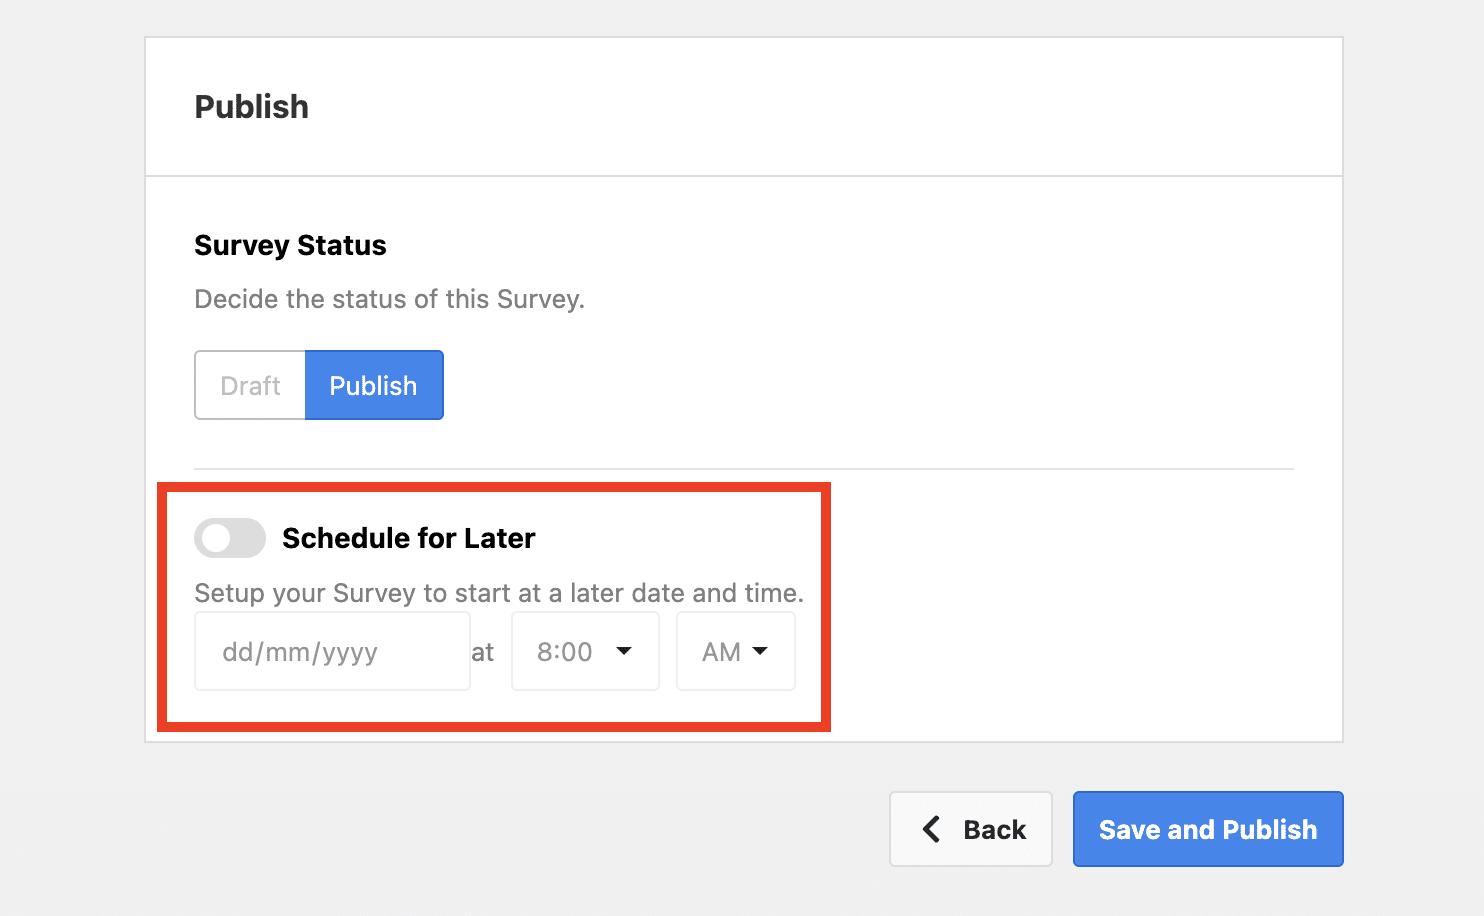
Once everything is set, click Save and Publish or Save and Schedule.
Congratulations, your customer satisfaction survey is now live and ready to collect valuable customer feedback!
Ready to Boost Customer Satisfaction and Business Growth
As you enhance your affiliate program, remember that understanding and improving customer satisfaction is crucial.
By using UserFeedback to create your customer satisfaction survey in WordPress, you’ve taken a powerful step towards more deeply understanding your customers’ needs and preferences.
Interested in exploring more strategies to elevate your business and affiliate program?
Here are some resources to help you on your journey:
- How to Automate Affiliate Onboarding in WordPress (Step-by-Step)
- Dropshipping vs Affiliate Marketing: Which is Best?
- 8 Reasons Why Your Business Should Have an Affiliate Program
- Why Free Affiliate Software Isn’t What it Seems
Now, with your new customer satisfaction survey set up, you’re just one step away from growing your business using a powerful affiliate management plugin.
Get AffiliateWP today and see your business reach new heights.