12-Day Shikoku Itinerary – Ultimate Road Trip Guide to Traveling Japan’s Hidden Gem

Are you ready for an adventure that takes you off the beaten path in Japan? Look no further than Shikoku, a hidden gem that promises to leave you in awe. This stunning island, tucked away from the bustling crowds, offers a unique blend of natural wonders, rich cultural heritage, and tranquil landscapes. Get ready to immerse yourself in the enchanting beauty of Japan’s smallest main island on this 12-day Shikoku itinerary.
By using this guide, you’ll learn the intricacies of how a road trip around the island of Shikoku can look like. Through my personal experiences, you’ll get deeper insight into this region than anywhere else.
What You’ll Get Out of This Article
- Day-by-day breakdown that covers how to build a 12-day itinerary in Shikoku.
- Critical details for important activities and sights you won’t find anywhere else such as which locations are cash-only, how to make reservations, critical mistakes you don’t want to make, and more.
- Google Map of all locations on the itinerary.
- Downloadable access to the itinerary spreadsheet.
My Shikoku Journey

Knowing that I’d be coming from a week in Tokyo and having done the Golden Route through our 12 day Japan itinerary, I asked experts I knew, where they’d recommend if I wanted to somewhere completely off-the-beaten-path. Shikoku was mentioned a few times and what I heard intrigued me.
From there, I started planning a journey through somewhere that I could tell hadn’t been discovered by the masses. Online information was sparse and not well consolidated. Thankfully Shikoku Tours was there to help fill in some of the gaps but I was determined to do it fully independently.
Digging in, I quickly realized that there are a few primary ways Shikoku is explored:
- Pilgrimage – Known as the Shikoku 88 Temple Pilgrimage or Shikoku Hendo, this involves travellers centering their trip around visiting many of the sacred Buddhist sites on the circular-shaped route. Most don’t do all 88 but do a selection of the highlights and combine walking with public transit, go with a private guide, or do special bicycle tours.
- Cycling – The second major interest in Shikoku is cycling, especially with the Shimanami Kaido route where you get to bike on Kurushima Kaikyo Bridge, crossing the Seto Inland Sea. You can do day trips or multi-day cycling circuits.
- Road trip – Although not as well documented, it was clear from the outset that relying on public transportation would not be efficient. I ended up opting for this because I felt like it was closer to my interests and would allow me the flexibility to see everything in a neat 12 days.
I certainly didn’t expect to be doing a full-on road trip loop in Japan of all places, but I have to say that I was very happy with how it turned out.
This part of the trip was solo after spending a month with Chantelle in Hokkaido and Tokyo.
Special Promotion with Shikoku Tours
Putting together a trip to Shikoku but would rather have someone plan it for you? The folks on the ground that helped me and are the go-to tour company on the island is Shikoku Tours.
As a bonus, we’ve also partnered with them so that you’ll get a free Imabari towel, Japan’s highest quality towel and made from the Ehime prefecture of Shikoku.
How? All you have to do is mention “Going Awesome Places” when you submit your inquiry.
How to use this Shikoku itinerary
We created this itinerary with you, our readers, in mind. We put down as much detail as we can so that all of the information is one place. From there, you get to use it as is or make tweaks based on your own schedule and interests.
This is a road trip version of a Shikoku itinerary so many of the specifics relate to being able to drive from location to location. That said, we’ve tried to share alternative details where we can.
Pay particular attention to our boxes called “What you need to know”. These extract essential details about important points of interest and activity, while also injecting our own observations. Japan is one of those places where you can easily get caught off-guard if you don’t know about specific rules and quirks.
We also make sure we summarize every day and each of those have links to either review pages or where to book specific activities. Lastly, we have our trip map near the end of the article, which is great for the visual planners out there.
At Going Awesome Places, we are obsessed about building travel itineraries because that’s how we do our trip planning and it’s the kind of detail that is hard to find these days. You’ll see a lot of similarities with other ones we’ve created such as the Adventure in the Ozarks of Missouri, Easter Island itinerary, 10 days in Patagonia, and classic Egypt itinerary.
Where is Shikoku?

So where the heck is Shikoku? We’re sure that even if you ask 10 or even 100 foreign tourists in Japan about Shikoku, most would give you a blank stare.
Shikoku is a secret that you’re going to be glad to be in on.
Japan is comprised of 4 main islands – Honshu, Hokkaido, Kyushu, and Shikoku. Shikoku is the smallest and least populated and that’s precisely why it’s unlike anywhere else in Japan.
The name Shikoku comes from the word shi (four) and koku (region) and as you guessed, there are 4 prefectures on the island: Ehime, Kagawa, Kochi, and Tokushima. To the south is the Pacific Ocean and to the north is the Seto Inland Sea.
Up until the mid-1980s, you could only get here by boat but luckily, modern engineering connected it to the mainland through 3 massive bridges. Then you have airports that serve each prefecture in the cities of Tokushima, Kochi, Matsuyama, and Takamatsu.
It’s worth mentioning that while this is a Shikoku itinerary, it does overlap with other regions. For one, there’s Setouchi region which covers all of the islands in the Seto Inland Sea and all adjacent coastal areas. The trip also ends in Okayama and this is outside of the island of Shikoku but is part of Setouchi.
As you’ll see really soon, there’s a real sense of mystery in Shikoku and with that, the excitement of uncovering the secret for yourself.
The Best 12-Day Shikoku Itinerary
Itinerary Day 1 – Feel The Energy of Tokushima
You will hit the ground running in Tokushima with full day of adventure and cultural immersion. Ride the Bizan Ropeway for stunning city views, witness the captivating Naruto whirlpools on a boat tour, and soak in the vibrant atmosphere of an Awa Odori dance performance in the evening.
Arrive in Tokushima
For this Shikoku itinerary, we recommend starting in the city of Tokushima and working your way around in clock-wise fashion. Tokushima is also a great place to start as it’s not overwhelming and quite easy to get around on foot.
You’ll most likely fly into Tokushima Awaodori Airport (TKS) which is primarily serviced by domestic airlines. In my case, I flew in directly from Tokyo’s Haneda International Airport via Japan Airlines.
After you land, you’ll catch the local bus which will take you right to the center of town, Tokushima Station.
TIP: At the far end of the airport is the bus ticket vending machine. The fare for Tokushima Station is ¥600 for adults and ¥300 for children. You can pay by cash or IC card only. Remember to tap “Receipt” to get a receipt printed.
First order of business – drop your off your bags at your hotel, Daiwa Roynet Hotel Tokushima, which is conveniently right next to the station. Re-organize your daypack if you need to because you won’t be back until the afternoon.
See Tokushima From Above

One of the best ways to get oriented is at the top of one of the symbols of Tokushima – Mt. Bizan. At the summit, you’ll see how the city is situated at the mouth of the Yoshino River, pointing northeast.
Sharing the same building as where you’ll be watching the Awa Odori performance in the evening is the Bizan Ropeway. The view from the top gives you a stunning overlook of the area and as far out as Awaji Island and Kii Peninsula on a clear day.
In addition to the main viewing platform, there’s a large kaleidoscope art installation, a Burmese pagoda honoring the soldiers from World War 2, and an expansive park of cherry blossom trees.
WHAT YOU NEED TO KNOW
Time:
- April 1 – October 31 – 9AM – 9PM
- November 1 – March 31 – 9AM – 5:30PM
- It is usually closed for several weeks between January to February for annual inspection.
- The ropeway takes 6 minutes and runs every 15 minutes (timetable in image above).
- The Bizan Cafe at the summit is open from 10AM – 7PM.
- The ropeway is closed the second Wednesday of February, June, September, and December. If any of these land on a public holiday, it’ll shift to the next day.
Price:
- Adults (Junior High School Student and above) – ¥620 one way, ¥1,030 round trip
- Elementary School Students – ¥300 one way, ¥510 round trip
- Combo tickets are available (not advertised on the website)
- 3 set (Awaodori performance, museum, ropeway) – ¥1,830 for adults, ¥1,280 for children up to 15, and ¥810 for children up to 12
- 2 set (museum, ropeway) – ¥1,130 for adults
- 2 set (Awaodori performance, museum) – ¥1,000
Parking: There’s parking at the Awaodori Kaikan Theater (drive to the rear) for a fee. You can get your parking validated (1 hour free) if you purchase ¥3,000 or more at the shop on the main floor.
How to get here without a car: From Tokushima Station, it’s an easy 15 minute walk to the ropeway station/theater.
Booking: You can only buy tickets in-person at the desk or vending machine. Machines are cash-only.
Website: Bizan Ropeway
FAQ:
- How much time do I need at the summit? If it isn’t sakura (cherry blossoms) season, you can easily see everything in 30-40 minutes.
- Where are the cherry blossoms on the mountain? From the summit, there is a walking path going away from the city that leads into the Bizan Park which has a cluster of cherry blossom trees.
Tips:
- To take the ropeway, you need to take the elevator to the 5th floor. From there, you get into a queue.
- Since there are two gondolas that go up together, best view going up is in the second (bottom) gondola so you can see a clear view of the city below.
Cruise into the Naruto Whirlpools
Head back to the main station and take the 1-hour long bus out to the far northeast corner where a natural phenomenon of tidal whirlpools can be found in the Naruto Strait.
In this narrow passageway of water measuring 1.3 km (0.81 miles), massive amounts of water move in and out of the Seto Inland Sea twice a day creating a difference in water levels between the sea and the ocean. This causes water to rush through the channel at high speeds, and at specific areas, spirals in the water.
One of the best ways to see the Naruto Whirlpools is to join a sightseeing boat cruise. The Wonder Naruto races large groups of tourists to the Onaruto Bridge every 30 minutes. Standing at the edge of the boat, you patiently wait for swirls to form – some are small and some gush with intensity.
After the cruise, you can either check out more of the area (observation decks, park, Uzo-no-Michi Walkway, and Otsuka Museum of Art) or head back to the city and check into your room.
WHAT YOU NEED TO KNOW
We’ll be focusing on the Wonder Naruto but if you’re interested in the underwater observatory, check out the Aqua Eddy.


Time:
- Open all-year-round and runs 12 trips per day.
- Boat ride is 30 minutes and the exact departure schedule is posted on their Sightseeing Boat page.
- The best time of the day to go is at high and low tide (1.5 hours before and after). Using their monthly tide table, you’ll be able to see those peak times for the exact day you wish to go.
Price:
- Adults – ¥1,800
- Child (Elementary School and younger) – ¥900
- First class cabin is available for an additional ¥1,000 for adults and ¥500 for children.
- Payment by credit card is possible.
Parking: There is plenty of parking (150 spots) at the whirlpool sightseeing boat dock and it is free.
How to get here without a car: From Tokushima Station, go to bus stop number 16. You’ll be able to hop on any bus that stops here. Take the bus for 1 hour and 15 minutes until you get to the stop “Naruto Sightseeing Port”. It might be difficult to tell which stop it is but there’s a point in the route where it turns around. It is the first stop right after the turn-around point. Payment is made as you get off the bus. The fare is ¥720 and you can only pay by coins. There is a change machine as well but it only breaks ¥1,000 bills. For route map, timetable, and fare table, visit the bus for Naruto Park page.
Booking: You can only buy Wonder Naruto tickets in-person at their counter. You can buy Aqua Eddy tickets in advance (mandatory).
Website: Uzusio
Language: The commentary through the speaker is in Japanese.
FAQ:
- Do the tickets sell out? While the boat has a capacity of 399 people, it can sell out especially if there are large bus groups and you are going during high-season.
- How early should I arrive at the boat dock? We recommend that you come 1-1.5 hours ahead of the time slot that you’re targeting. Worst case, you can book the sailing after it.
- Is the Aqua Eddy recommended? We don’t recommend Aqua Eddy because there simply isn’t enough time to be running between the underwater observation and the main deck. As the whirlpools aren’t predictable and can be on either side, we feel that this would add additional stress and force you to pick what you want to focus on. For this, the additional cost, and shorter trip time, it’s not worth it.
- Is it worth upgrading to first class on Wonder Naruto? The advantage of first class is that there are fewer passengers up there, allowing you more freedom to move around. The other benefit is that you are higher in elevation, allowing you to get better view of the whirlpools developing below. If we were to do it again, we’d pay for the upgrade.
Tips:
- They don’t announce that they ready for queueing (in English) so if you’re early, just get in line for Wonder Naruto before everyone else. The advantage of boarding early is that you’ll have your pick of the spot on the boat. That said, once you pick a spot, you’ll be surrounded by other people along the railing.
- There are actually two companies that run whirlpool sightseeing boats. The biggest one is the one that we ended up taking, called Uzusio (うずしお観潮船). There is another company called Uzushio-Kisen (うずしお汽船) which is a smaller but slightly cheaper boat. They also offer combo tickets to Uzu-no-Michi (a bridge with a glass floor). This is why there are two separate locations indicated on the bus map so don’t get them confused.
- The bus schedule time table isn’t the easiest to read but for Uzusio, the stop you’re looking for is 鳴門観光港 (fourth-last stop). If you’re interested in Uzushi-Kisen, the stop is 亀浦口 (second-last stop on the line).
Eat at a mouth-watering local izakaya
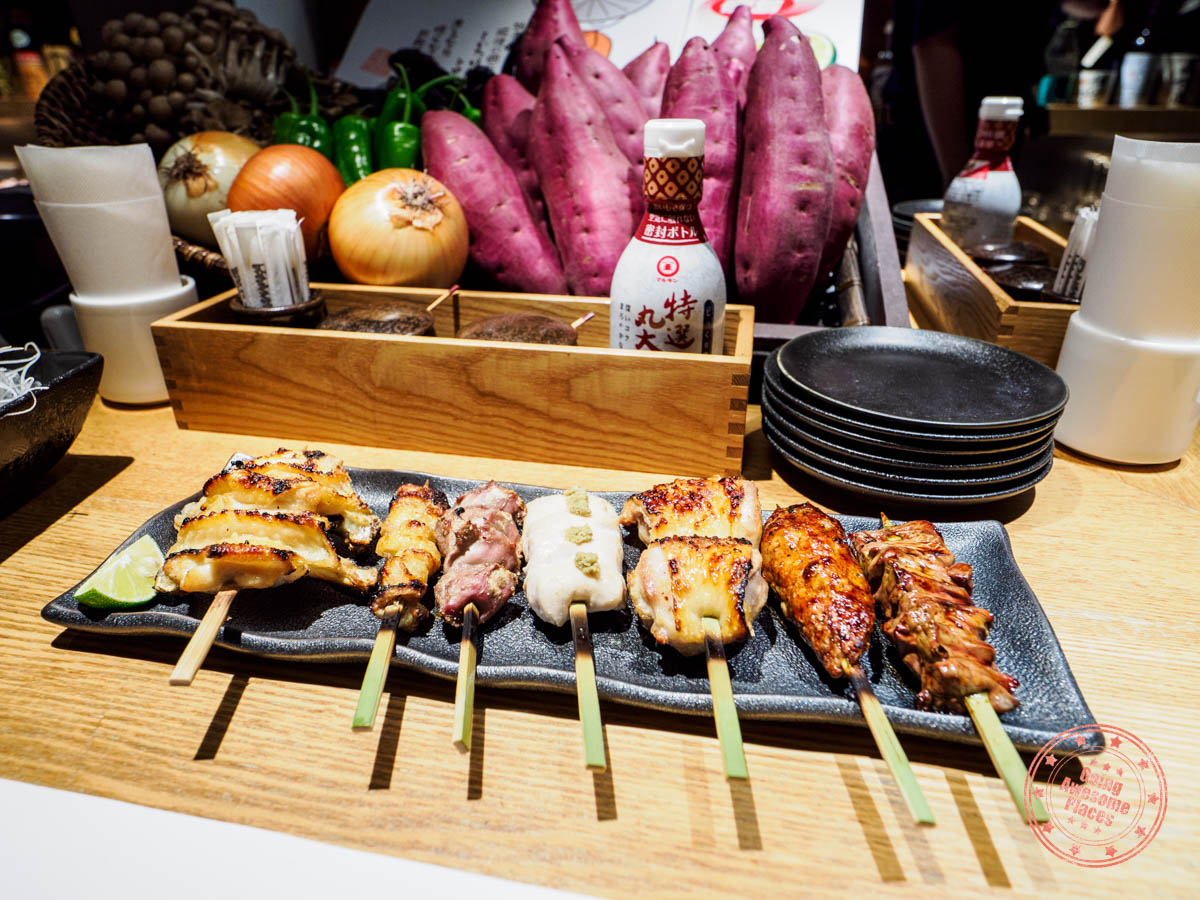
Local recommendations are the best. Domannaka is a short walk away from your hotel and features mostly locally-sourced ingredients and dishes that the region is best known for. You have to try their yakitori platter (depicted above), seared bonito (katsuo no tataki), and lotus root.

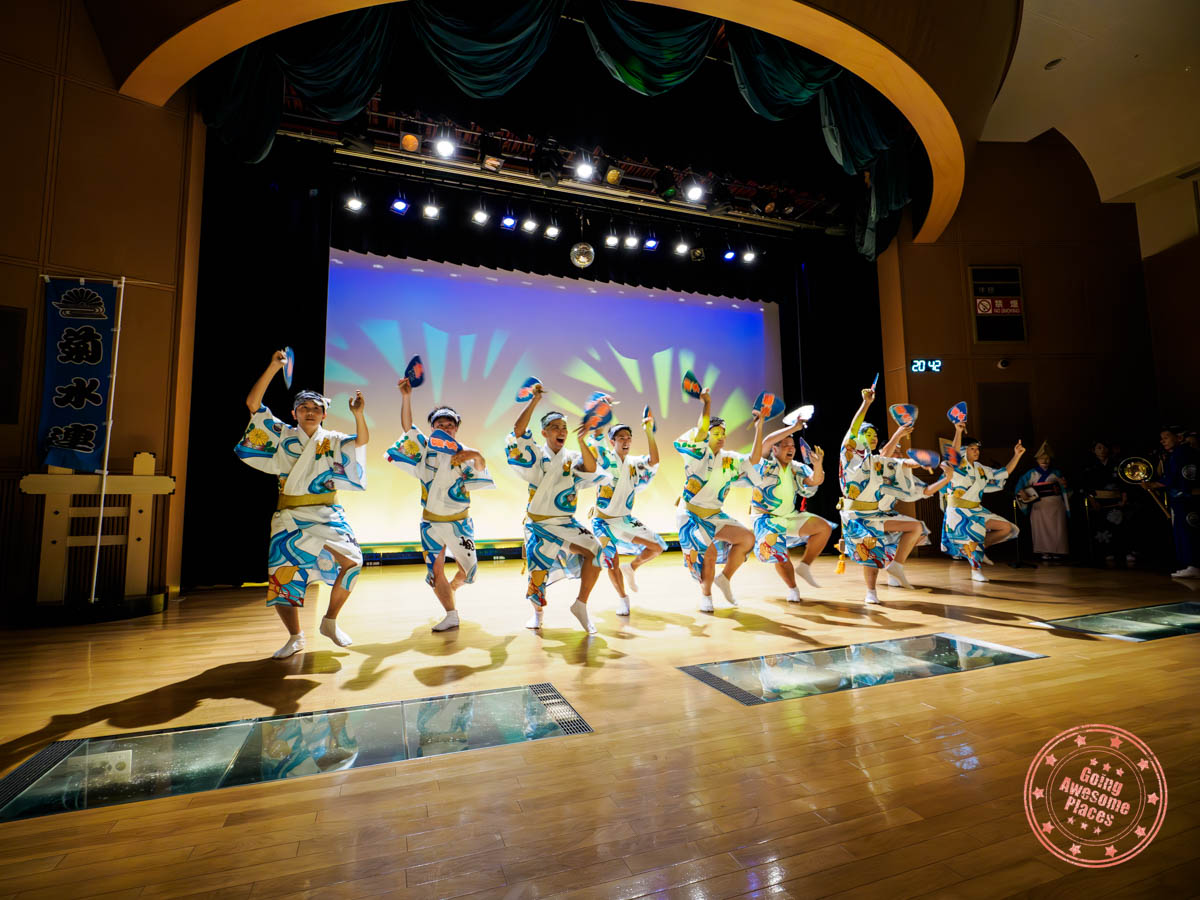
What Tokushima is best known for is Awa Odori, something you might’ve noticed not-so-subtly featured throughout the city. This is perhaps Japan’s most famous dance festival that is said to have originated from the celebration when Tokushima Castle was completed. While the official festival is performed in mid-August, the other way to see a performance is at the Awa Odori Kaikan, the same building as the Bizan Ropeway.
This 50 minute performance is the best showcase of what the Awa Odori festival is all about. Accompanied by musicians, you’ll get to see men, women, children, and elders perform the traditional dance. You’ll see and feel the energy, along with the intricacies of the dress of Awa Odori during the show.
The show is also quite interactive, with a segment in the middle dedicated to having the audience learn some of the basic moves of the dance. At the end of the night, the entire audience is invited to get down to the theater floor to join the dancers, culminating in a fun and immersive night.
WHAT YOU NEED TO KNOW
Time:
- Daytime Performances – 11AM, 2PM, 3PM, 4PM (40 minutes)
- Evening Performance – 8PM (50 minutes)
- There is a Google Calendar on the Awa Odori Kaikan homepage which clearly breaks down which performances are available for each day.
- The theater is closed the second Wednesday of February, June, September, and December. If any of these land on a public holiday, it’ll shift to the next day. It is also closed December 28 to January 1.
Price:
- Adults – ¥800 for daytime, ¥1,000 for evening
- Child (Elementary School and Junior High School Students) – ¥400 for daytime, ¥500 for evening
- Combo tickets are available (only works for daytime performances)
- 3 set (Awaodori performance, museum, ropeway) – ¥1,830 for adults, ¥1,280 for children up to 15, and ¥810 for children up to 12
- 2 set (museum, ropeway) – ¥1,130 for adults
- 2 set (Awaodori performance, museum) – ¥1,000
Parking: There’s parking at the Awaodori Kaikan Theater (drive to the rear) for a fee. You can get your parking validated (1 hour free) if you purchase ¥3,000 or more at the shop on the main floor.
How to get here without a car: From Tokushima Station, the easiest way is to walk to the ropeway station/theater. It’s a 15 minute walk away.
Booking: You can buy daytime tickets at the vending machine. You can only buy evening tickets on the night of at 7PM in front of the theater entrance. Both cases are cash-only.
Website: Awa Odori Kaikan
Language: The performance is in Japanese and there are no subtitles but it’s pretty easy to catch on what’s happening.
FAQ:
- Can I buy tickets in advance? No, they don’t have online booking.
- What is the difference between daytime and evening performances? The main difference is that the evening performances feature rotating groups of famous Awa Odori troupes and the show is 10 minutes longer. The daytime show is performed by the theater’s own exclusive troupe.
- Do the tickets sell out? The theater has a seating capacity of 250 so there should be plenty of tickets but it’s always a good idea to show up early.
- Are seats assigned in the theater? No, the seating is first-come-first-serve.
- Are photos and videos allowed? Yes, there are no restrictions for photos and videos.
- Where are the best seats in the theater? The first row in the center section of the theater is the best especially if you want to take photos of the show.
- How early should I arrive? If you want your pick of seats, we recommend that you come 1 hours ahead of time.
- Is the performance the same as the Awa Odori Festival? The actual festival from August 12 -15 is a multi-day event that takes over the entire city. This show provides a condensed version it, focusing on the dance styles for both men and women. The performance also includes an instructional component where the audience is encouraged to dance. You’ll get a really good sense of the dress, dance, and energy from this show.
Tips:
- They have a bit of a unique way of queueing at the theater. When you arrive, put a bag down in a straight line starting at the door. This way, you are free to go to the shop below, use the restroom, and walk around. It may seem a little strange at first but it’s quite a democratic way to hold your spot in a first-come-first-serve manner.
- The shop on the main floor is open until 8PM, allowing you to buy souvenirs before the evening show.
Day 1 Summary
What you’ll see & do:
Where you’ll eat:
- Lunch – Food from Tokushima Clement Plaza – This is the mall that’s attached to the city’s main train station where you’ll find plenty of food options including the bakery Vie de France, imagawaki (wheel cake), and local mochi cakes.
- Dinner – Domannaka – An elegant izakaya and yakitori restaurant that features local dishes and delicacies. Reservations are highly recommended here. They do not take online reservations so you’ll need to call to make reservations.
Where you’ll stay:
- Daiwa Roynet Hotel Tokushima (Agoda/Booking) – Conveniently located adjacent to Tokushima Station, this is a comfortable, new, and spacious hotel. We recommend staying here because of it is seconds away from the bus stop, train station, shopping mall, restaurants, and even has a 7-Eleven downstairs.
Itinerary Day 2 – Enter Hidden Iya Valley

It’s time to get the road trip started. You’ll start off going blue over the time-honored tradition of indigo dyeing. From there, you’ll drive into the heart of Iya Valley where you’ll quickly realize that you’re in a mystical place like no other in Japan.
Make your own indigo dyed creation

Shikoku is home to many traditional crafts and one of them is indigo dyeing. This is why you’ll see plenty of indigo-dyed goods along your journey.
Aizome refers to the traditional practice of indigo dyeing and there’s no better place to see how it works than to go to the region where the industry thrived for generations in Wakimachi and more specifically, the Udatsu Townscape.
Located in a charming and historically wealthy town thanks to indigo, is the Yamauchi Studio which preserves the tradition by teaching visitors how the dyeing process works by creating your very own handmade item.
What you’ll love about this experience is that you’ll come out with your own souvenir that was created using traditional indigo dyeing techniques. Your instructor will also allow you to design your own pattern. I thought this was the most interesting part, involving either marbles, special folding techniques, and lots of elastic bands.
WHAT YOU NEED TO KNOW


Time:
- Duration – 40 minutes to 1.5 hours
- Hours – 10AM – 4PM (closed on Tuesdays)
- Bookable time slots: 10AM, 1PM, 2:30PM
Price:
- Small Handkerchief – ¥1,100
- Large Handkerchief – ¥1,650
- Scarf – ¥4,400
- Shopping Bag – ¥3,850
- Drawstring Bag – ¥1,650
- Socks – ¥2,200
- It is also to possible other items so if you’re not interested in these, you can ask on-site.
Parking: There is a free parking lot to the south of town but it does fill up quickly. The attendant on-site will help guide you to your spot.
Booking: You can book online but drop-in is definitely possible when it’s not a busy day.
Website: Reservation Page Through Nishi-Awa Tourism Association
Language: The instructor only speaks Japanese but has a handheld translation device to provide basic instructions. It’s relatively straightforward.
FAQ:
- How hard is it to learn how to dye? It is extremely easy and suitable for ages 5 and up.
- Should I make a booking ahead of time? If you’re on a schedule and want to fit this in a specific time, it’s better to make a reservation ahead of time. If you’d like to keep things flexible, you can try to drop-in. Worst-case, you can explore the Udatsu Townscape if they’re busy.
- How early should I arrive for the activity? There is not a lot of prep work required so you can show up 5-10 minutes ahead of time.
- Will my hands get dirty? No, you will be given an apron and gloves so your hands won’t turn blue.
Tips:
- The English name of the store is “Yamauchi Studio” but on Google, you need to search for “Aizome Kobo, Waikimachi”.
- If you follow your GPS to the store, it will take you onto the pedestrian Udatsu Townscape street which will eventually trap you in (that was totally me). Instead, search for the “道の駅 藍ランドうだつ” or “Road station Airandoudatsu” parking lot. Our custom map have all of these marked.
- The studio doesn’t exactly run fixed workshop times. Instead, since there are at least 2 vats of indigo, they will get you started whenever you are ready.
- While the booking platform only shows 3 time slots per day, it doesn’t mean that the instructor will wait for everyone that booked that time slot to get started. It is simply a formality of the system. In reality, they get visitors going on a rolling basis of whenever people arrive.
- If you’d like to start earlier than your booked time slot, simply show up early.
- When you leave the studio, the handmade piece will still be damp so put it by the window of your car to let it dry.
Test your vertigo on the double vine bridges

Next begins your journey into Iya Valley. The small towns along the Yoshino River begin to disappear and are replaced with seemingly impenetrable emerald hills as you weave corner to corner and unknowingly passing around Mount Tsurugi.
Tucked away on the far eastern end of Iya Valley is Oku-Iya Niju Kazurabashi or the Double Vine Bridges. These are two of the last 3 remaining vine bridges in Iya Valley, where there were once 13.
The bridges are said to be connected to the story of the Heike Clan that took refuge in this area and built these as a way to get through the valley but could also cut them down if they were invaded.
What’s unique about this location is that there are two bridges, the larger one being male and the smaller being female. Crossing each is an adventure on its own as the bridges sway and the gaps between the planks of wood below are enormous. There’s also a hand-powered rope and trolley that you can also try if they’re operational.
What really sets this area apart are its tranquil and untamed surroundings with the trickling of the river below, the calm rustling of the forrest, and whispers of a nearby waterfall. It also helps that this is far-less visited part of Iya Valley because it’s not as accessible as the one you’ll visit tomorrow.
WHAT YOU NEED TO KNOW
Time:
- Hours – Open all-year-round
- April-June:9AM – 5PM
- July-August:8AM – 6PM
- September-November: 9AM – 5PM
- December-March: Closed
- Duration – Expect to spend 30 minutes to 1 hour here.
Price:
- Adults – ¥550
- Children – ¥350
Parking: Off the road, there are 30 parking spaces. Parking is free.
Booking: No online booking is available.
How it works: You pay your admission at the ticket booth on the main road. They’ll be a ticket and from there you walk down. There aren’t any turnstiles to enter so in a way, this is honour system. Unlike Iya-no-Kazurabashi vine bridge, there are no attendants by the bridge and you can cross them in any direction and as many times as you wish.
Website: No official website. Your best bet for an updated page is on Miyoshi Tourism.
FAQ:
- Are there bathrooms? There aren’t any facilities by the bridges but there are restrooms by the ticket office next to the road.
- Can you take a bus to the double vine bridges? This is serviced by the local bus that’s bound for Mt. Tsurugi and the Kazura Bashi Bus stop.
Tips:
- Currently, the rope wooden carts of Monkey Monkey Bridge are not in operation.
Visit the oddly charming scarecrow village
Driving deeper into the valley, you’ll come across a sleepy riverside village that seems normal at first, until you realize that the people you see hanging around aren’t people. The population of Nagoro consists of life-sized scarecrows and outnumber their human counterparts 10 to 1.
The Nagoro “Scarecrow” Village was started by Tsukimi Ayano, a resident that returned to her home village after living in Osaka for most of her life. It started with a scarecrow with her father’s likeness on her family farm. This evolved to becoming effigies of former residents to keep the spirit of the village alive.
The best way to appreciate all of Tsukimi-san’s work is to park your car and walk the village and see the vibrant population of scarecrows that are waiting at bus stops, working the fields, going to school, or simply hanging out.
Explore traditional thatched-roof houses


As you emerge from the mist and the twisty roads of the valley, you’ll enter into true heart of Iya Valley which consists of small hamlets that cling to the edge of the mountain slopes. It’s here that you’ll see enduring examples of ancient houses that date back well over 200 years.
The first you can visit is Koune-ke Historic House. Formerly of the Koune family, this is one of the simplest homes you’ll see, consisting of one room, garden, front space, and toilet in the middle front of the house. This is a small house so you can take a quick peek inside.
The other you’ll have time for is Nagaoka-ke Historic House. At an altitude of 610 meters (2001 feet) on a south-facing slope of Ochiai Village is a prime example of an upper-class clan of the village, featuring an asymmetrical 6-room floor plan. After taking off your shoes, you’re free to walk around. Make sure to ask the staff to show you the potato storage cellar accessed by a hidden hatch.
NOTE: Nagaoke-ke Historic House closes at 4PM.
Check into your traditional farmhouse


If you fancy staying in a living museum and getting a feel for what traditional Iya life is like, you have to do several nights in a restored farmhouse with jet-black beams, 130-year-old red-pine floors, sliding doors, and classic decor.
Your stay at Kouya is a once-in-a-lifetime experience. Originally a tobacco farm in the hamlet of Kubo, this house has been kept within the family and now provides a farm stay experience for visitors by combining unique lodging with local-style meals and hands-on activities.
2 nights in Kouya are an absolute must. Hosts, Shinsuke-san and Mari-san welcomed me with open arms and allowed me to truly unwind and relax in this multi-room home that I had all to myself.
The best part are their dinners where they are slow cooked in the traditional way in their large iori floor hearth. Using locally-sourced ingredients, you’ll be treated to an aromatic feast for the senses. In additional to a wide variety of small dishes and rice cooked in the traditional way, you’ll get to try specialties such as Hirara-Yaki (wall of miso past encloses a stew of amego fish, tofu and vegetables), amego fish grilled around charcoal flame, and a hearty oden (pot of fish cake stew).
WHAT YOU NEED TO KNOW
Details about how these farm stays or farmhouses work in Iya Valley so we thought it’d be valuable to go through the details of where we stayed and what to expect.


Time: Kouya accepts bookings open all-year round.
Price: Prices start at ¥13,000 per adult/night and includes 2 meals (breakfast and lunch), and hands-on experiences. If you book directly, you’ll have to pay by cash in person.
Capacity: There are 2 rooms and can house a maximum capacity of 7 people. Regardless of the size of your group, you will always get the full farm house to yourself.
- Large room (the one where we stayed) – 5 people
- Small room – 2 people
Parking: There is a parking in front of the house.
Booking: Reservations are recommended at least 4-6 months in advance, especially during the non-winter season because there are so few accommodation options in the area. Making a reservation is a bit more a challenge as you can’t do it online. The best way to do it is to email them at [email protected] or to use a tour operator like Shikoku Tours.
Website: Kouya
FAQ:
- Does the host speak English? No, the hosts, Shin-san and Mari-san don’t speak English but their hospitality is above all expectations. Shin-san puts in a big effort to have conversations with his guests even if it means using Google Translate.
- How far in advance should you book Kouya? 4-6 months in advance is ideal. The more time the better.
- Is there wifi in the Kouya farmstay? Yes, there is free wifi to use and it’s decently fast, measuring at 57.3 Mbps.
- Are there electrical outlets in the farm house? Yes, there are pop up outlets in the house, including the main bedroom which are suitable for charging your devices.
- Do the hosts live in the house with guests? No, the hosts live in an adjacent smaller house.
- Are there other guests with you during the farm stay? No, when you book Kouya, you get the whole house to yourself.
Tips:
- Ultimately, I chose to stay at Kouya because I was looking for a farmstay that included meals. While I loved several others including Tougenkyo-Iya in Ochiai, the idea of needing to plan meals and not being able to eat traditional food of the region put me off. Kouya has it all built-in which I appreciated.
- The entrance into Kouya can be a little confusing as GPS isn’t the most accurate and is easy to miss if you can’t read Japanese. Look for the oval-shaped wooden sign with the words “紺屋”.
- In the dining area, seating is on the ground. They provide a tatami chair with a cushion but isn’t the most comfortable sitting cross-legged. Try different sitting positions to see what works.
- The host is great at providing directions and creating a plan for you so make sure to ask them any questions that you may have. Share your plans as well so they can plan the soba-making class around your schedule.
- If you have any dietary restrictions, let them know in advance.
Day 2 Summary
What you’ll see & do:
Where you’ll eat:
- Breakfast – Konbini Breakfast – Eat konbini breakfast from the night before.
- Lunch – Aigura – Next to Yamauchi Studio in Udatsu Townscape is this charming cafe on the second floor is at the site of what used to be a warehouse for indigo. Their meals are made from local ingredients and their lunch menu incudes bao, curry, and nanban (fried chicken).
- Dinner – Kouya Farmstay – A true culinary experience where you’ll be able to dine in the most traditional way in Iya Valley while at your farm stay. Meals are cooked over a cast iron stove over fire in a sunken hearth using local ingredients and changes everyday. You’ll feel a real connection to the place as you sit on the wooden floor, eat, and chat with your host, while being warmed up by the charcoal fire.
Where you’ll stay:
- Kouya Farmstay – This is truly a once-in-a-lifetime-type of experience in Shikoku and one of the main reasons why you need to come to this region.
Tips:
- I skipped Oku-Iya Monorail because it was under renovation in 2023 (and 2024 as well). If it’s open, it would be worth trying their 5km monorail.
Apps You Need To Download for Japan
Before you go to Japan, make sure you have these apps on your phone.
Itinerary Day 3 – Uncover Iya Valley Secrets

Iya Valley is often called one of the “three most remote places in Japan”. By being cut off from the rest of the country for so long, you’re treated to more examples of Iya Valley’s old world charm and a place teeming with natural wonders.
Tranquil breakfast around the hearth

Start your day by enjoying your your platter of numerous surprises for breakfast in peace. From the open sliding door, you’ll be able to watch the veil of fog lift from the valley.
For coffee lovers like myself, Shinsuke-san also offered to make a fresh pot of coffee for me the enjoy while sitting on their traditional wood veranda.
Get the best view of Ochiai
There are so many incredible photographs of Ochiai Village so when I asked the farmhouse host where I should go, he pointed on a part of the map that I never would have thought to have looked. This is on our Shikoku trip planning map.
The Ochiai Village Viewpoint is a well-built platform and provides a brilliant view of the historic houses, hillside farm plots, and switchback roads.
Learn Iya Valley’s history and visit a samurai house
One of the best ways to learn more about region is to visit the Higashi-Iya Museum of Local History and Folklore (10AM – 4PM, closed on Wednesdays and weekends Dec to Mar, ¥410 adults, ¥100 child) . They have a comprehensive display of artifacts collected from all over the valley.
Thanks to their bilingual signage in English and Japanese, you’ll want to spend more time here to get a better appreciation of Iya Valley’s rich history. You’ll also learn the fascinating story of the Heike Samurai that took refuge here to hide from those that were pursuing them.
In connection to that story, you’ll drive over to the Bukeyashiki Kita-ke Historic House. This is by far the largest house you’ll visit. It was residence of the Kita Clan and built by the samurai headman of Oeda, a descendant of the feudal lord Kita Rokurosaburo.
From 9AM to 5PM (Apr 1 – Nov 30), this samurai residence is open to visitors (¥310 adults, ¥100 children) where you’ll be able to walk through its numerous rooms, see an example of samurai armor, marvel at its brilliant architecture, and also walk to its 800 year-old cedar in the garden.
Cross another legendary vine bridge
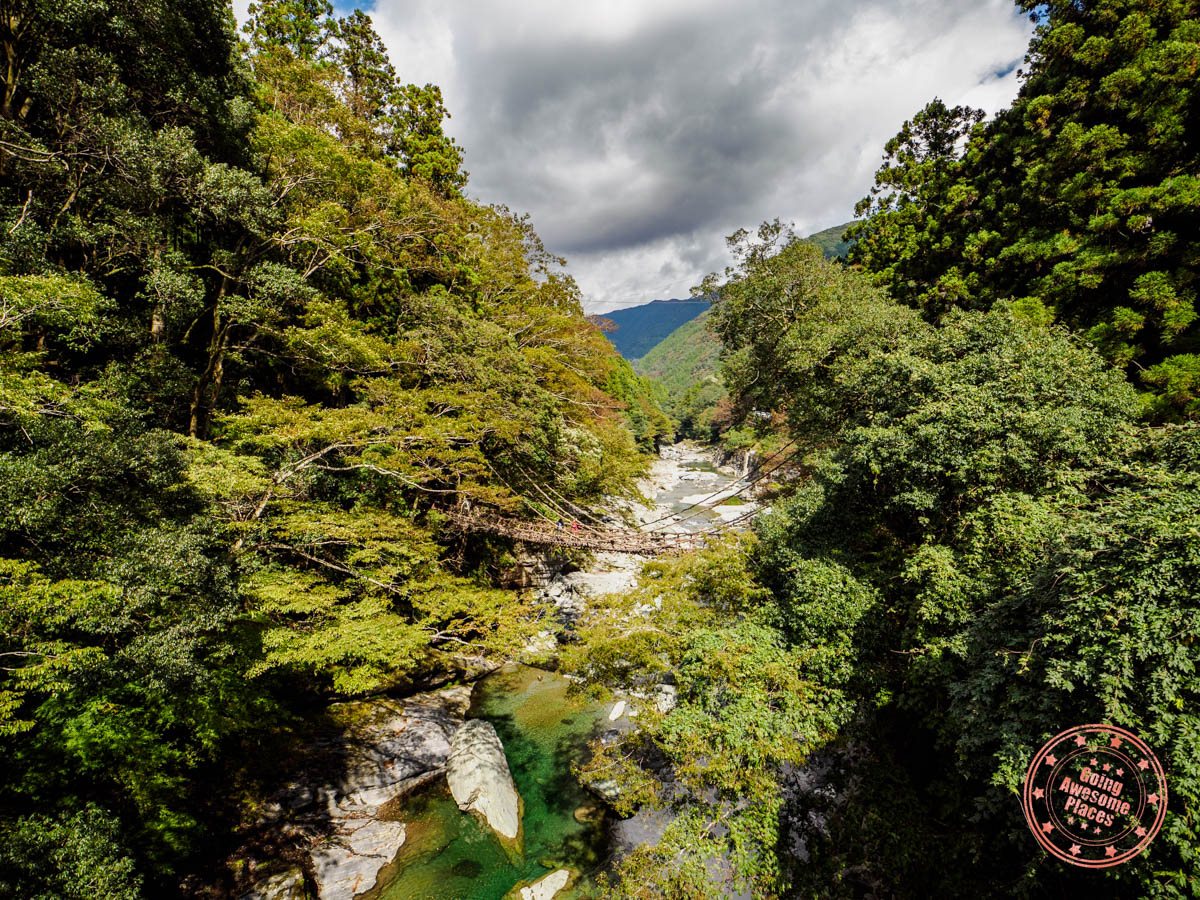
Take advantage of the third vine bridge of Iya Valley. Now that you’ve had some practice with two so far, you’ll hopefully be able to cross Iya-no-Kazurabashi Vine Bridge with the swagger of Lara Craft or Indiana Jones. Not so much in my case as I clumsily staggered from plank to plank.
When you’re here, you can’t help but be at awe with a bridge constructed of 6 tones of vine cut from the valley’s forest, measuring at 45 meters long, 2 meters wide and hanging 14 meters above Iya River.
The difference between here and the Double Vine Bridge is that it’s a bit more of a tourist attraction with its big parking lots, large bus groups, and crowd control in the form of one-directional crossing.
Biwa Waterfall is just beyond the bridge’s exit. This is a modest 50 meter waterfall that’s surrounded by stone and lush greenery.
WHAT YOU NEED TO KNOW
Time:
- Hours – Open all-year-round
- April-June:8AM – 6PM
- July-August:7:30AM – 6:30PM
- September-March:8AM – 5PM
- Duration – Expect to spend 30 minutes to 1 hour here.
Price:
- Adults – ¥550
- Children – ¥350


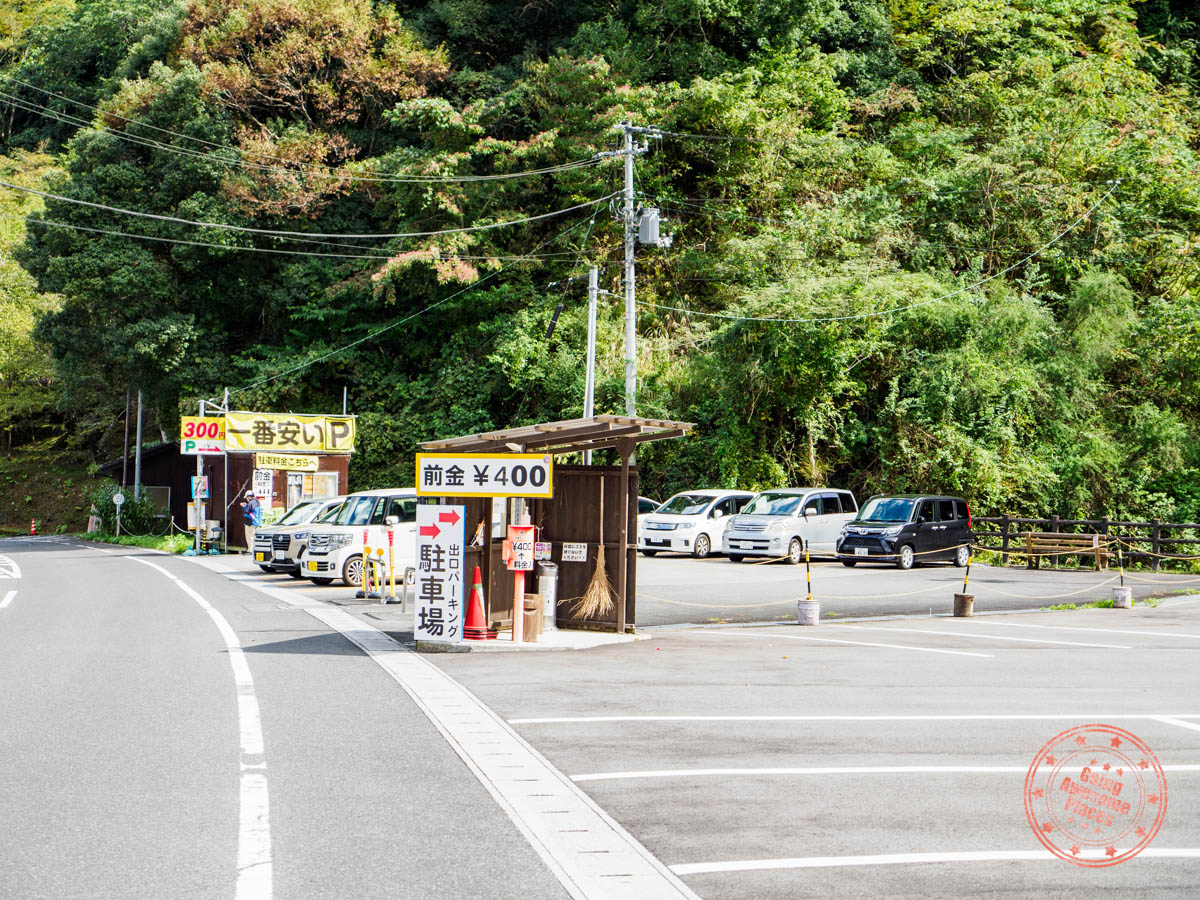
Parking: What caught us off-guard was the parking situation by the bridge. There are many different parking options and while it seemed like the main lot was the obvious choice, in this case, we think it makes more sense to use the private spaces instead of the municipal parking spaces. All locations are pinned on our Shikoku map so you know where to find them.
- Municipal lot – This is the official multi-story parking lot with space for 14 buses and 300 cars. Price is ¥500 per car.
- Private lots – There are several private lots along the road that curves before and after the bridge. While instinctively they might seem a bit sketchy, they’re ultimately cheaper and closer to the bridge, ranging from ¥300-¥400.
Booking: No online booking is available.
How it works: There is a ticket booth right when you enter the bridge. Once you pay, you are allowed to walk in one direction. Traffic only flows one way and they will control how many people are on it by limiting ticket sales when it’s busy. That said, they don’t usher people off the bridge. Once you get off the bridge, you can either turn left towards Biwa Waterfall or right to get back to exit and get back on the main road.
Website: No official website. Your best bet for an updated page is on Miyoshi Tourism.
FAQ:
- Are there bathrooms? There are no bathroom facilities at or near the bridge. The one that’s most easily accessible is in the visitor center that’s connected to the municipal lot.
- Can you take a bus to the vine bridge? Yes, there is a highway express bus which stops at the municipal lot and a local bus that stops on the north side of the river. Iya Times does a great breakdown of the buses in the region in English.
Tips:
- This bridge is considerably more popular than Oku-Iya Double Vine Bridges because it’s more central and easily accessible. As a result, this place can get very busy on weekends and holiday periods. If you can only choose one, we’d actually recommend the double vine bridges.
- The bridge is lit up at night from 7PM – 9:30PM if you’d like to see the bridge in a different atmosphere.
- Every 3 years, the bridge has to be rebuilt. The last repair was January 9 – February 23, 2024 so the next repair should be in 2027.
- There isn’t too much to the Biwa Waterfall. It’s a 50 meter cascade with some rocks to walk around but beyond that, it’s right next to the pedestrian path and you can’t hike around it. After you’ve seen the waterfall, you’ll turn around to exit the bridge area.
Explore the Old Iya Highway
As you go further along Route 32, you start driving through the lower reaches of the gorge and the road turns into the one-lane “Iya Highway”, twisting precariously high along the mountainside.
The two main sights to see are:
- Hinoji Bend/Iya River Bend Observation Point – Reminiscent of Horseshoe Bend in Arizona, Iya River below hooks around a mountain, creating a striking panorama.
- Peeing Boy Statue – At the precipice of a 200 meter drop is a daring statue of a boy. Built in 1968, this supposedly celebrates the boys that used to relieve themselves from this viewpoint. It’s a strange one that almost feels more of an homage to Manneken Pis in Brussels.
Soak in rejuvenating waters at the bottom of the valley


Your reward for making it this far is the soul southing power of Iya Onsen. There aren’t many other onsens like this where you descend to the bottom of a valley gorge by cable car in order to sink into a hot spring onsen with the swirl of the crisp mountain air around you and the tumble of Iya River in front.
While this is part of Hotel Iya Onsen, the secret is that they allow day guests which gives you access to the onsen below and also their indoor onsen. The water is alkaline pH water and rich in sulphur, meaning it’s great for relaxing and healing skin.
WHAT YOU NEED TO KNOW
These are the details for the onsen at Hotel Iyaonsen as a day-use visitor.
Time:
- Open-air onsen hours – 7:30AM – 6PM (last entry is 5PM)
- Indoor onsen hours – 24 hours except between 10:30AM – 11:30AM for cleaning
Price: Fee for the open-air onsen hours include the indoor onsen.
- Adults – ¥1,900
- Children – ¥1,000
- A private onsen (Yamagiri-no-yu) can be booked for 60 minutes. You will need to ask the front desk for the rate.
- If you’re only interested in the indoor onsen, it’s ¥700 for adults and ¥300 for children.
Parking: There’s free parking at the hotel but it is limited as it’s shared with hotel guests. They officially have space for 37 cars. Once the official spots fill up, most people park on the side of the road, on the mountain side.
Booking: It is not possible to make reservations day-use visitors can simply drop-in.
Website: Hotel Iyaonsen
FAQ:
- Can you take photos of the onsen? As with all onsens, no photos are allowed in the changing rooms or in the onsen itself. That said, you are allowed to take pictures of the cable car, the terace on the banks of the Iya River, and at the cable car station at the top and below.
- Are there time limitations? They don’t do timed entries or limit the amount of time you can spend at the onsen.
- Are private onsens available? Yes, they have a private open-air onsen that can be reserved for a fee. However, we imagine that availability will be hit or miss as hotel guests will have the first opportunity to book these ahead of time.
- When is the best time to go to the onsen? The mornings are usually the quietest but honestly it’s great anytime of the day.
- How long does the cable car take? The cable car ride descends 170 meters and takes 10 minutes.
- How many people can the cable car fit? The Hotel Iya Onsen cable car can fit 20 people.
Tips:
- They have them available for purchase but if you have your own onsen towel of your own or any small travel towel you’ve packed, remember to bring it with you as they don’t provide any for free.
- You don’t want to bring a backpack with you so it’s a better idea to have all of your belongings in a small drawstring bag. These drawstring backpacks are super handy for onsens.
- Lockers have keys built in so you don’t need to bring a lock.
- There are two baths – Keikoku-no-yu and Seseragi-no-yu. Since 2016, they alternate between male and female everyday.
- If you’d like to take pictures, it’s still worthwhile to bring your phone or camera with you to the onsen as it is quite picturesque from the terrace.
- Since this is a sulphurous hot spring, remember to take off your jewelry.
Head back to home sweet home

Even though you’ll be heading back to Kouya early, your day isn’t over! A stay in Iya Valley isn’t complete without a soba-making class.
Since Iya Valley is renowned for growing buckwheat, their soba is made of 100% buckwheat instead of a mix of buckwheat and flour. These noodles are also short and thick instead of its thinner cousin found in other parts of Japan.
In a separate building of the farm, you’ll make hand-made soba from scratch. Under Shinsuke-san’s guidance, you’ll kneed and roll out the dough, followed by hand chopping each noodle.
Afterwards, watch how rice is made using the traditional method of sticks and nurturing a flame with a bamboo blowing pipe.
Returning back to the farm house, you’ll be able to feast on the freshly made soba along with many other delights. As a solo traveler, it was nice to have Shinsuke-san join me for dinner where we tried our best to make conversation through Google Translate.
Day 3 Summary
What you’ll see & do:
Where you’ll eat:
- Breakfast – Kouya Farmstay – This is a traditional Japanese breakfast served in the same dining room with multiple small dishes and rice. They also brew a fresh pot of coffee (or tea) for you to enjoy on the porch.
- Lunch – Iya Bijin – This is one of the locally-recommended restaurants that you’ll pass by along the way that’s best known for their soba.
- Dinner – Kouya Farmstay – For one of your nights, your host will run their own soba-making class which combines with another dazzling array of Iya Valley specialities.
Where you’ll stay:
- Kouya Farmstay – Dare I say, this is truly the best accommodation experience in Japan that truly transports you back to olden days of Japan. The house is equipped with a washer, dryer, and detergent that are free to use so this is a good time to get that done.
Itinerary Day 4 – From Yokai to Castles
For your fourth day of this Shikoku itinerary, with many of its secrets uncovered, it’s reluctantly time to say goodbye to Iya Valley but not before you stumble upon another unusual delight. Spend the rest of the day seeing the main highlights of Kochi before detouring out to Shimanto.
Learn about the yokai

So far you’ve been focusing on the center and east end of Iya Valley. On the western side Oboke Gorge where you’ll find emerald green waters, white rock faces, and jutting cliffs. It’s here that legendary yokai take over.
Monsters, goblins, and spirits from local folklore are collectively called yokai. In olden days, this region was treacherous for people to residents and visitors and that’s how legends of yokai began as a cautionary tale.
While there are certainly a lot of adventure activities to do in the area, we think it’s worth your time to visit the Yokai House, a museum that’s part of Roadside Station Oboke. Inside are a collection of hand-made sculptures of mythical monsters, each with their own story and attributes.
It certainly helps that there are English signs here as well. Also, if you’re into gems, there’s an adjoining gem museum that displays gemstones found locally and around the world.
Seek out yokai monster statues
Now that you’ve got a good idea of what the yokai are all about, grab a map from the Tourist Information Center inside the roadside station and walk or drive the Yokai Village and try to spot all of the statues along Route 272.
This trail mostly follows the paved road so you can either walk it or if you were tight on time like myself, drive it, and make stops along the way. To give you an idea, it’s a 2 km (1.24 mi) walk from the roadside station to Fujinosato Park.
We suggest you go as far as the Konaki-jiji statue (depicted on the right). This is a famous yokai monster featured in the manga comic, GeGeGe no Kitarō, by Shigeru Mizuki.
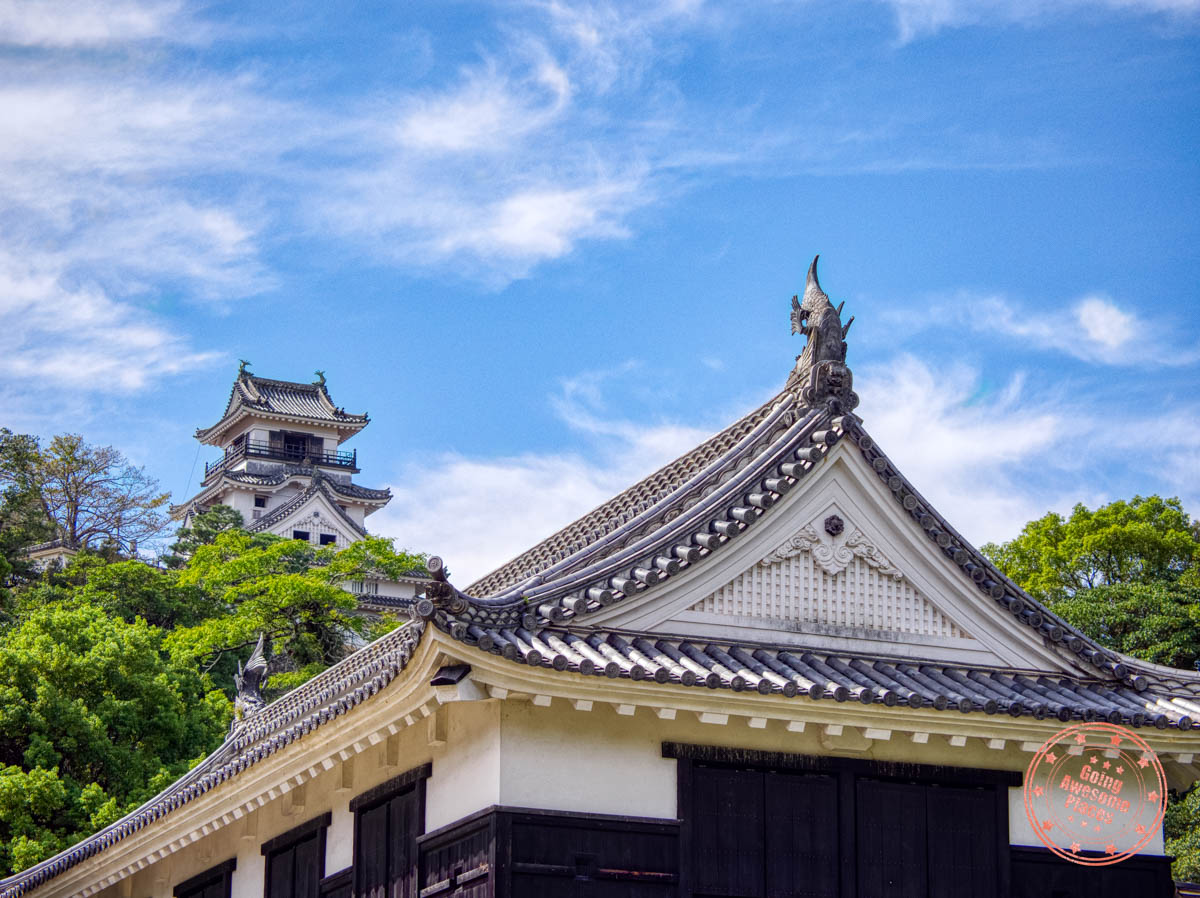
Climb the Kochi Castle
Exiting Iya Valley, you’ll drive into the heart of Kochi and visit your first of many incredible castles in Shikoku.
Kochi Castle was constructed in the 17th century and has the unique property of being the only one in Japan where both the original castle tower and main keep are intact. It’s also 1 of 12 castles in Japan where the main keep is intact.
On your visit, you’ll start from the perimeter of the castle grounds, enter through the main Otemon Gate, make your way around its towering stone walls, enter the main keep (honmaru), and finally all the way up the five-story castle tower (tenshu). At the very top, you’ll be able to walk the outside and get a full panoramic view of the mountains to the north and city to the south.
WHAT YOU NEED TO KNOW

Time:
- Hours – 9AM – 5PM (last entry at 4:30PM)
- Open everyday except from December 26 – January 1.
- Duration – Expect to spend roughly 2 hours here.
Price:
- Adults – ¥420
- Under 18 years old – free
- If you plan on going to the Kochi Castle Museum of History, you can buy a combo ticket from the vending machine for ¥900.
Parking: The official parking lot for Kochi Park is quite large. When you arrive, they’ll assign you a specific numbered spot. The first hour is ¥370 and every extra 30 minutes is ¥110. You pay on the way out.
Booking: You can buy a Kochi Castle ticket in advance or you can use the vending machine at the base of the tower. The machine is cash-only only accepts bills up to ¥2,000.
Website: Kochi Castle
FAQ:
- Which part of the castle requires admission? There’s no admission required to enter from the castle grounds. However, you’ll need a ticket once you get to the top where you’ll get access to Kochi Castle Watchtower, Kaitokukan Palace, and Main Compound Honmaru (including the corridor and Higashitamon East Wing).
- Do you need to book tickets ahead of time? It’s not necessary as you can pay for your ticket at the booth before heading into the castle. On a busy day however, you can save some time by buying your ticket in advance.
- Are there English-speaking guides at the castle? Yes, the Kochi SGG Club offers free guided tours on Saturdays, Sundays, National Holidays, and when cruise ships are in Kochi. You can also book private guided tours.
Tips:
- If you’re collecting Japan’s 100 Famous Castle Stamps, look for it at the Kochi Castle tower counter where you’ll be able to use their stamp from 9AM to 5PM.
- Before entering the keep, you’ll need to take off your shoes and put them in special shoe lockers. These are free to use.
Enjoy views from Godaisan Park
For lunch, Hirome Market is just a short walk from the castle. As a food hall, there are plenty of stalls to choose from and tons of seating as well. If you haven’t yet, make sure to try katsuo no tataki or fire-seared bonito.
Back on the road, on the outskirts of the city is a small mountain and park that overlooks Kochi City. The best view is from the wooden observation deck within Godaisan Park where you’ll get a clear view of the city, Urado Bay, and the Kochi Plain.
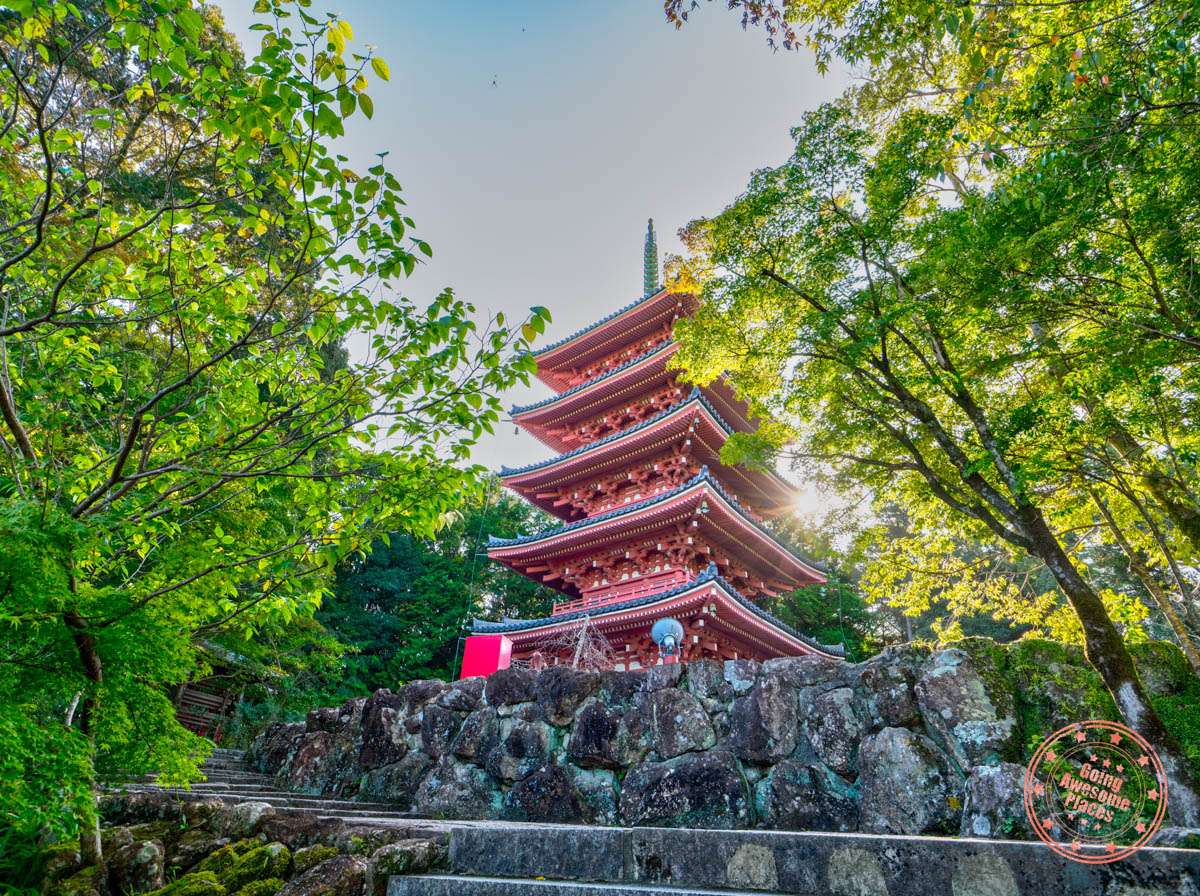
While you won’t be doing much of the famed pilgrimage trail on this Shikoku itinerary, this is your opportunity to visit temple number 31 of 88 – Chikurinji Temple, which is within the grounds of Godaisan Park.
This ancient temple is surrounded by sweeping Japanese maples and is deeply serene as you walk its moss-covered approach, make your prayers at the main temple buildings, and walk up to the brilliantly red five-storied pagoda.
Make your way to Shimanto
If you look at the map, it seems unusual to detour all the way out to the city of Shimanto, especially when Nakatsu Gorge is in the other direction. It’ll all make sense tomorrow.
It’s a long 2 hour drive from Kochi to Shimanto so we recommend taking a break somewhere along the middle, such as the Roadside Station Nakatosa.
Once you arrive in Shimanto, check into Hotel Sunriver Shimanto, grab dinner at Ichimonya located in the same plaza, and get some early rest.
Day 4 Summary
What you’ll see & do:
Where you’ll eat:
- Breakfast – Kouya Farmstay – Your last chance to enjoy the harmonious blend of flavors, textures, colors, and a stunning view of the valley.
- Lunch – Hirome Market – A short walk from Kochi Castle is a large food market with an array of stalls. If you haven’t had it yet, seek out katsuo no tataki or fire-seared bonito.
- Dinner – Ichimonya – Conveniently located in the same plaza as your hotel, this is a casual local restaurant with a wide selection of popular dishes including the aforementioned bonito, pork katsu, and unagi (eel).
Where you’ll stay:
- Hotel Sunriver Shimanto (Agoda/Booking) – A modest business-style hotel that shares a parking lot with the plaza that it’s part of which makes it convenient to walk to restaurants, groceries, and Family Mart.
Tip:

- There’s barely any information online about the Yokai Village walk with locations of all of the statues. The above is a scan of the pamphlet that has them all marked. It’s in Japanese but it should give you an idea of the potential routes you can do and where they are.
Japan Trip Planning Essentials and Discounts
If you’re in the middle of booking your trip to Japan, here are the most important places you need to go to book:

- JR Pass – The two most reliable places we always check are JRailPass and JRPass. If you are taking long distance Shinkansen across multiple region, get the full JR Pass. If you’re focusing on one specific area, you only need a JR regional pass.
- Shinkansen – The JR Pass prices have gone up and for many of you, it’ll make more sense to book tickets individually. The secret is that when you buy your Shinkansen tickets through Klook offers special vouchers for Don Quijote and BIC when booking. Their tickets are super easy to redeem as well. Right now, use code SKS10OFF to save $10 USD off.
- Hotels/Ryokans – In Japan, the best website for accommodations, hands down is Agoda. When we’ve compared them against Booking, Agoda consistently came out cheaper.
- Tours – While Viator and GetYourGuide are our go-to’s, Klook and KKDay are much popular in Asia so it’s always worth comparing across all of them to make sure you get the best price.
- Pocket Wifi – While we do love eSIMs, having a pocket wifi is great for sharing data with a large group. The most popular is NinjaWifi which is easy to pick up at the airport. Use code AWESOME15 to save 15% (automatically applied). Alternatives are offered by JRPass and JRailPass but they aren’t as cheap. For a more global solution, consider Solis and PokeFi.
- eSIM – The best one is Airalo. Save money by getting the Japan region eSIM and use referral code WILLIA9500 to get $3 USD credit on your first purchase. From now to Feb 29, the 10GB package is half price as well! Ubigi is another one that we’ve had success with where they uniquely offer 5G coverage. Use code AWESOME10 to save 10% on your first order.
- Car Rental – Big companies like Budget, Avis, and Enterprise operate in Japan but they’re usually the most expensive. The best companies are the local Japanese ones such as Toyota Rentacar, Nippon Rentacar, Orix Rentacar, Nissan Rentacar, and Times Car Rental. To make things easier, use Rentalcars and Klook to compare prices all in one place. Don’t forget, you need an IDP to drive in Japan so get one before you leave your home country.
- Learn Japanese – It helps to know even a bit of the language before you go. Start your learning with Rosetta Stone Japanese.
- Cash or credit – Cash is still very important to have in Japan but when you use credit cards, make sure you’re not getting charged those extra exchange rate fees. The best card right now is the Wise Multi-Currency Card which is actually a debit card where you can convert at favorable rates beforehand. This cuts out any sneaky transaction fees.
- Travel Insurance – Make sure you’re covered in case something happens. Get quotes from Insured Nomads and if you’re from Canada, get quotes from RATESDOTCA.
- Shopping – Discovering Don Quijote is a quintessential part of the Japan experience. The secret for tax-free shopping is that they have a coupon that can help you save 10% off + additional 5% off if you spend ¥10,000 or more.
Itinerary Day 5 – Knife-Making in Shimanto
The theme of hidden secrets weaves its way around the entire 12-day Shikoku itinerary and Workshop Kurogane is a prime example of its many pleasant surprises. Nestled alongside the undisturbed natural beauty of Shimanto River, you’ll find the truly one-of-a-kind knife-making experience.
Forge your own kitchen knife

Deep in the Kochi mountains, Nobuya-san focuses on an ancient forging technique that dates back 1500 years. Taking from his own philosophy of connecting with nature and the old-style of living, he says “I focus on crafting one-of-a-kind knives that reflect my unique strengths and weaknesses, as well as the bold beauty of Kochi’s countryside that can’t be found anywhere else.”
The only reason why I knew about this activity was because it popped up on Viator during my trip planning process. My initial instincts were that this didn’t quite flow with how the itinerary was laid out, but I knew this was too good of an opportunity to pass up. I eventually re-organized what would’ve been an extra day in Kochi and included this experience.
The best way to get a feel for what the knife-making workshop is like is to watch our Shikoku video in the video player. You can also check out or 12 Days in Shikoku video on YouTube.
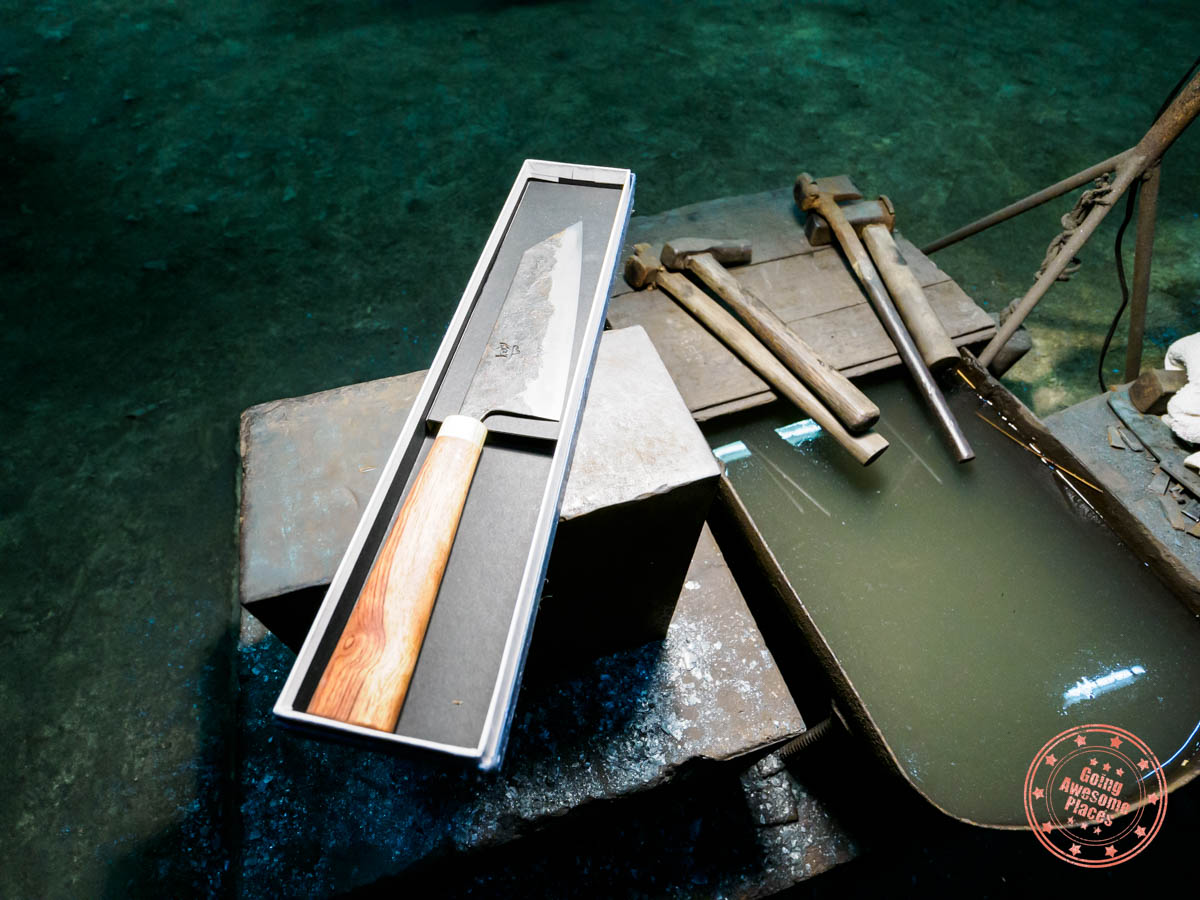
Your one day class starts with a raw piece of Blue Paper #2 steel. Step by step, you’ll create the shape of the blade and forging it through hammering, grinding, sanding, hardening, and tempering. The final steps involve the handle, name carving, and sharpening with a whetstone.


Beyond the meticulous knife-making steps, you’ll enjoy getting to know the master, Nobuya Hayashi and his apprentice, Jesse from Canada. Unlike most knife-making workshops, Nobuya-san doesn’t come from a line of knife-making masters but instead, inherited the workshop from his late master, after coming to him with a passion blacksmithing in his second life.
This is why you’ll find that there’s a refreshing modern approach to running a knife-making workshop here, whereas other workshops in Japan are typically more conservative and cookie-cutter. Here, you can make any type of knife you want and you get to be involved in quite a number of steps.


We believe that the Workshop Kurogane knife-making class is for everyone. You don’t need to be an expert craftsman or a connoisseur of Japanese knives. As long as you have an appreciation for learning the Japanese way of creation, enjoy being hands-on, and have use for a knife back home, this is a no-brainer.
WHAT YOU NEED TO KNOW


Address: Use “Workshop KUROGANE” on Google Maps when navigating here.
Time:
- Operating days – Friday, Saturday, and Sunday
- Duration – 8-9 hours
- Start time – 9AM
Price:
- One-day knife making class (with pre-made magnolia handle) – ¥34,000
- Add-ons
- Custom-made wooden handle (i.e. bubinga, walnut) with ferrule (brass or copper) – ¥8,000
- Worldwide shipping – ¥4,000 for up to two knives, ¥6000 for up to six knives to one address.
- Engraving (up to 3 characters) – free
Parking: Workshop Kurogane has enough spots on their driveway for cars.
Booking: You can book your experience through Viator or email [email protected] / [email protected]
Language: Master Nobuya-san and apprentice Jesse-san both speak English.
Website: They have an old website but it is out of date so the best way to connect is through Master Nobuya’s Instagram and Apprentice Jesse’s Instagram (typically more responsive) accounts.
FAQ:
- How far in advance should you book? It’s recommended you book at least 3 months in advance. As more enthusiasts and travelers learn about this experience in Shikoku, spots are filling up quickly.
- Do you need prior knife making experience? You do not need any prior skills or knowledge of knife making before coming here.
- How challenging is the class? This class is meant to be for all skill levels and the instructors are very good at adapting the experience to how much you want to put into it. From a physical perspective the hardest part is the hammering out of the steel. It is quite the fun process but can get tiring. Overall, expect this to be a very hands-on experience but anything you’re not able to do, the instructors can do for you.
- Is lunch provided? No meals are provided in this experience so you’re expected to pack your own. For most, it’ll be the easiest to go to stock up at the Family Mart next to Hotel Sunriver Shimanto or other convenient store to load up on bread, onigiri, and other snacks.
- What equipment is provided by the workshop? They provide gloves, apron, and safety goggles.
- What type of steel is used? The base steel is Blue Paper #2 which is pre-laminated. This is carbon steel which is incredibly strong and more durable but is less corrosion-resistant.
- Is it okay to travel by plane with the finished knife? You won’t be able to have it in your carry-on but you can absolutely travel with this knife in your check-in luggage. Alternatively, you can always ask them to ship the knife to you.
Tips:

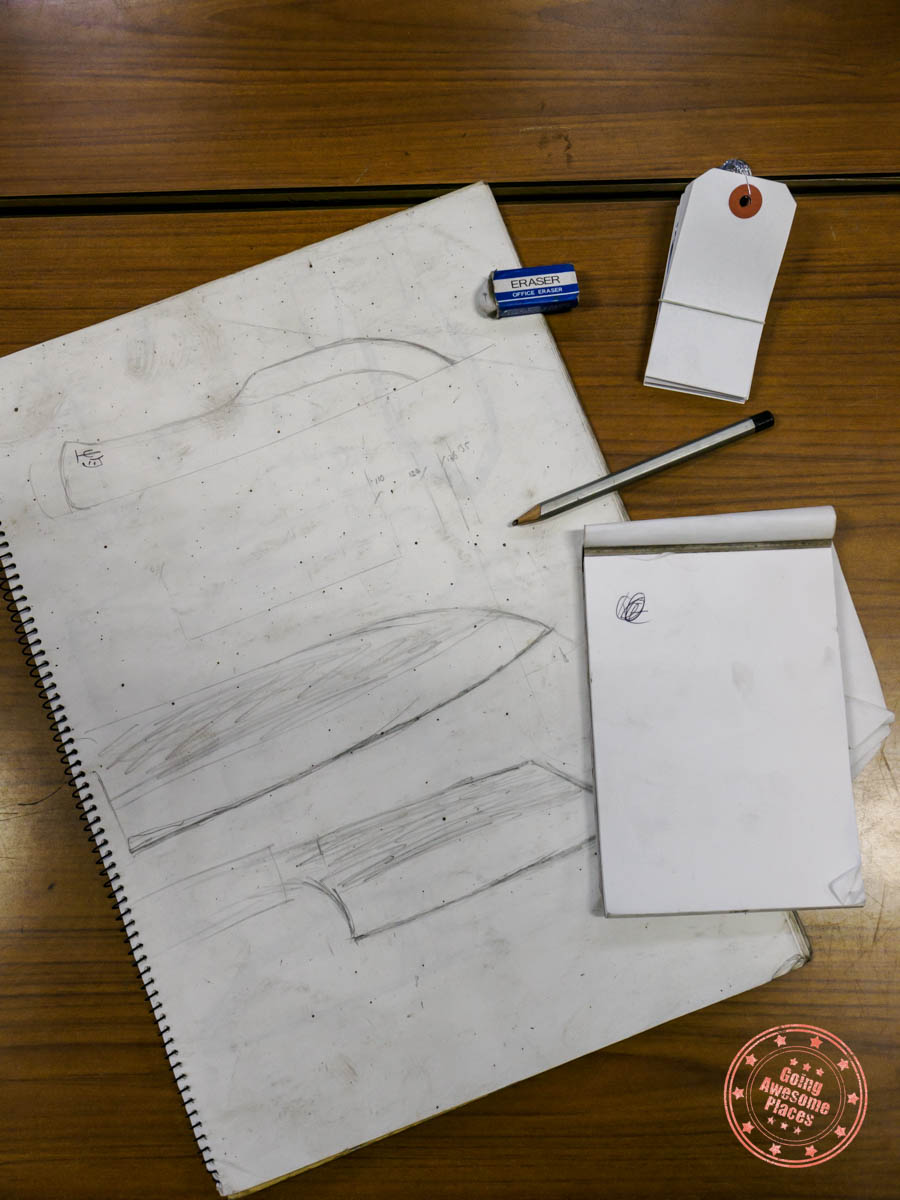
- Before going, we recommend that you research the type of knife that you’re interested in making. To help with that, it might be worth picking up a book like handbook on Japanese knives and sharpening techniques which we saw in the workshop. There isn’t much time to think about this so come in with the style in mind or have a sketch ready.
- If you didn’t book this ahead of time and find yourself wanting to join last-minute, it doesn’t hurt to reach out by DM’ing Jesse on Instagram to see if there’s a way to fit you in.
- If you are tight on time, they can also offer a half day program where you don’t get involved in the grinding, and see the remaining steps of sharpening and attaching the handle. Instead, you the sensei finishes the knife and you pay extra to have it mailed to you.
- For those that are Tamahagane knife lovers, you should definitely consider extending your Shikoku itinerary and do their 4-day Tamahagane knife making class where you go even further back in the process and see a very traditional smelting method of creating precious steel from ironsand.
The hard part about incorporating the blacksmithing experience is that you then have to make the 2.5 hour drive back to Kochi City. It’s not ideal, but this way, you have a much shorter drive the next day into Nakatsu Gorge.
Have dinner at a traditional Japanese restuarant in Ishoku Club Jyunya and have much-deserved rest at Comfort Hotel Kochi.
Day 5 Summary
What you’ll see & do:
Where you’ll eat:
- Breakfast – Konbini Breakfast – You’re going to want to head out ASAP to get to your 9AM knife-making class start time so it’ll be easier to eat something quick in your room or as you drive up to Kurogane Workshop.
- Lunch – Konbini Lunch – Since lunch isn’t included with the class, pack something with you.
- Dinner – Ishoku Club Jyunya – This was another local-recommended Japanese restaurant that serves all of the Kochi specialities. The hostess here is extremely friendly and may even offer to sit down with you to share what Okyaku culture of Kochi is all about including drinking etiquette and games which I did not expect.
Where you’ll stay:
- Comfort Hotel Kochi (Agoda/Booking) – While the brand isn’t as well-regarded in North America, this Comfort Hotel is quite respectable, modern, and with a bit more character than the basic business hotel. The best part is that breakfast is included. One thing to note is that they don’t have the largest parking lot and fills up quickly.
Interested in more off-the-beaten-path Japan?
Similar to Shikoku, Hokkaido is another place in Japan that deserves a lot more attention. If you love the outdoors, wildlife, Indigenous experiences, and seafood, you need to check out our adventures in Far East Hokkaido
Itinerary Day 6 – Adventure in Nakatsu Gorge

Enter Nakatsu Gorge. You’ll once again delve into the mountains valleys of inner Shikoku, where pristine turquoise water, ancient moss, dramatic waterfalls, and giant boulders await.
Seek out canyoning thrills

We’re firm believers of seeking experiences that let you try something new or push your boundaries. In the case of Nakatsu Gorge Canyoning, you get both!
With Niyodo Adventure, you’ll be guided through an exclusive part of the Nakatsu Gorge that can only be explored by floating on your back, jump into the water, abseiling down cliffs, ducking behind waterfalls, and climbing giant rocks.
In the spray of the water and surrounded by ancient rock, you get another sense of Shikoku’s natural beauty. Add this to the growing list of secrets you’ve unlocked.
WHAT YOU NEED TO KNOW

Time:
- Duration – 3 hours total with 2 to 2.5 hours inside the canyon to get through a 200 m (0.12 mi) stretch.
- Time slots – 8:20AM and 1:15PM
- This trip runs throughout the year.
Price:
- Canyoning tour – ¥8,500

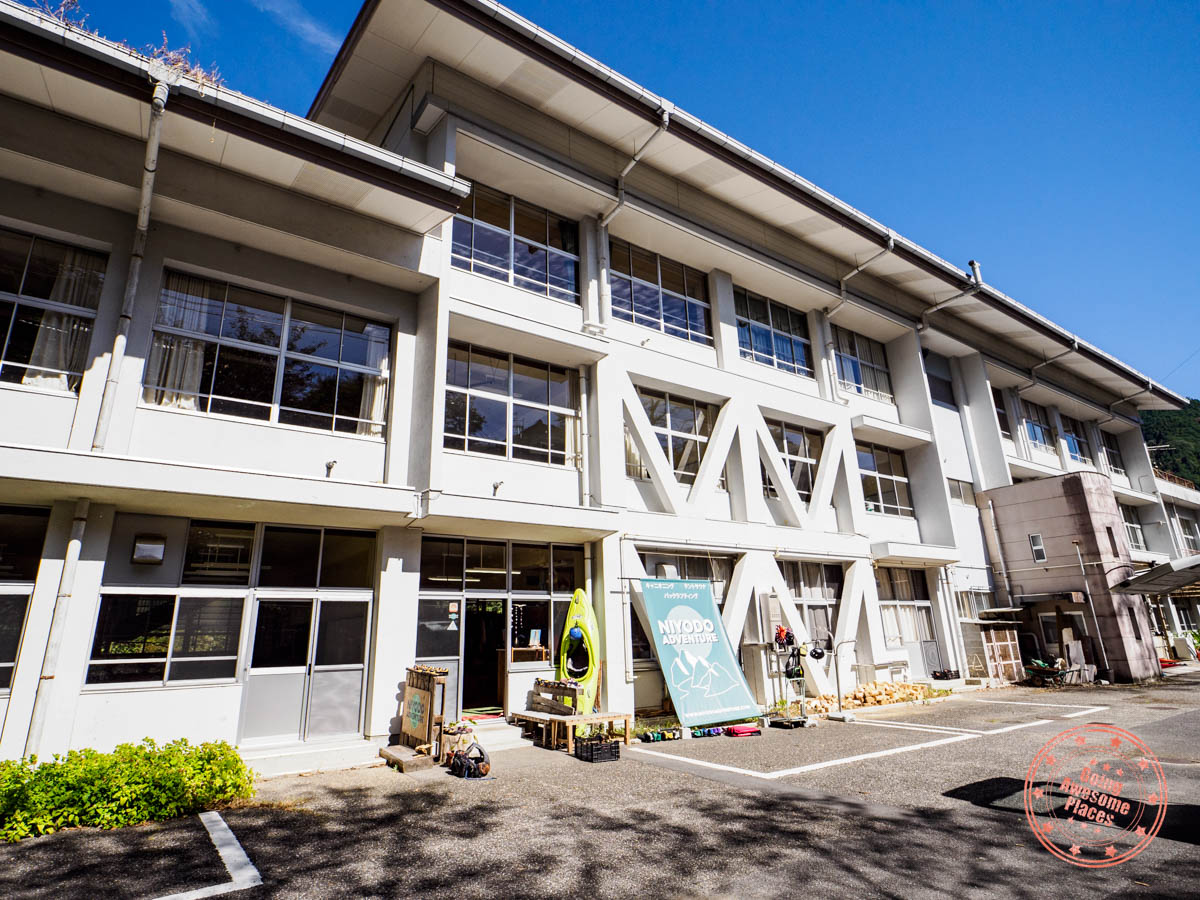
Parking: There are two parking lots. One is the larger lot below the old elementary school and the second is further up and on the same level as the Niyodo Adventure shop itself. Parking is free and you can continue to park here for your Nakatsu Gorge walk afterwards.
Booking: You can book directly on their website. Since they don’t have staff at the store the whole time, it would not be reliable to try to drop in. When reserving online, you’ll first make the request by providing your e-mail. You will then receive an email with a link to fill out your detail and provide a credit card for payment where it will be processed right away.
Website: Niyodo Adventure
Language: They have guides that speak English so make sure to request this when you fill out the reservation form.
FAQ:
- How challenging is canyoning in Nakatsu Gorge? Canyoning is definitely a more physically challenging excursion that will put you through several thrilling situations such as jumping into the water from height, going down a natural slide, ducking behind a waterfall, and letting go of a rope after abseiling. Skill-wise, you only need basic swimming skills and is designed to be for first-timers but you need to be fit enough to get up on rocks and up and down stairs.
- How cold is the water? The water stays roughly around 12-13°C (53.6 – 55.4°F) which means it’ll be chilly initially but the wetsuit does a good job at keeping you insulated so you stay relatively comfortable.
- What equipment is provided? They provide helmets, 5mm full-length wetsuit, water shoes designed for canyoning, and life jacket.
- Does the canyoning trip overlap with the Nakatsu Gorge hiking course? No as you’ll be going into in a part of the gorge that you can only get to by canyoning. The end part of the trip is right below the Ishibashira Stone Pillars, the uppermost part of the hiking course.
- How large are the groups? The maximum group size is 7.
- Is there a minimum group size for tours to run? No, the canyoning trip will run even if it’s only one person.
- What is the refund policy? 7 days prior, it’s 100%, 2-7 days is 70%, and 1 day prior is 50% refund.
- Is canyoning suitable for children? If you have smaller children (6+), there is a Family Canyoning Trip product available.
- Are photos and videos available for purchase? What’s really nice about this trip is that the guide will use their GoPro to take photos and videos at no extra cost.
- Can you bring a water bag into the canyon? If you own a dry bag, you can bring it with you but they’ll want you to put it in a separate backpack that they can provide for free. You don’t really need much gear with you in the canyon but if you’d like to have water or larger camera gear, they’ll allow it.
- Are there change rooms in the shop? Yes, there are male and female change rooms in the Niyodo Adventure store. There are separate bathrooms in the building as well.
Tips:
- Make sure to pack a towel, swim suit, change of clothes, and camera (serious/casual) for Nakatsu Canyoning. Keep in mind that your swim suit will be wet so either have a bag for it or spread it out to dry in your car.
- If you aren’t providing your own GoPro for the guide to use, make sure to have an extra high-speed Micro SD memory card.
- I was able to ask if it was okay to bring my own camera gear which they were okay with. I ended up testing out the Insta360 X3 with the unicorn helmet mount which worked out really well to stay hands-free.
- Only one or two of their helmets have GoPro mounts so we’d recommend bringing your own adhesive mount in-case.
- If canyoning isn’t your thing, a new adventure activitiy that opened in the region is called Niyodo Fly High.
Hike the Nakatsu Gorge walking course
After you’ve dried up from your canyoning adventures, it’s time to head into Nakatsu Gorge on foot. This gives you a different perspective of surrounding nature because this time, you’ll be able to see more of the details of this magnificent scenery.
Meander your way through the well-built path and concrete bridges, following Nakatsu River as you pass by a shrine, statues of gods, massive fallen bounders, pools of Niyodo Blue, the ethereal surrounding forest, and eventually the thunder of Uryu Falls.
WHAT YOU NEED TO KNOW

Time:
- Duration – Expect to spend 1 to 1.5 hours here to walk the 2.3km trail. Budget another 30 minutes if you’re planning to go all the way to the stone pillars (#5 in the picture above).
- Open all-year-round.
Price: Free
Parking: The best place to park are the same lots you’d use for Niyodo Adventure. The walk from the parking to the start of the walking course is 230 meter and takes 4 minutes.
Website: Nakatsu Gorge from Niyido Blue Tourism Council
FAQ:
- How challenging is the walk through Nakatsu Gorge? Walking Nakatsu Gorge (also called Nakatsu Valley) is mostly gentle along its 2.3 km path (1.4 miles). It’s a special laid path but does include several staircases. The path ends at Uyru Falls but continues onwards involves a long continuous staircase up towards Ryugubuchi which can be quite taxing.
- Are there bathrooms? There are bathroom facilities at the beginning of the walk but there are none in the valley.
- Can you swim in the gorge? No, swimming is prohibited.
Tips:
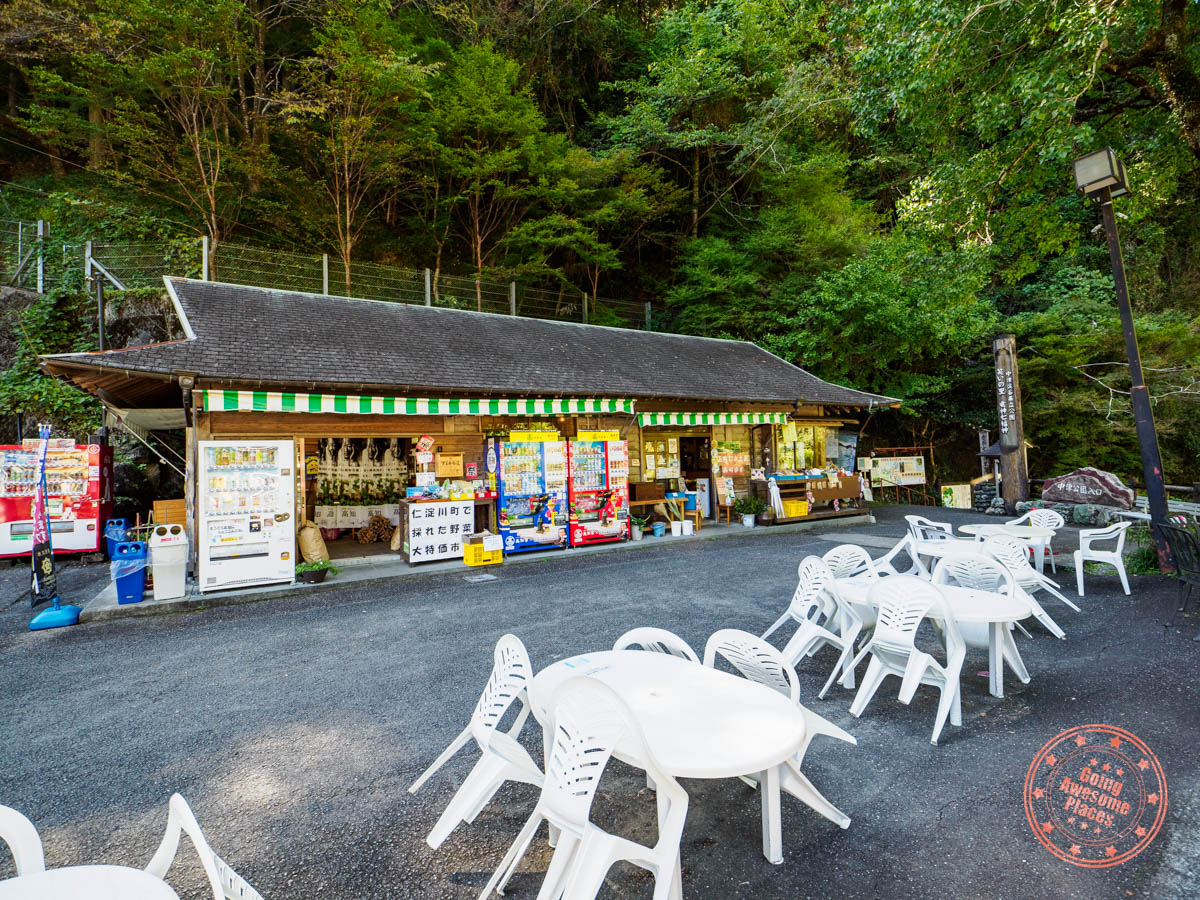
- There is a variety store at the start of the path which is stocked with several vending machines and sells a variety of things including food and snacks if you want to stock up.
- There are railings in some sections of the walk but there are sections on the concrete path without so be careful where you step.
- All of the literature says the walking path is 2.3km however this only goes up to Uryu Falls. Beyond Uryu Falls, there’s a wooden platform which looks down on the valley, Ryugubuchi, and then Stone Pillars which is furthest away.
- Stone Pillars are the same ones that you see from the base of the canyon at the end of your Niyodo Adventure canyoning so if you’ve done this already, there isn’t as much of a need to walk all the way here.
- There are 7 Gods of Fortune scattered around the path so be on the lookout as some are quite hidden.
Lunch at Cha Cha Asurano
There aren’t too many restaurants in the area but one spot that’s highly recommended is Cha Cha Asurano. They specialize in delicious set meals accompanied with one of the region’s specialties – Sawatari tea.
Decompress at Seirannosato
It’s been a busy couple of days so it’s at this point in the itinerary where you have the rest of the day to recharge and relax. Enjoy the tranquility of being in the middle of nowhere.
Taking the winding mountain roads, you eventually make it to the town of Tsuno, lodged so deep in the Kochi mountains that even locals would have a hard time pin pointing exactly where it is on the map.
Your accommodations for the night is at the newly re-developed Seirannosato. Once a basic ryokan, they’ve built quite the remarkable modern lodge featuring 6 rooms, rooms with private patios that face Shimanto River, and a fusion of Western and Japanese design elements.
Dinner at Seirannosato

For dinner, enjoy a continuous stream of regional Kochi dishes that will have you completely satisfied at the end.
Day 6 Summary
What you’ll see & do:
Where you’ll eat:
- Breakfast – Comfort Hotel Kochi – An excellent buffet breakfast that’s free for all guests.
- Lunch – Cha Cafe Asunaro – One of the more popular restaurants in the Niyodo Gorge area and located next to Odo Dam. They offer various set meals and feature local ingredients and Sawatari tea leaves (tea-growing region along Niyodo River). For those on the go, they have smoothies, lattes, soft-serve and waffles available for takeout.
- Dinner – Seirannosato – When you book with this hotel, it includes breakfast and dinner service, which you’ll be glad to have as there isn’t much else nearby. Dinner is a multi-course Japanese meal featuring Kochi cuisine and homemade financier for dessert.
Where you’ll stay:
- Seirannosato (Rakuten Travel) – Deep in the Kochi mountains and at the source of the Shimanto River, this is a newly-built lodge that has a nice fusion of Western and Japanese design. This is the type of place where you can rewind and get connected to nature. Staying in one of the 6 rooms, make sure to take advantage of their private patio that faces the tumbling river. Lastly, they have a free-to-use laundry machine and dryer so bring your own travel detergent sheets if you want to use it.
Spending time in Tokyo?
With over 100,000 restaurants in the city to choose from, how do you pick where to eat? Our Tokyo restaurant guide makes it easy by picking the best places to eat.
Itinerary Day 7 – Mighty Matsuyama Castle
It’s time to turn your attention to the north and Ehime prefecture where a legendary castle, mikan, and onsen await!
Breakfast at Seirannosato
Enjoy a filling breakfast at Seirannosato with a blend of a traditional Japanese breakfast set and also buffet items such as pastries, curry, toast, and more.
Make your way up to Matsuyama Castle

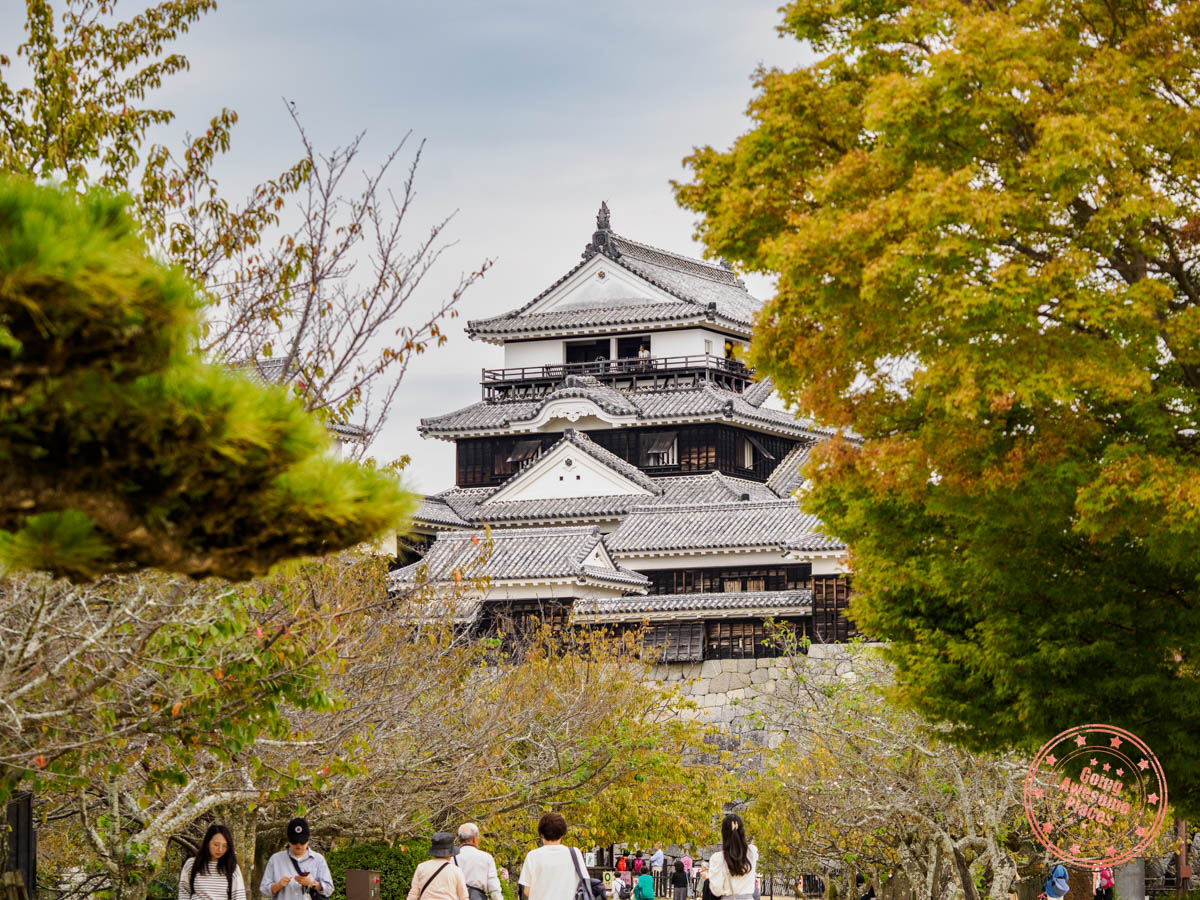
Matsuyama Castle is a historic Japanese castle situated atop Mount Katsuyama in Matsuyama City. It’s renowned for its architectural grandeur, strategic location, and layers of defense. Joining the likes of Kochi Castle, this is also on the list of the 12 castles that have come out of the post-feudal era intact.
Thanks to its steep hilltop location, the visit starts with a choice of taking either a chairlift or gondola to help with the ascent. From there, you’ll be winding your way through a labyrinth of gates, courtyard kill-zones, stone turrets, and impenetrable walls.
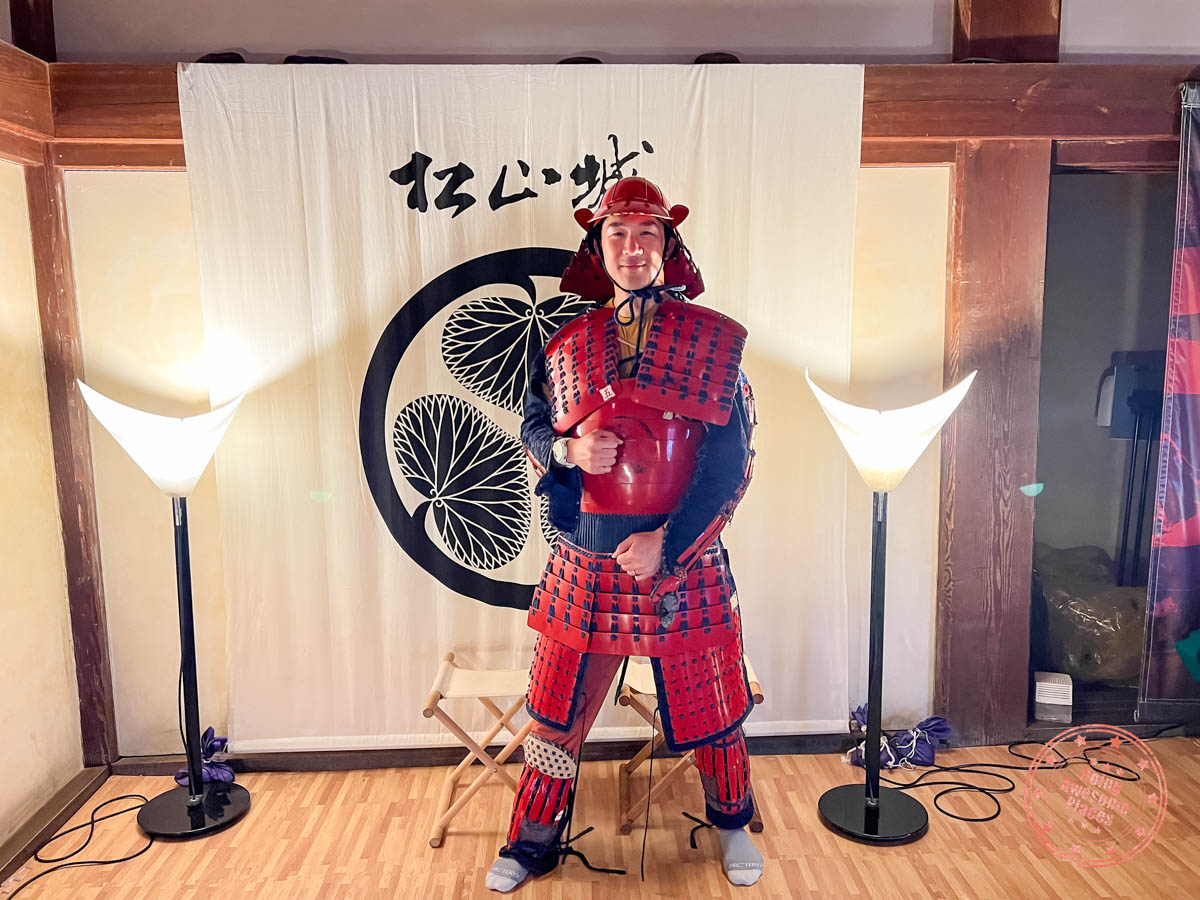
After passing through a line of cherry trees on the hill’s plateau, you’ll finally arrive at the main keep which houses the castle tower. As you climb the tour, make sure to enjoy the in-depth displays of feudal Japan including numerous katanas and armor on display, a samurai photo opportunity, and virtual reality station.
When you arrive at the top of the tower, relish how commanding of a position the castle has with its bird’s eye view of the city and also the Seto Inland Sea.
Before you go, have a refreshing cold glass of mikan juice and soft-serve.
What is mikan: From juice drinking stations, soft-serve toppings, cute bear mascots resembling oranges, and special Pocky Stick boxes, mikan is everywhere in Matsuyama. What’s the deal? Well, these are basically a type of mandarin orange and is extremely popular because they are easy to eat, is extremely sweet, and has a pleasant scent. The best quality Mikan comes from Ehime prefecture which is why you’ll see them everywhere.
WHAT YOU NEED TO KNOW


Time:
Ropeway – Takes 3 minutes and departs every 10 minutes.
- Feb – Jul – 8:30AM – 5:30PM
- Aug – 8:30AM – 6PM
- Sept to Nov – 8:30AM – 5:30PM
- Dec to Jan – 8:30AM – 5PM
Lift – Takes 6 minutes and is constantly running.
- All year round – 8:30AM – 5PM
- Closed if there is rain or chance of rain.
- Children under 6 may not ride the lift.
Castle Tower – Takes 10 minutes to walk from ropeway/lift.
- Feb to Jul – 9AM – 5PM
- Aug to 9AM – 5:30PM
- Sept to Nov – 9AM – 5PM
- Dec to Jan – 9AM – 4:30PM
NOTE: Since last entry to the castle tower is 30 minutes before closing, you should be on the ropeway/lift 50 minutes before closing.
Price: You’ll need to pay separately for the castle tower and ropeway/lift.
Ropeway/Lift
- Adults – Round-trip is ¥520 and one-way is ¥270
- Elementary school students – Round-trip is ¥260 and one-way is ¥140
- Up to two children under 6 are free with parent/guardian.
Matsuyama Castle Tower
- Adults – ¥520
- Elementary school students – ¥160
NOTE: Cashless payment (credit card and IC card) for Matsuyama Castle Tower and ropeway/lift ends at 3:15PM. Also, combo tickets are no longer sold anymore.
Parking: The official parking lot for Matsuyama Castle has enough space for 26 cars. This is first-come, first-serve and costs ¥420 for 2 hours and ¥100 for every additional 30 minutes. This lot fills up quite quickly so you’ll likely have to try to find a spot in one of the small mini lots that are scattered in the area. These require the use of vending machines which only take coins and ¥1000 yen bill. The cost is 100 per 30 minutes. In this type of lot, you pay on your way out by pressing the spot number, paying the amount indicated, wait for the flap to go down, drive away within 3 minutes. The two parking lots are marked on the Shikoku trip map.
Booking: You can’t buy tickets online ahead of time so you’ll have to do it on-site. The first is to buy your ropeway or lift ticket. Both are the same ticket so you can choose which one you want to take. The other ticket you’ll need is for the castle tower which you can do at the entrance (credit card and IC card accepted).
Website: Matsuyama Castle
FAQ:
- Can I get to the castle without the ropeway/lift? There are 4 different ways to walks that you can take to Matsuyama Castle’s main enclosure which you can find in their climb guide.
- Which part of the castle requires admission? There’s technically no admission to get into the castle grounds. The ropeway/lift is optional although we recommend taking it to save time and energy. From the grounds, the one area that requires admission is the castle tower.
- Do I need to book tickets ahead of time? You don’t need to buy tickets for Matsuyama Castle in advance.
- How long do I need at Matsuyama Castle? Expect to spend roughly 3 hours here.
- Are backpacks allowed on the lift? Yes, you are allowed to have a backpack with you but you need to carry it strapped in front of you.
Tips:
- Be prepared for very steep stairs up the castle tower.
- If the weather is good, we recommend taking the chair lift because it’s such a unique experience and there’s no waiting. You can also try both – one on the way up and the other on the way down.
- If you’re collecting Japan’s 100 Famous Castle Stamps, look for it on a table next to the the Matsuyama keep ticket booth.
- Before entering the keep, you’ll need to take off your shoes and put them in special shoe lockers. Green slippers are available but completely optional. These are free to use.
- While you’re at Matsuyama Castle, don’t miss out on trying mikan juice that you can pour from the tap (¥500) and iyokan orange-topped soft-serve ice cream (¥500).
After eating lunch at the popular Gansui Taimeshi Stand near the base of the castle, drive over to the neighbourhood of Dogo Onsen and check into Dogo Onsen Yamatoya Honten. This will allow you to park your car and settle in.
Dogo Onsen is the name of Japan’s oldest and most well-known hot springs and is surrounded by numerous bath houses and ryokans. In the past, the Imperial family came here to vacation but today, it’s the tourist hub of Matsuyama.
Check out the Botchan Train Museum
For 67 years from 1888, a tiny steam locomotive ran in the city. What makes it endearing is its lack of speed and inability to turn. In fact, since it’s not a circular route, train crew dressing as they did 100 years ago, have to to manually lift and rotate it around by hand. If you’re feeling nostalgic, you can ride in the carriage of a diesel-powered replica of the original Botchan Train. They run between JR Matsuyama, Shieki Station and Dogo (¥1,300 per per person).
Your schedule might not line up with the train or it might be suspended so if you’re interested, you can always head over to the Botchan Train Museum hidden inside a Starbucks which has more history, artifacts, and a full-sized replica.
Feel the energy of a local izakaya
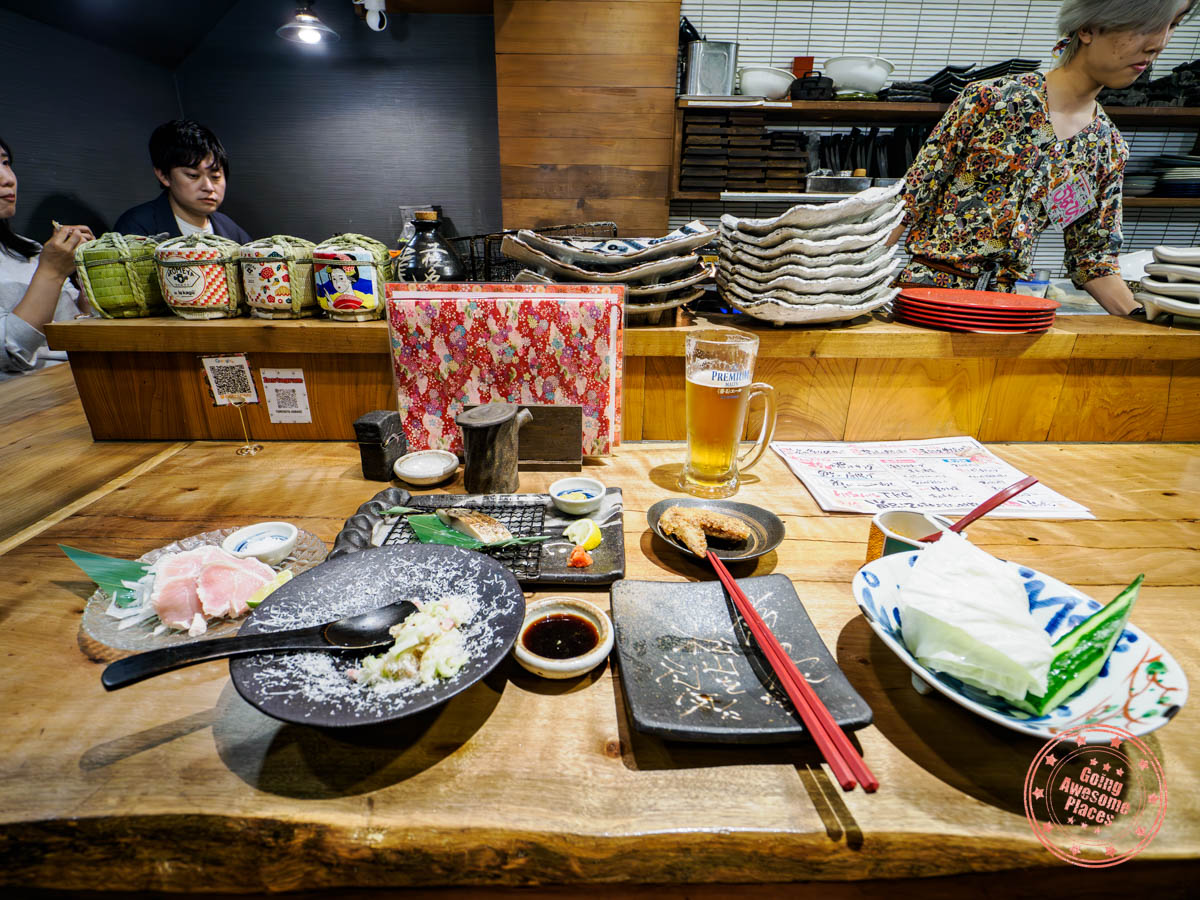
Get fired up for a local-recommend spot for dinner, Yumenoya Hanare, where izakaya meets local specialties and Western fusion. If you’re feeling adventurous, make sure to try raw chicken which is completely safe to eat, mackerel that’s flame-seared in front of you, and the charcoal-flamed chicken.
Experience Dogo Onsen classics
Dogo Onsen is a true onsen town and when you’re here, do as the locals (actually mostly tourists these days) do. In your hotel room is a cotton yukata robe, outdoor slippers, and bag. It is perfectly acceptable, and in fact, encouraged, to wear your yukata around town.
The beauty of this neighbourhood is that everything is a short walk away and interconnected by several large covered shopping arcades. Drop by its many shops and make sure to drop by the Botchan Karakuri Clock which comes alive every hour from 8AM to 10PM (every 30 minutes on weekends and holidays).
A trip to Dogo Onsen wouldn’t be complete without going to its original onsen, Dogo Onsen Honkan. It’s said that this was the inspiration for Miyazaki’s “Spirited Away”.
After you’ve gotten a feel for what a traditional bathhouse is like, head back to your own hotel and go for another soak to experience some of the differences between one from ancient times to something a little more modern. You’ll be an onsen expert in no time.
Not a bad way to end the day!
Day 7 Summary
What you’ll see & do:
Where you’ll eat:
- Breakfast – Seirannosato – In addition to serving a Japanese-style breakfast, they also have a buffet of additional dishes such as curry, rice, fruit, yogurt, bread, and pastries.
- Lunch – Gansui Taimeshi Stand – Popular restaurant that’s walking distance from Matsuyama Castle Ropeway station. The must-order item is the uwajima taimeshi which is rice topped with sea bream sashimi and eaten with a special sauce that’s comprised of soy sauce and egg yolk.
- Dinner – Yumenoya Hanare – An izakaya where their energy is infectious and you have to order their charcoal-flamed chicken, seared mackerel, and tamago made with award-winning eggs. It’s also one of the few places you’ll be able safely have raw chicken.
Where you’ll stay:
- Dogo Onsen Yamatoya Honten (Agoda/Booking) – Located almost immediately next to the original and historic Dogo Onsen, this property is classic in its own elegant way and gives you the best of both worlds, being able to comfortably walk in a yukata to the original onsen and also use the hotel’s own as well (which we found to be much better). While the rooms are small, you can choose between Western and Japanese-style rooms. A pleasant surprise is that the Western rooms have their own massage chair. When staying here, don’t forget to get your free blue charm that they give out if you ask at the front desk. Parking is through a valet service but it is completely free.
Itinerary Day 8 – Memory Lanes Of Ozu and Uchiko

Go on an exquisite cultural journey in both the charming town of Ozu and the picturesque village of Uchiko. In Ozu, you’ll find the Ozu Castle and historic streets from a bygone era. Meanwhile, Uchiko captivates with its well-preserved machiya residences and traditional kabuki theater.
See a smaller but a unique Ozu Castle

You’ve been to two impressive castles up until this point so the bar is set quite high. Instead of having you visit another one that’s on the list of 12 intact keeps, we’re going a different direction.
Ozu Castle met a tragic end in 1888 when its keep was completely demolished because it was rapidly deteriorating. In a turn of events, the community rallied around a project to have it reconstructed in 2004 using old photographs, maps, and discovery of a model. However, instead of using concrete, they used primarily wood and traditional construction techniques. The result is a castle that looks like the original from the outside and inside as well.
Coming here in the morning, appreciate the fresh glaze on the golden timber, no iron nails in sight, and a beautiful view of the city and river below.
WHAT YOU NEED TO KNOW
Time:
- Hours – 9AM – 5PM (last entry at 4:30PM)
- Open every day
Price:
- Adults – ¥550
- Children (Junior high school students and under) – ¥220
- Children under 5 – free
- Combo tickets are available for Ozu Castle and Garyu Sanso (Adults – ¥1,100, Children – ¥440)

Parking: The closest parking lot for Ozu Castle is also called “Ozu Citizen Hall Paid Parking Lot” and costs ¥150 for the first hour and then ¥80 per additional 30 minutes.
Booking: You can’t book tickets to Ozu Castle in advance.
Website: Ozu Castle
FAQ:
- Which part of the castle requires admission? To enter the castle, you need to pay admission. Otherwise, the grounds are free to explore.
- Do you need to book tickets ahead of time? You don’t need to buy tickets for Ozu Castle in advance.
- How long do you need in Ozu Castle? Expect to spend roughly 1 to 1.5 hours here.
Tips:
- Be prepared for very steep stairs up the castle tower.
- If the weather is good, we recommend taking the chair lift because it’s such a unique experience and there’s no waiting. You can also try both – one on the way up and the other on the way down.
- If you’re collecting Japan’s 100 Famous Castle Stamps, look for it on a table next to the the Matsuyama keep ticket booth
- Before entering the keep, you’ll need to take off your shoes and put them in special shoe lockers. Green slippers are available but completely optional. These are free to use.
- If it’s been your dream to sleep in a Japanese castle, you can be a lord of a castle with an Ozu Castle Stay.
See where extraordinary architecture meets Japanese beauty

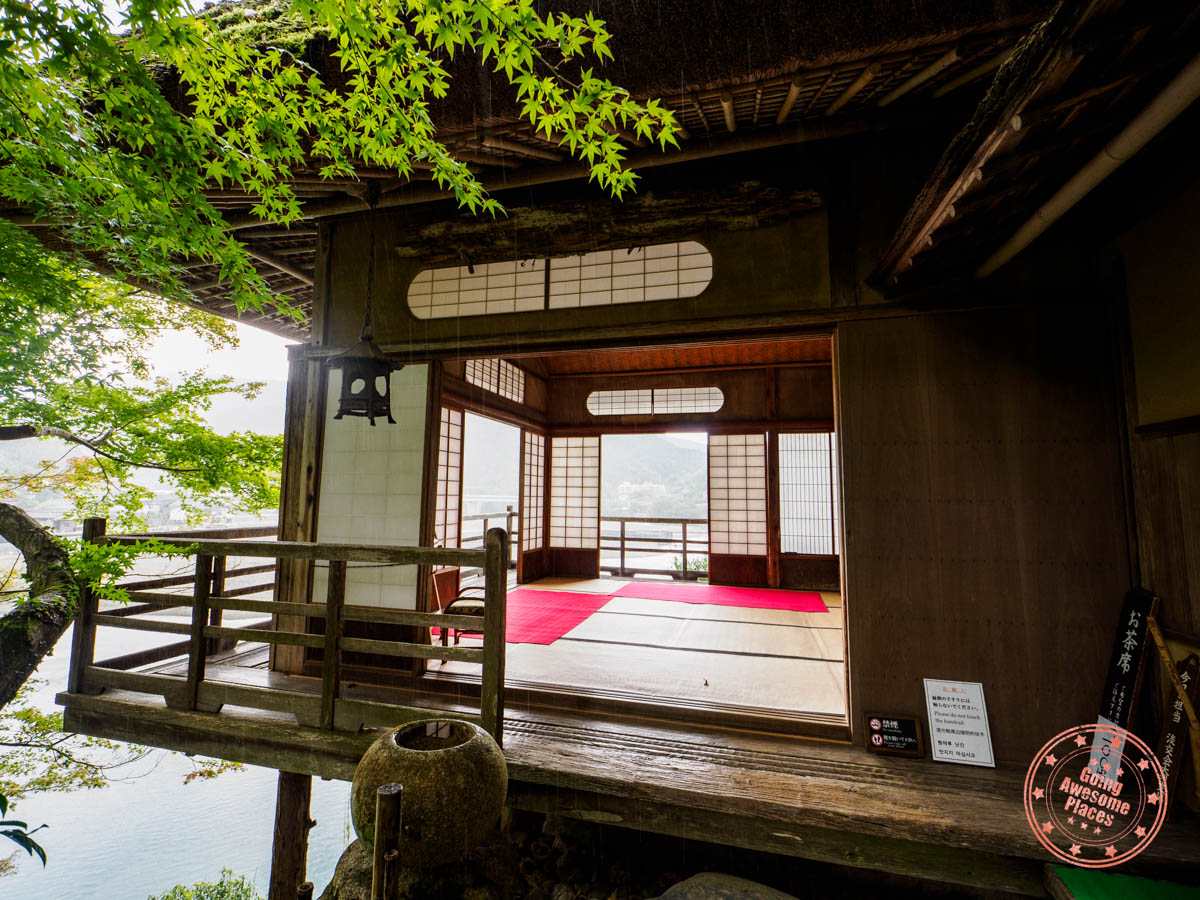
Next, you’ll drive over to an impressive villa overlooking Hijikawa River that took 4 years and 9000 artisans to build. Garyo Sanso Villa truly epitomizes the union of nature and tea.
When you’re here, it’s not hard to slip back in time with its extraordinary architecture, fine details, and aesthetic concept of “wabi-sabi” that sees the beauty in imperfection.
WHAT YOU NEED TO KNOW
Time:
- Hours – 9AM – 5PM (last entry at 4:30PM)
- Open every day
Price:
- Adults – ¥550
- Children (Junior high school students and under) – ¥220
- Children under 5 – free
- Combo tickets are available for Ozu Castle and Garyu Sanso (Adults – ¥880, Children – ¥330)
Parking: There is very limited parking here. Next to Garyu Sanso are 4 spots. There is a lot across but it’s only meant for restaurant guests. Alternatively, there’s parking below Ozu Shrine that has a good 5-6 spots. Both parking sites are free. We’ve marked these on our Shikoku trip planning map.
Booking: You can’t book tickets to Garyu Sanso in advance.
Website: Garyu Sanso
FAQ:
- Are there bathrooms at Garyu Sanso? No but outside of the villa is a public bathroom facility.
- Do you need to book tickets ahead of time? You don’t need to buy tickets for Garyu Sanso in advance.
- How long do you need in Garyu Sanso? Expect to spend roughly 30 to 45 minutes here.
- When is the tea service available? On Sundays from April to October (excluding August), tea is served in Furo-an for an additional fee. However, these days aren’t indicated.
Tips:
- There are many hidden architectural details that are easy to miss. It’s worth reading these Garyu Sanso details ahead of time so you can pick them out.
Tap into the nostalgia of “Old Japan”
If you happen to be here on a Sunday, make sure to go to Pokopen Yokocho, a vintage flea market that’ll surely take you back in time.
It’s not a big area but you can’t help but be fascinated by countless displays of enamel advertising plates, retro toys, travel pamphlets from the 1950s, and simple kids games. In the back, there’s also a Showa period museum packed with more memorabilia from the time of Emperor Hirohito’s rule.
The adjacent red-brick building is Akarengakan, where you’ll find local-made crafts such as candles, washi paper, ceramics, and other mementos. The building also houses an exhibit about brick-making around the world and a museum featuring old movie cameras and model trains.
Slip back in time in Uchiko
Spend the rest of your afternoon exploring the town of Uchiko that seemingly froze in time from the Edo (1603-1867) and Meiji (1868-1912) periods. It’s a town made its mark in the 18th century with its thriving wax trade
Uchiko’s wealth and influence shows with its well-preserved streetscape where machiya, or traditional wooden townhouses, line the main thoroughfare where sharp eyes will notice the use of pale yellow lime plaster, wooden lattices, and dark kawara roof tiles. It’s truly an open-air museum here.
When you’re here, don’t miss the last remaining candle shop where you can see how they are continuing the tradition of making them using ancient techniques. You’ll also be able to see a real-life kabuki theater at Uchiko-za Kabuki Theater with its hand-powered stage elevators and rotating stage.
Above all, I was continuously reminded of Kyoto, not so much in visual similarities but I kept thinking “this is what Kyoto must’ve been like before mass tourism”. That’s why I loved Uchiko so much.
Indulge in the onsen one more time

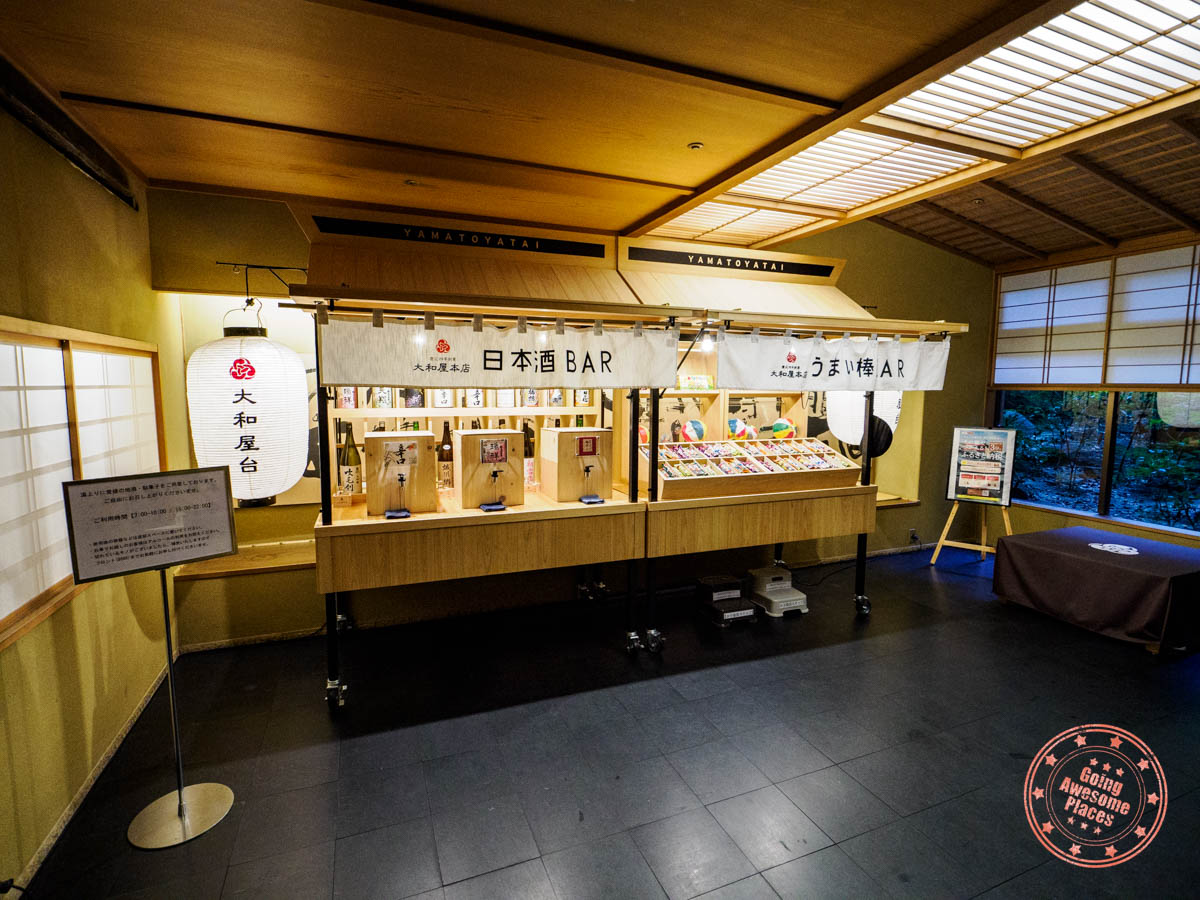
Return back to Matsuyama and Dogo Onsen. Use this as free time to walk around Dogo Onsen, try other onsens such as Dogo Onsen Annex, or simply enjoy your own hotel’s onsen with its free snack and sake bar.
Day 8 Summary
What you’ll see & do:
Where you’ll eat:
- Breakfast – Konbini Breakfast – If you didn’t purchase breakfast with your stay, you’ll want to plan to buy some food at a convenient store the night before so you can hit the ground running.
- Lunch – Charme Bakery – A modern Japanese bakery located in the historic district of Uchiko with comfortable seating for guests.
- Dinner – Iyo Shokudo Otora – This restaurant is a short walk away from the hotel and serves a variety of local Japanese dishes.
Where you’ll stay:
- Dogo Onsen Yamatoya Honten (Agoda/Booking) – The best part about this hotel are the onsen facilities found in the basement. While you’ll be tempted to go to the original Dogo Onsen Honkan or the newer Dogo Onsen Annex Asuka-no-Yu, the one found here is still the best, especially when you consider that it’s included with your stay, you can shuffle down in your slippers from your room, has a free sake and snack bar (open 3PM – 10PM and 7AM – 10AM), and has foot massagers to wind down afterwards. They also have a Noh Stage “Senjuden” free photo spot on the 4th floor from 3PM to 9PM.
Tip:
- Uchiko-za Kabuki Theater offers English-speaking guides. The entrance fee is ¥400 but the guide is included.
- When navigating to either Ozu Castle or Uchiko town, make sure to put in directions for the parking lot.
- The Uchiko main parking lot costs ¥300 and is good for the whole day. Again, this is marked on our Shikoku itinerary map.
Itinerary Day 9 – Climb to New Heights in Kotohira
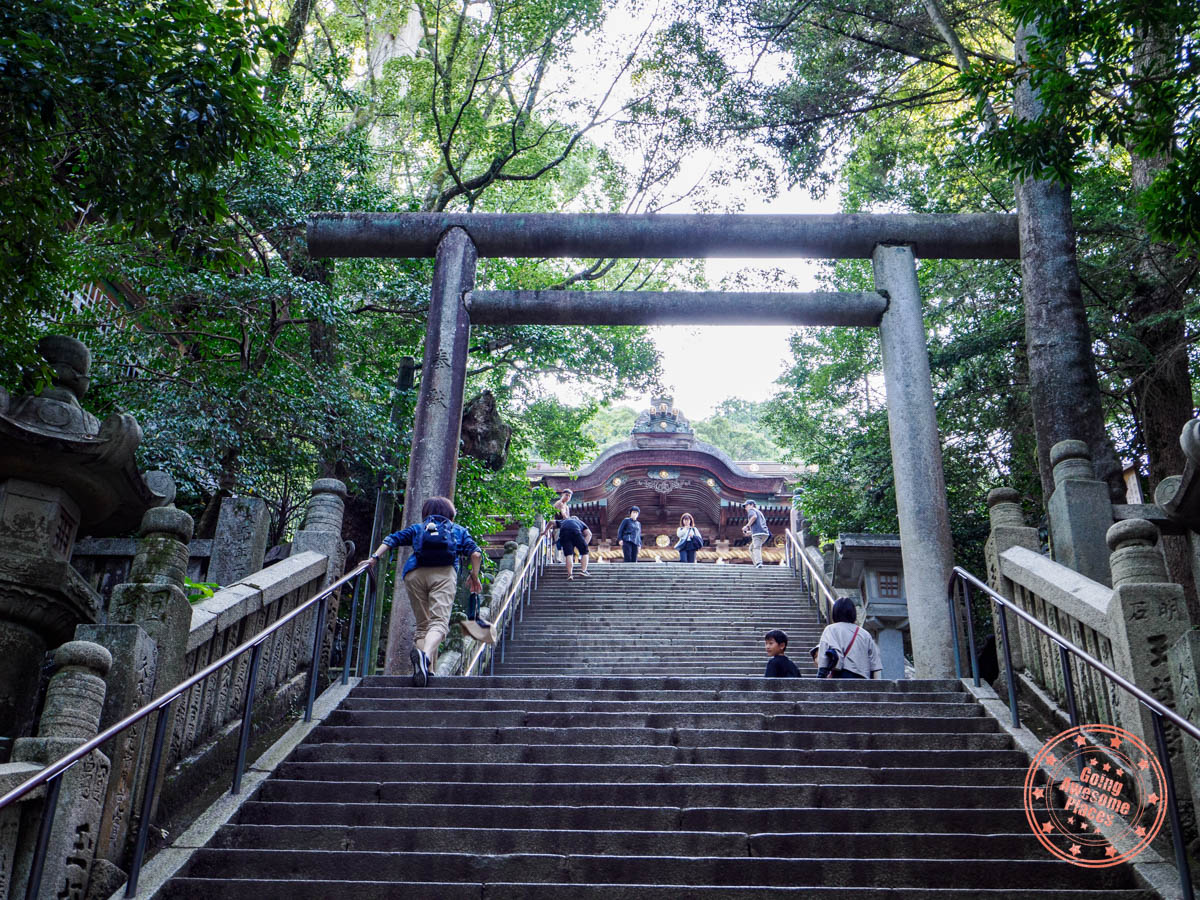
Start your day in Ehime Prefecture and end off in your final prefecture within Shikoku – Kagawa. Your main goal for today is to not only visit a legendary Shinto shrine but to also get some good cardio in.
See where mochi meets mikan

As you drive along the northern coast, drop by the confectionary shop, Seikodo located in Imabari. They have a long and storied history but their recent claim to fame is their mochi-wrapped mikan or their full Japanese name, ichifuku hyakka marugoto mikan daifuku.
When it first came out, it was laughed off as something that would never work but they proved their naysayers wrong and are now a hit all across Japan.
What makes it so delicious is its blend of substantial chewy and melty outer layer with a bite-sized mikan that’s sweet and tart at the same time, clean of pith and seedless. Since they come frozen, if you defrosted it, but not fully, you get another layer of textures to it that work quite nicely.
In addition to the mochi mikan, they have a traditional red bean with hints of shiso encased in a boat-shaped crisp and fruit-flavored mochi popsicles that will blow your mind.
Climb all 785 steps to get to Kotohira Shrine’s main hall
Halfway to the top Mount Zozu stands a shrine that pilgrims have visited since ancient times to worship “the God of the Sea”. There’s one catch though, its main hall is up a long staircase of 785 steps that isn’t necessarily hard, but you just might break a sweat.
Kotohira-gu or Kotohira Shrine is commonly known as Kompira-san since it is the head shrine of multiple Kompira shrines all over Japan dedicated to the safe navigation for sailors. Over the centuries it’s flip-flopped between being Buddhist and Shinto until being declared a Shinto shrine in the Meiji period. This explains why there are elements of both religions visible.
The steps start from the base of the mountain in the town of Kotohira. Before you get to the main gate, your path is flanked with everything from udon restaurants, souvenir shops, teahouses, confectionary shops, and cafes.
At step 365, you’ll enter the shrine grounds. While it sounds daunting, the climb up is a mix of gradual walks uphill and pure stair climbing. Along the way are there are several auxiliary shrine buildings, religious elements, and even a stable for special white horses known as shinme.
When you hit 785 steps, you’ll make it to the main hall, a significant achievement for most that come here. In addition to a beautiful view of the plains below, visit Ema Hall, make a wish, get your fortune, and purchase a Yellow Charm of Happiness.
For those that are interested, you can do the full 1,368 steps along a forested path to make it to the small inner shrine (Okusha).
WHAT YOU NEED TO KNOW
Time:
- Shrine grounds – Open every day and all hours.
- Main shrine prayer shop – (Apr – Sept) 6AM to 6PM, (Oct – Mar) 6AM – 5PM
- Duration – The walk up to the main shine takes on average 45 minutes but if you factor the walk through the main street prior to the steps, expect to spend 3 hours here.
Price: There is no admission required to enter.

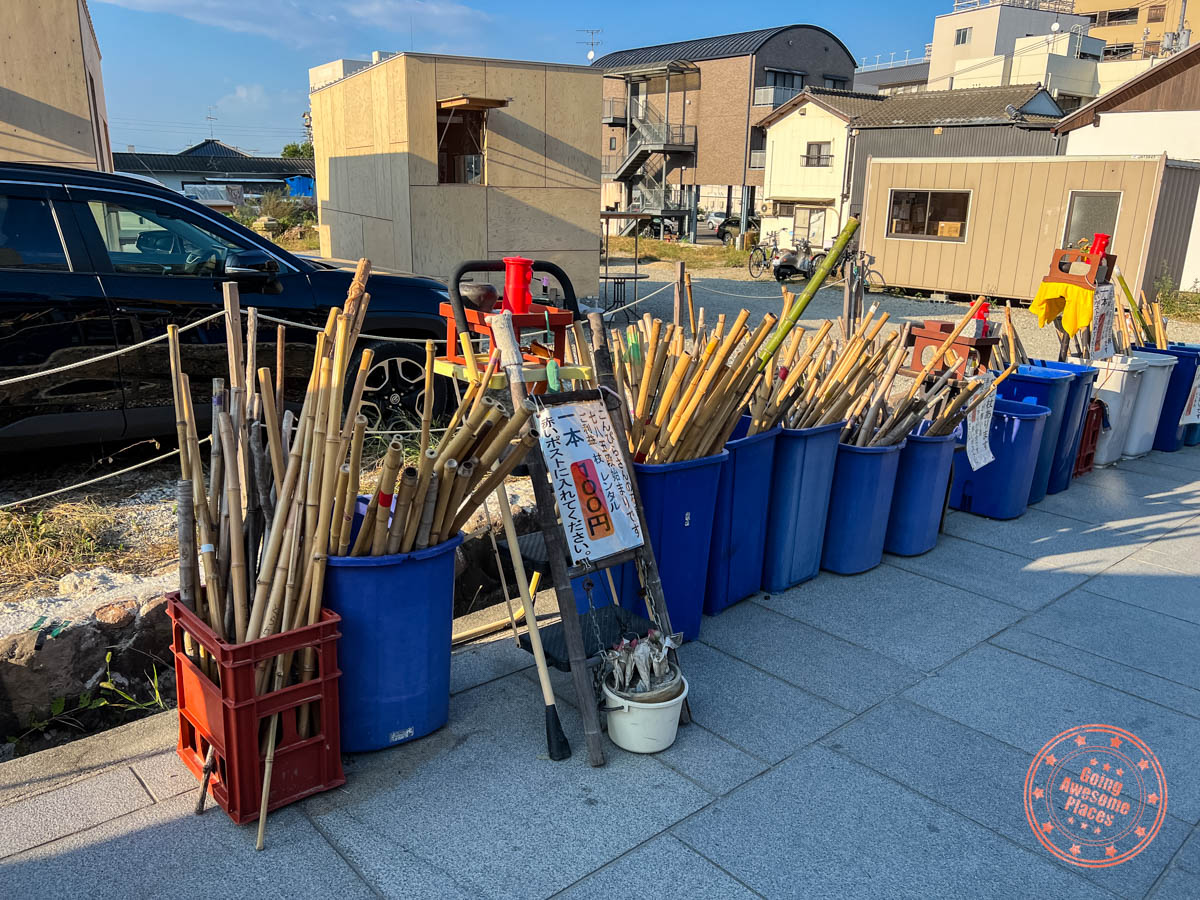
Parking: There aren’t any official parking lots for the shrine. Instead, there are a mix of public and private lots. While it might be tempting to drive around to look for the cheapest lot, it’s not worth it as the traffic and complicated local streets will only frustrate you. Park closest to the entrance to the main street.
Interestingly, some of the closest lots are associated to souvenir shops. The rate is ¥500 but the kicker is that it’s free if you make a ¥1,500 purchase from their store.
Since they cram in a ton of cars in one lot, they’ll need to take your car keys so they can move car.
Booking: There’s no need to book anything since the shrine is free.
Website: Kotohira-gu Shrine
FAQ:
- Is Kompira-san the same as Kotohira-gu? Yes, they refer to the same shrine. Kompira-san is the alternative name to Kotohira-gu. The English name is Kotohira Shrine.
- How many steps are there to get to the main hall? There are 785 total steps to climb to get to the main hall.
- Is it worth going to the inner shrine? If you can muster the extra 583 steps, for a total of 1,368, to get to the top, the red-painted inner shrine isn’t necessarily large but a meditative place of spirituality and peacefulness. Being higher, it also offers a more elevated view of the Sanuki plain.
- Do you need to go to the inner shrine? This depends on if you have the interest and energy but we’ll say that the majority of visitors to Kotohira-gu only go to the main hall.
- Are there bathroom facilities along the way up and in the shrine area itself? There are 4 restrooms spread out throughout the shrine including a baby changing area where the main shrine is located. Prior to the shrine, we did not notice any bathrooms.
- Do the 785 steps include the shopping arcade leading up to the entrance to the shrine? Yes, the stone steps start counting once you start climbing any steps from the main thoroughfare upwards. In fact, by the time you get to the main gate of Kotohira Shrine, you would have done 365 steps already.
- Are there porters that can take you up? There used to be a porter service where you could be taken up in a palanquin but this has been discontinued since the early 2010s.
- What souvenir should you buy in Kotohira? To commemorate your visit to Kotohira-gu, the best souvenir is the Yellow Charm of Happiness. This is a golden protector that prays for health and happiness. The individual amulet is ¥1,000 and the package including a mini Konpira dog is ¥1,500.
Tips:

- There are traditional bamboo walking sticks for rent near the base of the steps. These are self-serve honor system stalls and costs ¥100 per stick.
- When you reach the main hall don’t miss Ema Hall. Located next door, you’ll see the mini sub, Malt’s Mermaid amongst displays of plates, and pictures of ships, battleships and space rockets.
- Horses are important part of your visit to Konpira-san. Mid-way through the shrine, you’ll find a small stable with special horses known as shinme. These are offerings to the gods in Shintoism as these are meant for the gods to ride. Throughout the day, the horses are brought out for a walk, doing circles in front of the giant golden propeller.
- A quality map of the shrine grounds is impossible to find online so below we’re attaching a photo of the map they have on-site which indicates not only the path but also the number of steps you would have taken at specific junction points, and location of restrooms.
Treat yourself after all of those steps
After you climb all of those stone steps, treat yourself with soft-serve ice cream topped with oiri, a local sweet traditionally given out as gifts when couples marry.
An easy-to-miss spot on the main street is a free foot onsen that’s free for everyone to use, the perfect remedy for tired feet.
Your final stretch of driving is ahead of you. In 45 minutes, you’ll reach the city of Takamatsu. Return your car and pay the money owed for tolls (more on that in the car rental section). Take the local Kotoden train to your hotel and get yourself checked in.
Eat the extremely rare olive wagyu

Olive wagyu is a type of steak that not many people get to have because they’re made in such micro-batches that many would say this is one of the rarest types of wagyu (Japanese beef).
It comes from an inspiring story on the island of Shodoshima nearby where through much experimentation, it was discovered that cows fed a diet of toasted olives resulted in beef with marble, rich, and nutty umami flavor. In addition, it has the highest levels of healthy fats, at 65.2% oleic acid content.
I learned about olive wagyu through Adam Waxman of Dine Magazine but as I dug into where I could have it in Takamatsu, I quickly realized I was out of my depths as there isn’t exactly an online guide for the best olive wagyu restaurants in the city. Again, with the help of Shikoku Tours, they helped me with a reservation at the steakhouse, Ichigo.
In my own private room, I had the most divine steak I’ve ever had. Ordering a set meal for 150 grams of the lamp cut of olive wagyu, I cooked the beef to my liking on a hot stone. Every bite was magic, with texture where its marbling was soft and delicate but layered with a meat that was bold and nutty.
This certainly isn’t a cheap dinner but considering how hard it is to find olive wagyu not only globally, but even within Japan, it is totally worth it.
Day 9 Summary
What you’ll see & do:
Where you’ll eat:
- Breakfast – Konbini Breakfast – Again, with no breakfast at the hotel, your best bet is to buy your own food from a convenient store.
- Lunch – Snacks in Kotohira – There aren’t any specific restaurants to plan for as your schedule will be pretty fluid based on how long you take climbing Kotohira-gu so it might be best to snack on your own food and other goodies you find along the way.
- Dinner – Ichigo – You’d think that olive-fed wagyu is easy to find in Takamatsu given that they are from the nearby island of Shodoshima but it’s not that obvious where to go, especially for foreigners. Ichigo claims to be the first restaurant on Shikoku specializing in olive wagyu so I was sold. When reserving, make sure to instruct them to order a set course as well because you can’t do that on the day of. If you don’t, you’ll have to order off of their a-la-carte menu which still includes corn soup, salad and rice. Since they add a 20% service charge, expect to spend a pretty-penny here. My meal including a pint of beer cost ¥7,720.
Where you’ll stay:
Tip:
- Pack a small towel if you plan on using the foot onsen.
- Initially, I wanted to make a reservation for the restaurant at Royal Park Hotel Takamatsu but they wouldn’t take reservations for 1 person.
- The local Kotoden trains in Takamasu are very easy to take and accept all IC cards including Suica, PASMO, and Kitaca.
- If there’s one regret, it’s that I didn’t get to fit in Ritsurin Garden which is highly spoken of. This is something that you might want to try to fit in.
Itinerary Day 10 – Enter the Mediterranean of Japan
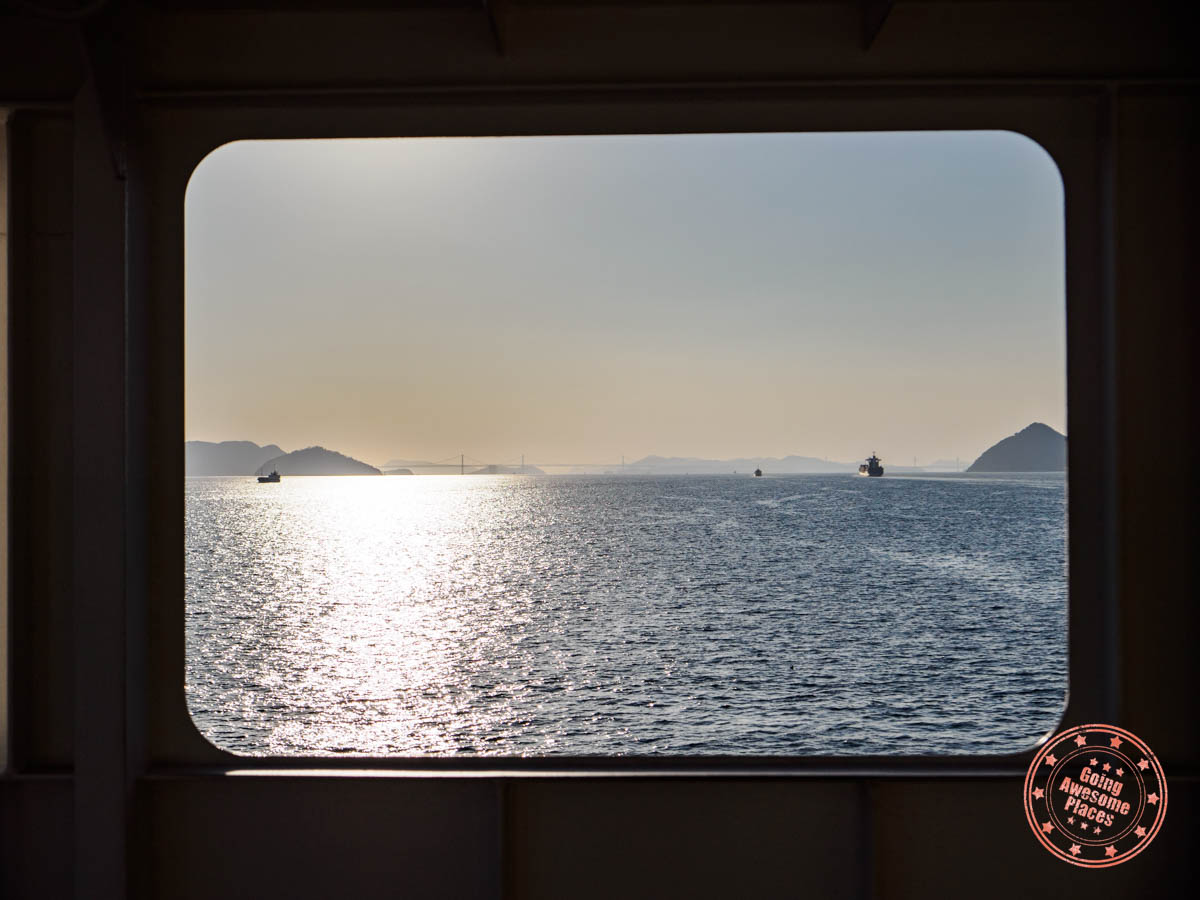
Now you could simply end your trip here but you’d be missing all of the amazing islands in the Seto Inland Sea. The one that has received international recognition is the art island of Naoshima and is one that you should definitely visit if you’ve made it this far.
Kagawa prefecture used to be called Sanuki which is why you’ll see that term used in various places including their udon. In fact, Sanuki udon is ranked among Japan’s top 3 famous udon noodles.
For brunch, head over to Sanuki Goyashiki where you’ll be able to taste what makes udon here special – chewy and firm texture with square shape and flat edges.
Take the ferry to Naoshima Island
The restaurant is located right at Sunport Takamatsu, a revitalized business and shopping area near JR Takamatsu. This is also within striking distance of Takamatsu Port, the original entry point into Shikoku by ferry and your best connection to the Seto Inland Sea Islands.
Whether you soak in the warmth of the sun from the upper deck or enjoy the comforts of the main deck inside, you’ll make it to in just 50 minutes. One thing you’ll remark when you arrive is 1) Takamatsu stays in sight the whole time so you’re really not that far away and 2) The Red Pumpkin is literally the first thing you see when you arrive.
WHAT YOU NEED TO KNOW
Here are some details for taking the ferry from Takamatsu to Naoshima. Since most visitors will be taking the standard ferry, we’ll be focusing on this but we’ll also mention a few details about the high speed ferry.
Location: The ferry terminal for Naoshima is the one that is labelled with a large number 1 and 2. It also has signage that says in English that it is for ferries going to Shodoshima and Naoshima. Note that this is for the standard ferry. The high speed ferry is at an adjacent pier and has a separate ticket office as well. Check the board pier page.
Time:
- Timetable – For the most up-to-date schedule, visit the Shikoku Kisen timetable page. For the Takamatsu – Naoshima (Miyanoura) route, they standard ferry runs 5 times a day and the high speed boat, 3 times a day.
- Duration – Standard ferry is 50 minutes and high speed boat is 30 minutes.
Price:
- Standard Ferry – ¥520 for adults and ¥260 for children (6-12)
- High Speed Boat – ¥1,220 for adults, and ¥610 for children (6-12)
- One child (1-5) per adult is free
- Process process for the regular ferry
- Tickets only get sold 40 minutes before departure. You can’t purchase tickets in advance.
- Only cash is accepted.
- You can either buy a ticket from the vending machine or the attendant at the booth.
- Purchase process the high speed boat
- Tickets only get sold 30 minutes before departure.
- If you are taking the last boat of the day (8:30PM), those tickets are sold on the boat.
Booking: You can’t book ferry tickets online in advance and you can’t buy them in person in advance either. You can only purchase ferry tickets 40 minutes from departure.
Website: Shikoku Kisen
FAQ:
- What is the difference between the three Naoshima ports? The island of Naoshima has Miyanoura, Honmura and Seto ports. Don’t worry about Seto Port as this services the industrial part of the island. If you’re coming from Takamatsu, Miyanoura is the only port you can access. When leaving, you’ll have the choice of Miyanoura and Honmura ports. Miyanoura is on the western side of the island and Honmura is on the eastern side of the island. Miyanoura Port has significantly more frequency but ultimately choose the one that is the most convenient, is close to your hotel, and has the best departure timing.
- What amenities are available on the standard ferry? On the standard ferry, there are bathrooms, drink vending machines, select electrical outlets, and elevator.
- Is there a cafe on the ferry? No, there isn’t a cafe on board.
- Is the high speed boat worth it? If you’re willing to pay the extra cost (more than double the cost of the standard ferry), can take advantage of the 20 minute time savings, and fits your schedule, it might be worth it.
- Is there a luggage storage area? No, there’s no special compartment for larger suitcases and bags. The expectation on the ferry is to keep it with you.
- When does boarding start? Boarding starts 10 minute prior to departure.
- Does it make sense to take a rental car to Naoshima? While this is a car ferry, there’s really no advantage to having a car on the island as it’s quite small and the bus, shuttle, and bikes are very efficient transit options. If you brought one, it’d most likely sit in your accommodation’s parking lot.
Tips:
- Unlike the Greek ferries, you have to take your luggage up to the passenger decks. There is an elevator but it’s only on one side of the ship and if you happen to board on the wrong side, you’ll miss it completely.
- If you would like to use the elevator, board on the left side of the ferry.
- Since there are only drink vending machines, bring your own food to eat on board.
- The best seats on the ferry are the ones that face the window on the right side of the main indoor deck.
- There are electrical outlets but they weren’t designed for passengers. You’ll find them on the sides of the ship but use-able in a pinch.
- The top deck is a great place to sit on your ferry ride. Just keep in mind that it doesn’t have any cover so it’ll be very sunny and can get get windy as well.
- There are lockers at the Takamatsu ferry terminal for Naoshima. It has 27 in total, of which 2 are oversized (¥800), and 4 are large (¥700).
After you disembark, you’ll be tempted to take photos of Yayoi Kusama’s Red Pumpkin like I was, but I think the smarter move is to head straight to your hotel, so you’re not trying to keep your luggage in sight while taking selfies.
The walk to Sparky’s House is slightly uphill but you’ll be on the side of the paved road so it’s not too bad. Get checked in and grab your e-bike rental. You’ll immediately feel a new jolt of energy (pun intended) as having a bicycle is quite liberating on an island such as Naoshima.
Watch the sunset at Miyanoura Port

Ride back down to Miyanoura Port and enjoy the backdrop of the sunset reflecting on the calm waters and shimmering off of the Red Pumpkin.
Under the night sky, you’ll notice the illumination of Naoshima Pavilion and Bunraku Puppet sculptures so ride around to them to snap a few photos.
For dinner, hopefully you’ve made reservations ahead of time through Sparky’s House but if not, you’ll have to bike around to the recommended restaurants. In my case, every single one was packed except for Cin.na.mon. Stepping in there, they initially said no since it was quite full but I noticed an empty table. I told them it was only for 1 person and they eventually said OK.
Day 10 Summary
What you’ll see & do:
Where you’ll eat:
- Breakfast – Konbini Breakfast – Since we didn’t pay extra for the breakfast at the Hotel Wing International Takamatsu, we got our usual favorites at the nearby 7-Eleven which includes onigiri, bread, and yogurt.
- Lunch – Sanuki Goyashiki – Takamatsu is in the Kagawa Prefecture and they’re famous for their Sanuki udon which is characterized by its square shape, flat edges, and chewy texture. Come to this restaurant near the ferry pier for your chance to try it.
- Dinner – Cin.na.mon – Every restaurant seemed to be booked solid but this was one that had one table remaining when I dropped by. This is a Japanese restaurant that has excellent sashimi, fried chicken, curry, and craft beer from Naoshima Story.
Where you’ll stay:
- Sparky’s House (Agoda/Booking) – A relatively new property on the island that’s a combination of container-style accommodations and a house converted to separate rooms on the second floor. While small, the rooms are comfortable, new, clean, and have the benefit of a full kitchen on both the first and second floor of the house. They offer e-bike rentals (adults only) for ¥1,500 for one day, ¥2,000 for two days. They also offer luggage storage for ¥500 (maximum 4 items). All payments are cash-only.
Tip:
- When you arrive at Miyanoura port, get inside the terminal building and look for the “Naoshima Area Map”. This map is actually quite useful as it has all of the updated ferry, bus, and shuttle times, in addition to a handy map with English descriptions of all art sites.
- The Red Pumpkin next the Miyanoura port gets very busy near ferry departures and arrivals. While it’ll be temping to take photos right when you get off, it’s a better idea to drop off your luggage at your accommodations first and then take the bicycle back down at sunset when it calms down.
- Since there are limited number of restaurants and a ton of visitors these days, you need to make reservations. If you don’t, you’ll find that most of the popular restaurants won’t take walk-ins. To book, reach out to your hotel to make a reservation. If you book with a platform like Booking.com, you can conveniently use their chat feature to ask them to help make reservations. Recommended restaurants in the Miyanoura area are in the photo above.
- On Naoshima, the 7-Eleven closes at 9PM so pick up your supplies early.
- We found free wifi throughout Naoshima under the SSID “KAGAWA-Wifi”. You can join up to 8 times a day and allows you to be connected for 30 minutes.
- If you had to choose, we believe Miyanoura is a better location to be based just because it’s closer to the ferry. This gives you more options because you can always walk to the port.
- Just an observation, but this is the first and only place on the itinerary that felt touristy. This is the most evident when trying to take photos of popular sculptures like the Red Pumpkin where you’ll need to be quite a bit more patient.
Special Promotion with Shikoku Tours
Putting together a trip to Shikoku but would rather have someone plan it for you? The folks on the ground that helped me and are the go-to tour company on the island is Shikoku Tours.
As a bonus, we’ve also partnered with them so that you’ll get a free Imabari towel, Japan’s highest quality towel and made from the Ehime prefecture of Shikoku.
How? All you have to do is mention “Going Awesome Places” when you submit your inquiry.
Itinerary Day 11 – Art Immersion on Naoshima Island
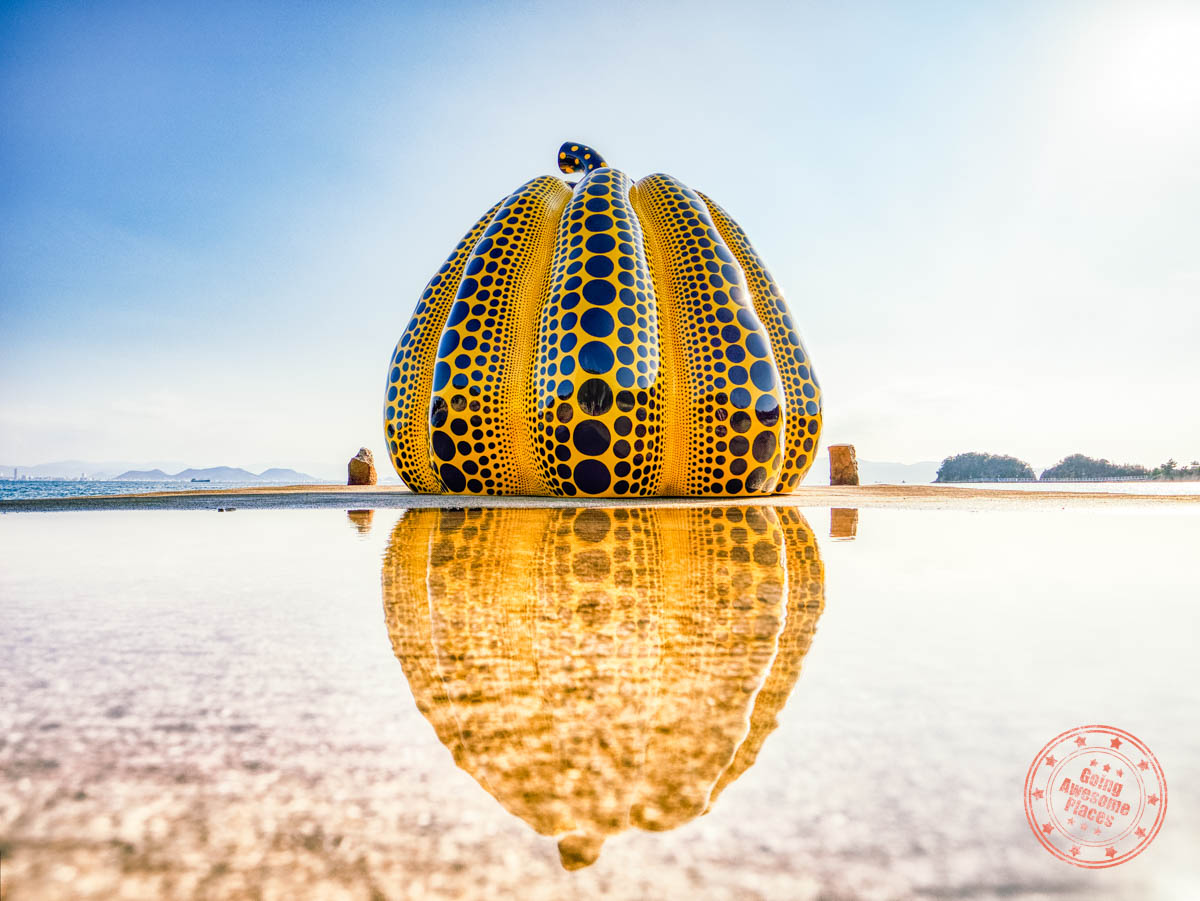
At only 8 square kilometers, Naoshima is home to some of the very best of contemporary art and architecture in the world, featuring the likes of Yayoi Kusama, Tadao Ando, Claude Monet, and James Turrell to name a few. Discover the artwork scattered throughout island. The only catch is that you have to leave the island at the end of the day so make the most of it.
Enjoy Miyanoura Port at sunrise
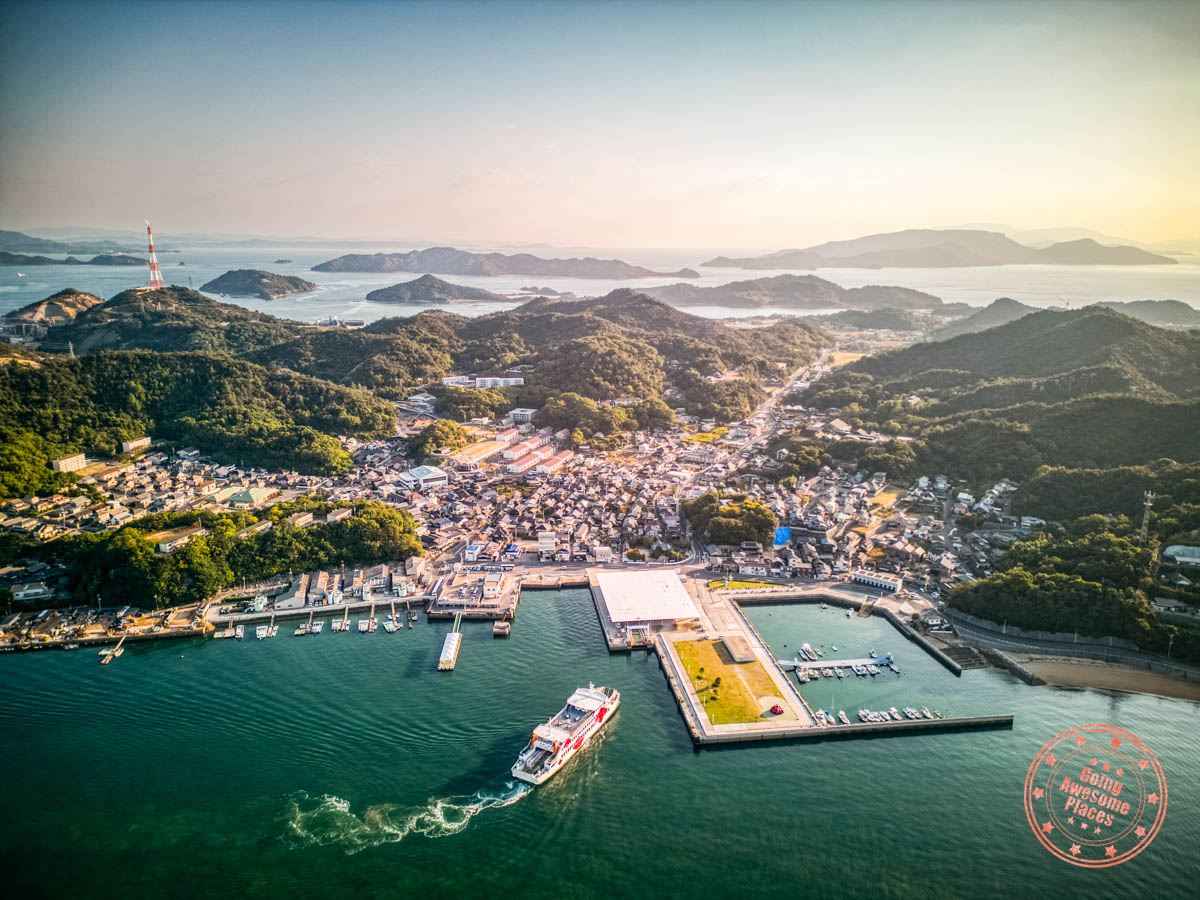
There’s something alluring about the pumpkin sculptures and not wanting to let any moment slip, I recommend that you head back to Miyanoura Port early in the morning so you can have the Red Pumpkin all to yourself.
Have an immersive art experience at Chichu Art Museum
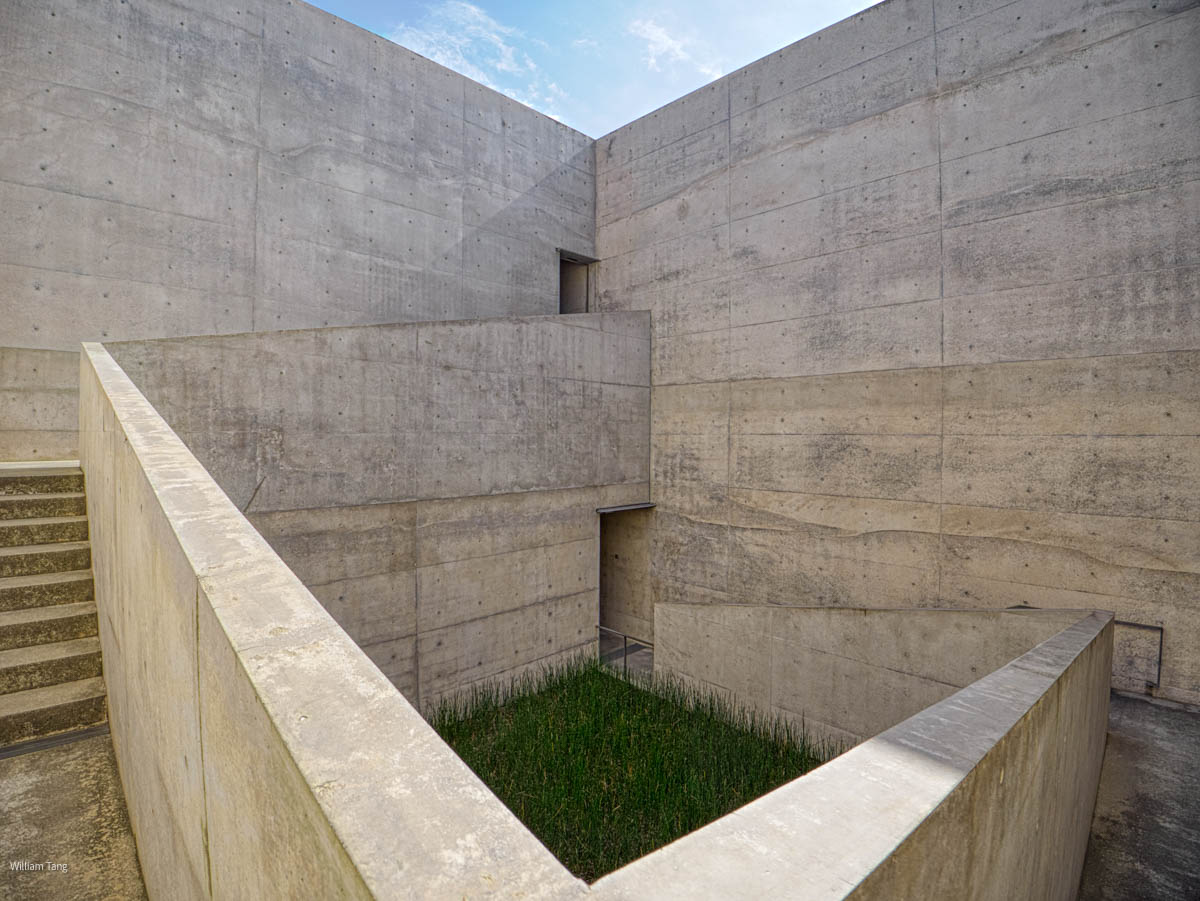
Welcome to the Chichu Art Museum. This architectural masterpiece seamlessly blends art and nature, offering a unique experience for everyone. Designed by Tadao Ando, the museum itself is a work of art, mostly built underground to harmonize with the island’s landscape. As you approach, you’ll be awed by the museum’s minimalist concrete exterior, which hides its many artistic treasures within.
Once inside, ditch your phone and camera (since they’re not allowed) and open your mind to a carefully curated collection of contemporary artworks. The museum focuses on the works of renowned artists, Claude Monet, Walter De Maria, and James Turrell.
Beyond the individual art pieces, this is more about the immersive space itself, blending in natural and artificial light, optical illusions, the delicate tiling of the floor, and thought-provoking sculptures.
This is easily my favourite museum on the island which is why you need to secure those tickets as soon as they are available online.
WHAT YOU NEED TO KNOW


Time:
- March 1 – September 30 – 10AM – 6PM (last admittance at 5PM)
- For Golden Week, they open at 9AM
- October 1 – last day of February – 10AM – 5PM (last admittance at 4PM)
- Closed on Mondays (except it’s on a national holiday, in which it closes the following day).
- The Chichu Store hours align with the museum hours.
- They are also closed on maintenance days so make sure to check their calendar.
- Duration – You can see this movie in 1.5 hours.
Price: ¥2,100 for adults and free for children 15 and under. When booking online, only credit cards are accepted.
How to get here: There are two directions you can take to get to Chichu Art Museum. What’s important to know is that biking is forbidden from the stretch of road between Benesse House Area North Gate and East Gate. This is why it’s critical to understand how to get around.
- Counterclockwise by bike or foot – Logically this seems to be the obvious way on foot or bicycle. The town bus does not go this direction. If on bike, park at the Chichu Art Museum Ticket Center. Locals mentioned that this bike ride is slightly more challenging because it’s uphill. From Miyanoura Port, by bike is 15-25 minutes and on foot is 30 minutes.
- Clockwise by bike – The longer way would be to take the bicycle or Naoshima Town Bus all the way around to the Tsutsuji-so bus stop. Park your bike at the specialized lot and from here, wait for the free shuttle bus which will take you to Chichu Art Museum. This is what we did and found the route to be quite pleasant and passes through the town of Honmura which you can explore on your way back. From Miyanoura Port, by bike is 20 minutes + 7 minute shuttle.
- Clockwise by bus – For those that don’t have a bike, the Town Bus runs between Miyanoura Port and Tsutsuji-so. The fare is ¥100 for adults and ¥50 for children (coins only). Check the official timetable. From Miyanoura Port, the bus take 12 minutes.
- Shuttle – There is a simple free shuttle that runs between Tsutsuji-so and Chichu Art Museum (where bikes aren’t allowed). These are small mini buses with a capacity of 26. You can get on and off at any stop (except Hiroshi Sugimoto Gallery). Their timetable does their best to line up with the ferry schedule. Lastly, this shuttle doesn’t run on days when the Chichu Art Museum and Lee Ufan Museum are closed (Mondays). To get from one end to the other takes 7 minutes.
Arrival procedure: Once you arrive at Chichu Art Museum, if you have tickets already, head directly to the Chichu Art Museum main gate and not the ticket center. They will scan your digital tickets and hand you a see-through handbag. You’ll take the path will take you down the narrow passage to the Square Courtyard, and up into the souvenir shop. Once you’re pass this point, cameras are no longer allowed. The bag is meant to store your things and camera.
Museum rules:
- Online tickets are valid for 30 minutes from the reservation time, after which they are automatically cancelled.
- If you have large objects (suitcases, umbrellas, tripods, large backpacks), you will need to put them in the coin lockers at the museum or left at the ticket center.
- Use of cellphones is prohibited (although this is mainly around taking photos and being disruptive).
- Other than in the cafe, you can’t eat or drink in the museum.
Booking: You need to buy your tickets online in advance. These are timed tickets where you choose to enter at intervals of 15 minutes. Time slots for a month become available 2 months ahead of time. For example, the block of May tickets open up on Friday March 8th at 10AM JST (local time).
Website: Chichu Art Museum (as part of Benesse Art Site Naoshima)
FAQ:
- Are photos or videos allowed in Chichu Art Museum? No, photography and videography is strictly prohibited.
- How many seats are on the shuttle bus? These are mini buses and has a capacity of 26 people.
- Does the museum have audio guides? No, there are no audio guide devices available.
- Is there a limit to how much time you can spend in the museum? No, they only have specific entry time slots but you can stay for as long as you’d like.
- Are drones allowed? You can’t use drones anywhere in the Benesse Art Site area.
- Can you enter the Benesse Art Site by bike on the Chichu Art Museum side and exit from the Yellow Pumpkin side? This might seem like a logical counterclockwise route but if it simply doesn’t work if you have a bike because you can’t even walk with your bike inside museum grounds. The farthest you can take your bike is the North Gate Bicycle Parking Lot. Conversely, you can’t take your bicycle around the island clockwise either.
- Does Chichu Art Museum have wifi? Yes, they have free wifi under the SSID “chichuartmuseum”.
Tips:
- The museum is quite minimal when it comes to signage and explanations and they don’t offer so we found it very handy to buy the Chichu Handbook (available in English) at the souvenir shop before heading in.
- The free shuttle bus fills up very quickly especially at the Tsutsuji-so stop. Resist the temptation to explore the beach especially when it’s close to departure of the bus.
- The Claude Monet Space and James Turrell’s Open Sky require you to take off your shoes. If you want to make things easier, wear shoes that you can easily take on and off.
- Cancellations are allowed 1 hour before reservation time using their cancellation form without penalty.
- If it fits in your schedule, check to see if the Open Sky Night Program is a possibility (only Fridays and Saturdays). Reservations open 3 months ahead of your desired date and allows you to go to James Turrell’s Open Sky installation at sunset.
- When walking to and from the museum, you’ll pass by the Chichu Garden. Notice how the trees and flowers here are very similar to the ones planted at Giverny that served as the location for Claude Monet’s Water Lilies.
Explore the wonders of Benesse Art Site
Intentionally designed for pedestrians (and their free shuttle bus), set out on foot and choose from the litany of outdoor art spaces, museums, and art pieces.
Depending on your interests, you can head inside Lee Ufan Museum. In our case, I couldn’t fit it in but I made sure to walk around their collection of outdoor sculptures.
Next is Valley Gallery which is under the same ticket as Benesse House Museum. Built along a valley that starts with small pond and narrows inwards, there’s an symbiosis between the work and surrounding nature. The most recognizable piece is Narcissus Garden by Yayoi Kusama which features large chrome balls. This is a much larger version of what we saw in the Crystal Bridges Museum of American Art in our Arkansas itinerary.
Lastly, there’s a Where’s Waldo of art pieces along the island’s southern coast so keep your eyes peeled!
Enjoy Benesse House Museum
The central hub and largest museum on the island is Benesse House Museum which was also designed by the legendary architect Tadao Ando. Inside is an impressive collection of contemporary art that seamlessly blends into the natural light and surroundings.
WHAT YOU NEED TO KNOW
Time:
- Hours – 8AM – 9PM (last admittance at 8PM)
- Open year round
- Museum shop hours – 10AM – 5PM
- Duration – You can finish this museum in an hour.
Price: ¥1,300 for adults and free for children 15 and under. They accept cash or credit card. You can pay at the entrance to Valley Gallery where they have a small temporary tent set up. This ticket includes access to both Valley Gallery and Benesse House Museum.
How to get here: As an extension to Chichu Art Museum’s details, here are two possible places you could be coming from. Our recommendation is to catch the initial bus to Chichu Art Museum after parking your bike at Tsutsuji-so and then walk the rest of the way back as it’s a pleasant and easy walk, with opportunities to see plenty of outdoor works.
- Coming from Chichu Art Museum – If you came by bicycle you won’t be able to go any further. The rest is on foot to the museum or you can take the museum shuttle. The walk is 20 minutes and the bus takes 4 minutes.
- Coming from Tsutsuji-so – The walk from the bus station takes 20 minutes. By bus, this is 4 minutes.
Arrival procedure: Benesse House Museum operates more like your standard art museum. When you arrive, they’ll check your ticket and if you haven’t purchased one yet, you can buy one at the ticket desk.
Museum rules:
- If you have large objects (suitcases, umbrellas, tripods, large backpacks), it isn’t clear if there are any lockers at the museum. That said, it may be possible to leave items behind with the museum hotel’s desk.
- Use of cellphones is prohibited (although this is mainly around being disruptive).
- Other than in the cafe, you can’t eat or drink in the museum (that includes candy and gum).
Booking: No booking is required and it is not possible to book ahead of time. Luckily, there isn’t any stress entering this museum as they don’t have capacity limits.
Website: Benesse House Museum (as part of Benesse Art Site Naoshima)
FAQ:
- Are photos and videos allowed at Benesse House Museum? Officially, photos, videos, and sketches aren’t allowed in the museum. That said, we didn’t know this when we entered as there aren’t visible signs for this rule and their FAQ has information that says photos of most artworks are allowed. We found local Japanese and visitors alike were freely taking photos in the museum.
- Does the museum have audio guides? No, there are no audio guides available.
- Are drones allowed? You can’t use drones anywhere in the Benesse Art Site area.
- Are there water fountains in the museum? No, we did not see any but outside of the museum is a spout for tap water.
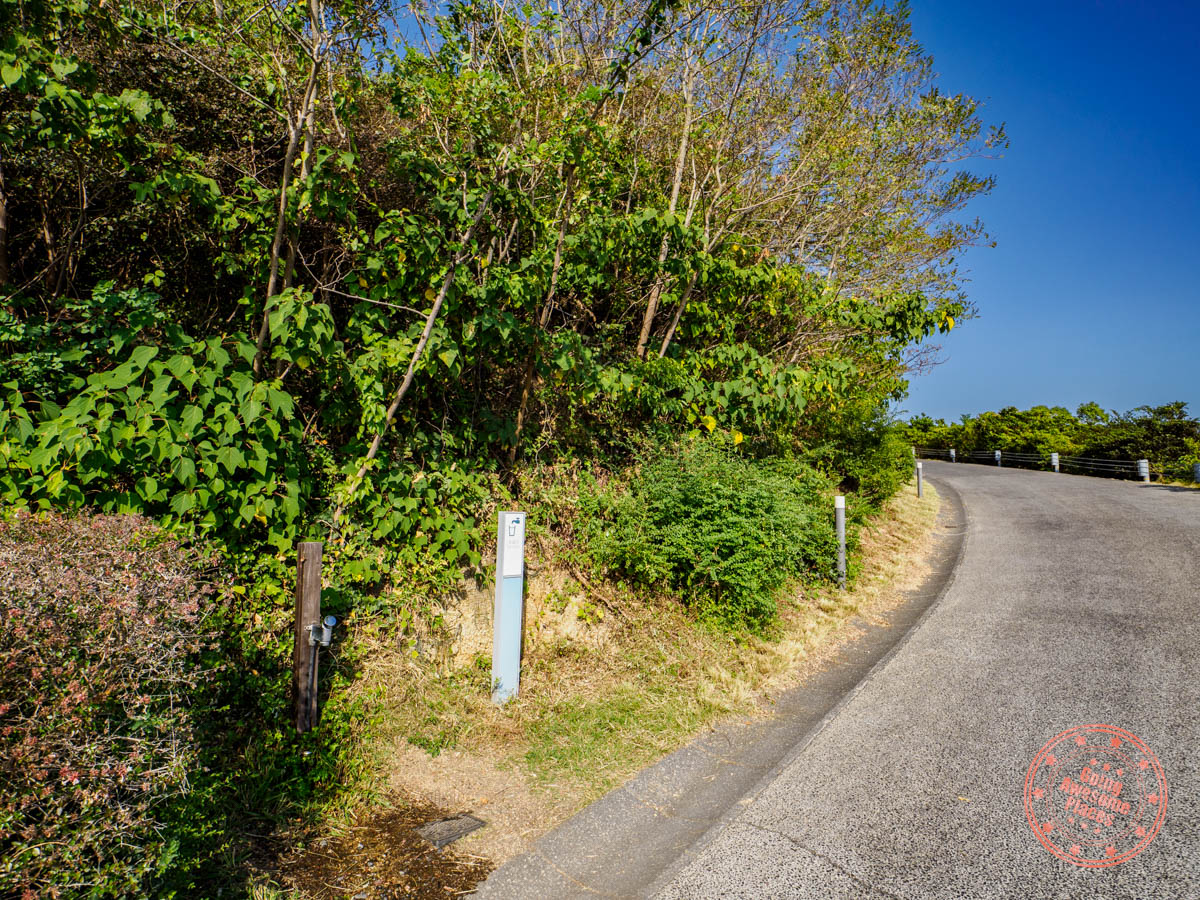
Tips:
- Museum Restaurant Issen and Museum Cafe don’t take reservations and fill up quickly so expect to have to queue.
- If you’re an art enthusiast and would like to have a more extensive experience, Benesse House is also a hotel in 4 different buildings, each providing special perks. For instance, the only way to see the Oval is by being a guest there. If you stay in the adjoining rooms to Benesse House Museum, you can stay in the museum past standard hours until 11PM (instead of 8PM).
- There’s also a “Cultural Melting Bath” Bathing Experience Program which is only available to hotel guests on Sundays and requires reservation.
Make your way to the Yellow Pumpkin

Being mindful of time, make sure you leave enough time to continue walking along the pedestrian path that hugs the coast, checking out the numerous Benesse House Museum Outdoor Works, and eventually arriving at the icon of Naoshima and Yayoi Kusama, the Yellow Pumpkin.
Sitting solemnly on an old pier is Kusama’s largest pumpkin to date and what separates it from the others that have ever been produced, this one was uniquely designed with its location in mind. The vibrant yellow stands out amongst the sea and coastal mountains.
“Art is an Endless Struggle, Art is Love, Art is Life”
Yayoi Kusama
Make a quick stop in the town of Honmura
Grab your bike from where you parked it at Tsutsuji-so and ride to the town of Honmura which is along your way back.
Art is truly all around you on Naoshima. Even as you park your bike in Honmura, you enter a pavilion with a smattering of translucent spheres resembling a cumulonimbus cloud.
Take a break by grabbing a refreshing cup of gelato from Naoshima Gelato and if you skipped lunch like I did, One Stop is a nice pitstop as well for small bites.
Take the ferry to Uno
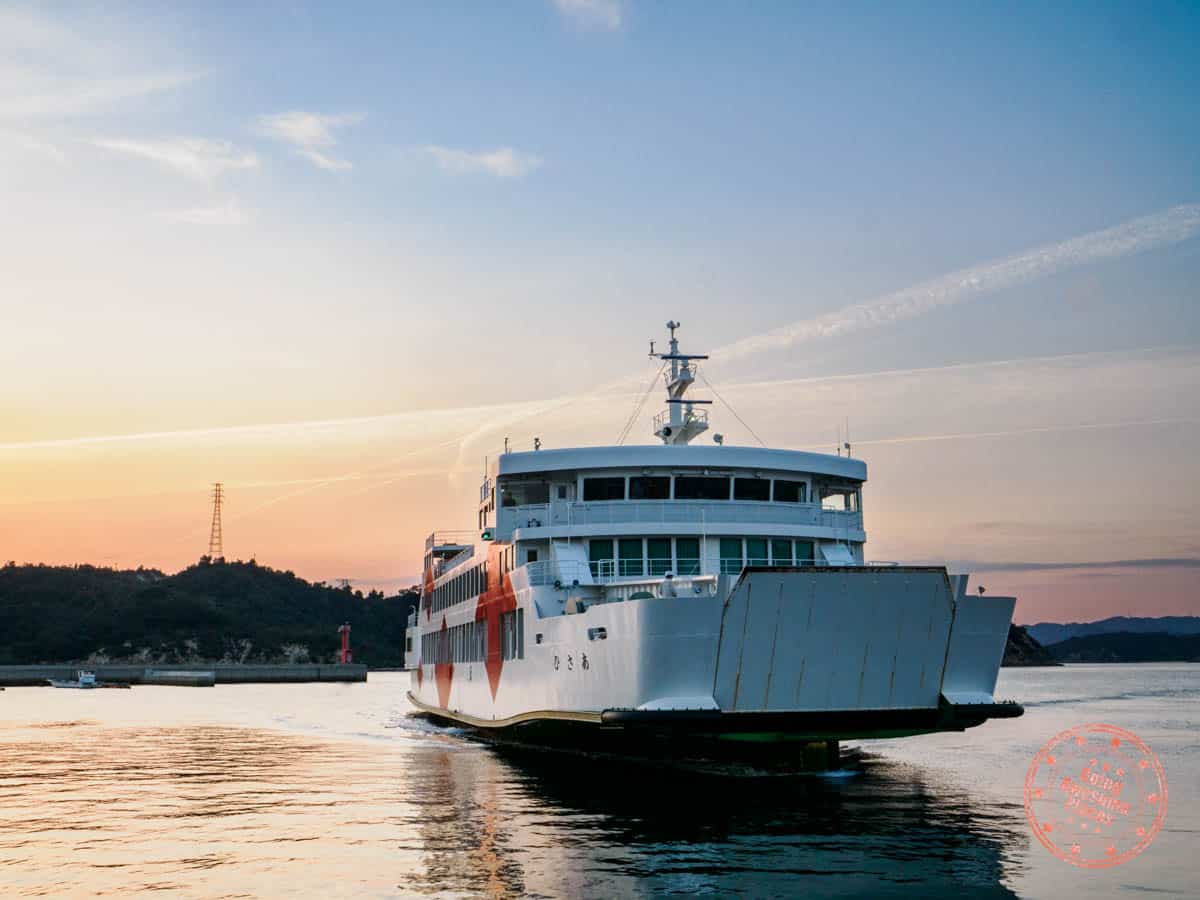
If your timing is right, you’ll be able to return your e-bike rental at Sparky’s House, get your stored luggage, have them drive you to the port, buy your ferry ticket, and be on your way to Uno.
The ferry ride from Naoshima to Uno is a swift 20 minutes. To get to Okayama Station, you’ll then need to take a JR train which is another hour into town. Luckily, it seems like the departure of the JR train is timed to the arrival of the ferry so you should be able to link them up nicely.
After you arrive in Okayama, it’s a short walk away to your hotel, Abest Grande Okayama.
There are plenty of restaurants nearby but for something hearty and quick, you can never go wrong with ramen at Nicoichi.
Day 11 Summary
What you’ll do:
Where you’ll eat:
- Breakfast – Kombini Breakfast – With an early morning back at Red Pumpkin, check-out, and needing to bike clockwise to Tsutsuji-so, it’s best to keep it simple and grab something from 7-Eleven the night before.
- Lunch – Kombini Lunch – With how crunched for time you’ll feel throughout the day, it’s best to save the time needed for a proper lunch and just eat food you pack with you.
- Snack – Naoshima Gelato – Perfect stop for a break to see the Naoshima Port Terminal bike-stand art piece. They have creative gelato flavors such as sweet potato milk gelato and roasted green tea milk gelato. They have various benches and tables available for their outdoor-only seating.
- Snack – One Stop – If you’re feeling hungry, this is cute small cafe with a patio deck that overlooks the main street running out of Honmura. Their menu is rather basic but they have a selection of drinks, waffles, sausage, noodles, and curry.
- Dinner – Nicoichi – You’ll be pretty exhausted after a long day so this is the perfect night for ramen. Found in the basement of a non-descript building where you’ll typically find a small line up of locals for this 10-seat restaurant that is known for their Hakata ramen.
Where you’ll stay:
- Hotel Abest Grande Okayama (Agoda/Booking) – This hotel was quite the gem to find on Agoda. While unusual in how challenging it was to find the elevator to take you up and how they also offer pod rooms, this was easily the largest room on the trip, they surprisingly also had their own onsen, and they had their own version of a happy hour with free drinks from 3PM to 9PM.

Tips:
- If your accommodations doesn’t have a luggage storage option, the Miyanoura Port terminal area has quite a few lockers of varying sizes available. Prices range from ¥200-¥300.
- The ferry from Naoshima to Uno from Miyanoura Port is ¥300 for adults and ¥150 for children.
- While 1 day is certainly enough to see the key highlights and museums, there are plenty of galleries and museums that I missed. If you’re interested in seeing more, a second night is definitely recommended.
- The Uno JR Station isn’t directly connected to the port so follow the crowd of people heading there.
Itinerary Day 12 – Experience Okayama’s Past

Your whirlwind trip in Shikoku is coming to a close and while technically you’re now on the main island of Honshu and Okayama prefecture, take this final day to continue the trend of awesome experiences and charming towns.
Customize your own Betty Smith jeans

Not knowing much about Okayama, I initially thought that this would be a short overnight stay before flying out but as I did more research, I learned about the region’s deep connection with denim and that’s what lead me to the discovery of Betty Smith’s jeans making experience.
Now buying Japanese jeans off the rack in Tokyo is boring but customizing jeans from the factory where the denim movement started in Japan is quite exciting.
Start your day by taking the train down to the town of Kojima, birthplace of Japanese denim, and take the cab to the venerable jeans company, Betty Smith.
Granted, the name of the experience is a bit misleading. You don’t make jeans from scratch but instead, you get to pick the button, rivets, and leather label to go on the high-end Betty Smith jeans. Once selected, you’ll be the one to drive in the selected buttons and rivets using a special tool. The skilled craftsman will do the rest.
The beauty of this is that you get to learn how the finishing touches to jeans are made, and you come away with your own custom pair to take home.
WHAT YOU NEED TO KNOW

Time:
- December to February – Monday only 9:30AM – 5PM
- March to November – Daily 9AM – 6PM. On weekdays they take a 12PM – 1PM lunch break.
- Jeans making time slots – Normally at 10AM, 11AM, 1PM, 2PM, 3PM, and 4PM
- Duration – 1 hour
Price: The price depends on the jeans that you purchase. The jeans available for customization are their Omiyagi jeans (regular straight) which start at ¥8,800 and their DENIMWORKS line (slim straight, slim straight stretch, and button fly straight) and starts at ¥17,600. Interestingly, the price increases with waist size. We’ve attached a gallery of photos that show their pricing since you can’t find them anywhere online. Credit cards and IC cards accepted.
How to get here:
- Going there – The inconvenient part about Betty Smith is that it is not close to the JR station. Since Kojima doesn’t really have good public transit that runs that way, your only option is to get a taxi. The good news is that there’s a taxi stand at the station so you can easily catch one. This is a metered rate and cost us ¥1,300 for the 10 minute ride.
- Leaving – The coming back part will require you asking the Betty Smith staff to call a cab for you. Our rate to get to Kojima Jeans Street was ¥1,400 and another 10 minute ride.
- Note – Taxi’s here don’t take IC card or credit card so treat them as cash-only.
Booking: Reservations are recommended. Counter-intuitively, they are the busiest on weekdays because large school groups come in. To avoid disappointment, it’s best to book ahead of time. The easiest way to do this is through Klook but you can also book directly if you’re willing to navigate their Japanese booking engine. No payment is required to book.
Language: They don’t have English-speaking instructors. For us, Oshima-san had limited English but he was very patient and we used a combination of Google Translate and hand signals.
Website: Betty Smith Museum Jeans Making Experience (Japanese only)
FAQ:
- Is it possible to drop in? If it isn’t a busy day, you could drop in without a reservation. Similar to the Indigo Dyeing experience, they don’t seem to strictly follow the booking schedule. They just start when you show up and they’ll spend as much as time as you need to get the jeans done.
- Do they hem the jeans for me? Yes, the instructor will measure the length and hem the jeans for you on the spot.
- Do they have Hello Kitty patch or buttons? Klook mentions Betty Smith’s collaboration with Hello Kitty but when we went, we did not see any Hello Kitty patches or buttons. This may have been a limited-time collab.
- If I don’t want to make jeans, are there other hands-on experiences? If you’d rather make a pencil case, stationary bag, pouch or key chain, you can drop by to make these without reservations. They only take 10 minutes as the main step is the attaching of a few rivets.
- Is there a Betty Smith store? Yes, there is a full store in the campus and it’s located on the 1st floor of the head office building.
- Does the jeans making experience building have a change-room? Yes, there is a single change room at the back.
- Are there restrooms in the building? No, they don’t but there are restroom facilities in a building behind.
- Between the jeans making and museums, how much time should I expect to spend here? The experience is officially 1 hour but it might take longer. There are multiple museum buildings and depending on your interest, this could be 30 minutes or an hour. On average, we think you should budget 2 hours at Betty Smith.
- Do I get to sew in this experience? No, all of the sewing is done by the instructor.
Tips:
- The location of the the experience isn’t super clear when you get there because they have so many different museums and buildings. The exact one is pinned on our Shikoku itinerary map.
- What I really struggled with was selecting the jeans. It helps to speed things up if you have a budget in mind or whether you want stretchy jean material or regular.
- If you can’t fit this in on your Shikoku itinerary, they also run this jean making experience in their Tokyo location in the neighborhood of Ebisu.
- After your jeans making experience, make sure to drop by their factory where there’s a clear view of an active sewing floor, Jeans Museum 1 (foreign denim production), and Jeans Museum 2 (domestic denim production). These are free.
Learn about the history of jeans
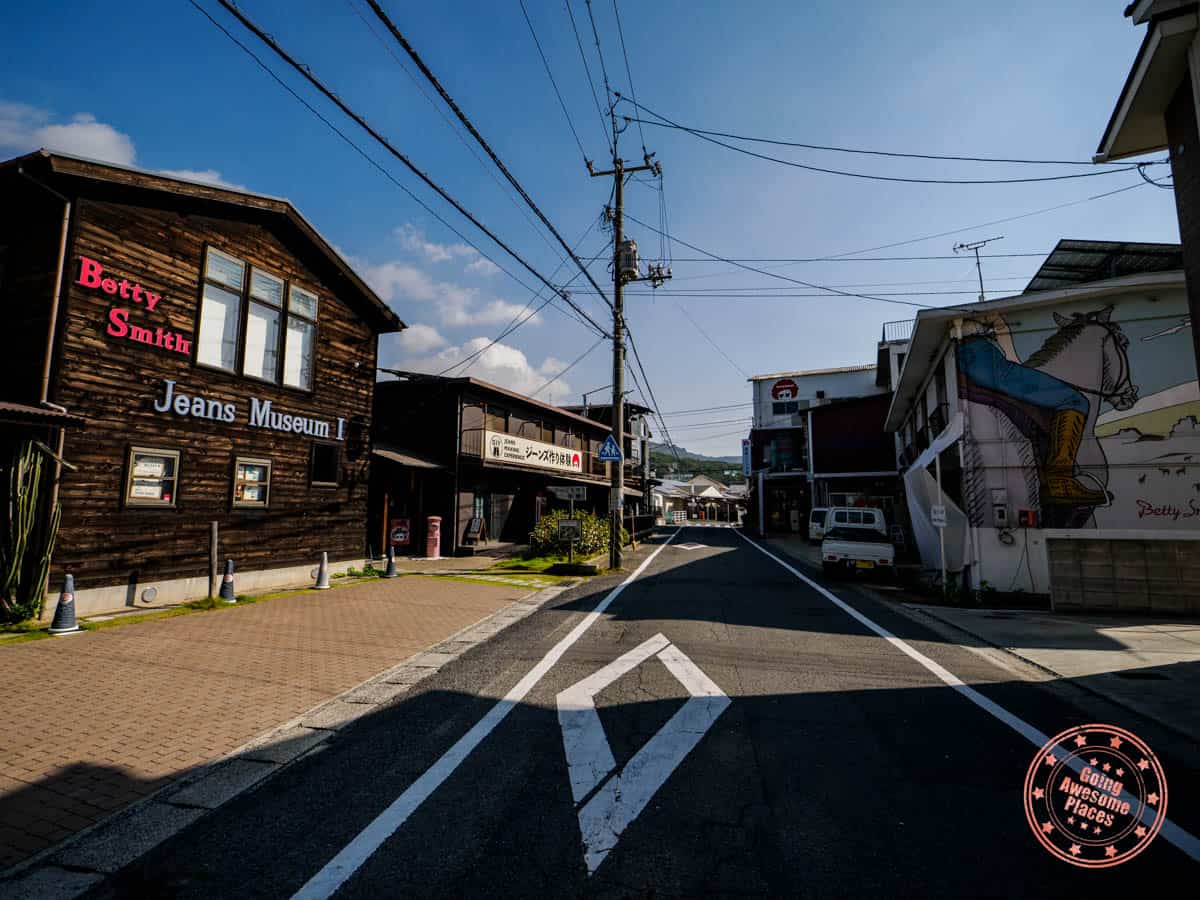
Before you leave, make sure to visit the two free museums they have on-site. Jeans Museum 1 focuses on international denim including its origin and etymology. In the larger Jeans Museum 2, you’ll see how denim was brought to Japan and insight into the manufacturing process.
Stroll down the iconic Jeans Street

Next, take a taxi to Kojima Jeans Street which is lined with over 30 shops selling denim products. You most likely will not have heard of any of these brands but it’s fun to be able to pop into a few of them to see what the trends are and what makes Japanese denim special.
The walk back to the Kojima Station is 15 minutes. From there, you’ll take the JR train back up to Okayama and then transfer to another train that’ll bring you to Kurashikishi Station.
Enjoy an afternoon exploring Kurashiki Bikan Historic Quarter
As you walk from Kurashikishi Station to the Kurashiki Bikan Historic Quarter, you’ll see the gradual transition from modern buildings and shopping arcades to Edo-period architecture and picturesque canals.
Similar to Uchiko, this is another example of a well-preserved prosperous town that’s retained many of its traditional white-walled merchant houses. Spend your time strolling down the narrow-lined streets and popping into its shops, galleries, and cafes.
There is a ton to see here. Don’t miss the renowned Ohara Museum of Art, the first Western museum in Japan. Explore the historic Kurashiki Ivy Square, a former cotton mill transformed into a cultural complex. Take in the scenic beauty of the willow-lined canal with a traditional punting boat ride. For the curious, step into the quirky Kurashiki Piggy Bank Museum.
And when you’re hungry, there are plenty of well-known cafes and snack stands to try including pudding from Yuurin-an Cafe, award-winning croquettes from Kinsho Croquettes Kurashiki, and yummy warabimochi from Kamakura Kurashiki.
TIP: Most shops close unusually early at 5PM.
Eat dinner at Kappa Tonkatsu
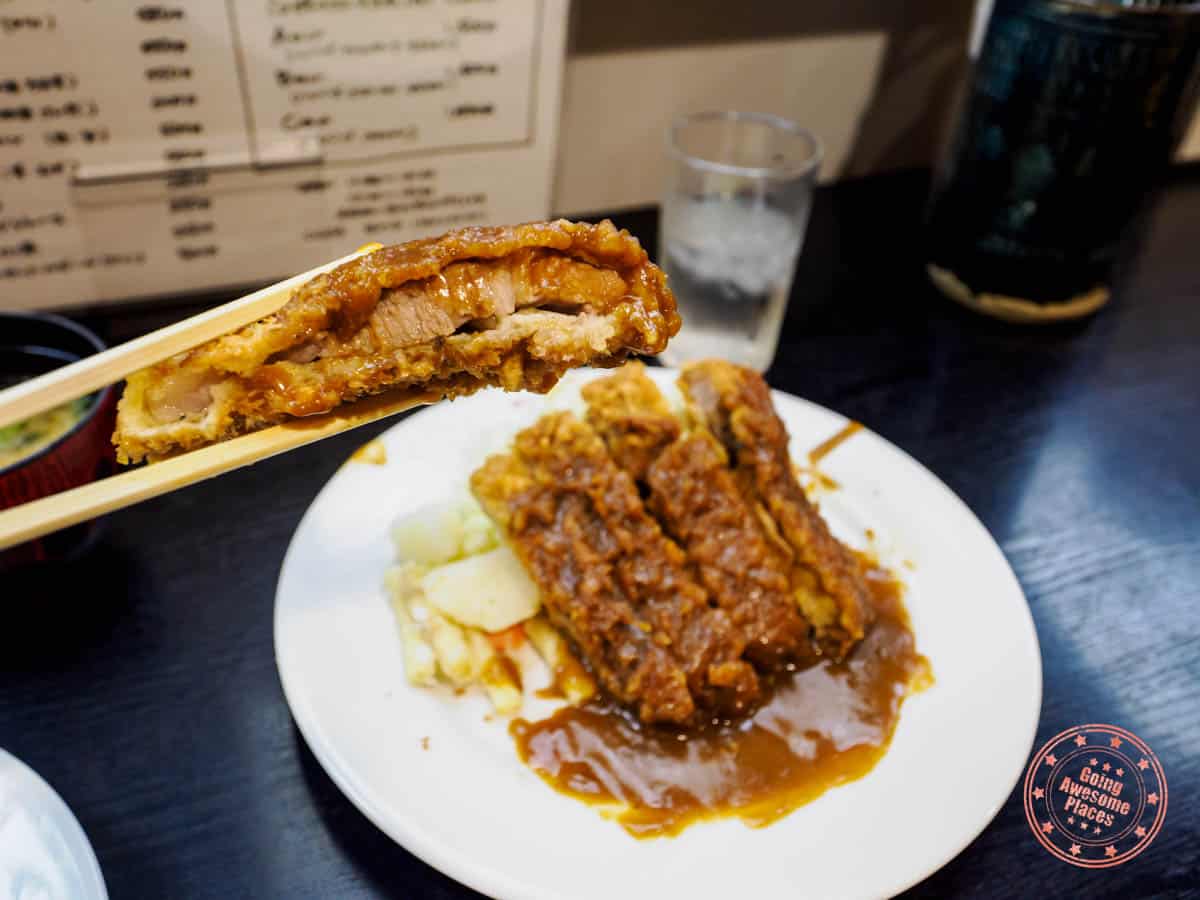
Before heading back to Okayama, you’d be remiss to not have dinner at Kappa Tonkatsu, a restaurant that specializes in crispy and tender cutlets of pork smothered in special demi-glace. It’s a easily one of the best tonkatsu I’ve had in Japan.
TIP: This restaurant is cash-only.
Before you head close off your 12th day on this Shikoku itinerary, here are a few things you need to know when you leave Okayama.
- While there is a taxi stand near the hotel, it’s safer to ask hotel reception to book a taxi. The 30 minute ride is metered and cost us ¥8,200.
- If you don’t have an early morning flight, there is a 30 minute bus from Okayama Station to the airport.
- Okayama Momotaro Airport (OKJ)’s hours are 6AM – 10PM. This means that they actually close their doors outside of these hours. If you have an early morning flight (i.e. 7:05AM), there’s no need to go to the airport before 6AM.
Day 12 Summary
What you’ll do:
Where you’ll eat:
- Breakfast – Konbini Breakfast – It’s a packed final day so you’ll find it most efficient to grab some convenient store food the night before to have in your room.
- Snacks – Yuurin-an Cafe – This is a cafe that’s connected to their guesthouse. They’re best known for their Happy Pudding which is creamy and soft. If you’re looking for food their Tamago-kake Gohan which is rice topped with raw egg and a special soy sauce.
- Snacks – Yamau Coffee Stand – A no-nonsense coffee shop that specializes in espresso-based drinks. They also make a great tea soda.
- Snacks – Kinsho Croquettes Kurashiki – Small stall in the Bikan quarter that sells award-winning croquettes.
- Snacks – Kamakura Kurashiki – Delicious and freshly-made warabimochi.
- Dinner – Kappa Tonkatsu – One of two amazing tonkatsu restaurants in Kurashiki. The tonkatsu is crispy and the katsu sauce with the perfect amount of umami. Uniquely, this restaurant is run primarily by women. They are cash only. The alternative restaurant is Misokatsu Umenoki, which does a baked version of tonkatsu.
Where you’ll stay:
Tip:
- The name Kurashiki can get a bit confusing. On its own, Kurashiki refers to an entire district of Okayama Prefecture and this includes both Kojima and the Kurashiki Bikan Historic Quarter. However, the commercial center of the district is commonly called Kurashiki as well. Typically when someone says Kurashiki, they are referring to Bikan and surrounding area.
Map of Shikoku Itinerary
To help with your Shikoku trip planning, this map will be instrumental in identifying all of the locations mentioned on this itinerary and also some nitty gritty details like parking locations.
Japan, more than anywhere else in the world, we’ve found it important to have places pre-pinned on a map because some places just don’t show up when you search their English name.
HOW TO USE THE MAP: You can use the Shikoku itinerary map as is but if you’d like to do more with it, expand the map and create a copy in your logged-in Google account. With this copy, you’ll be able to access it in your Google Maps app under the Saved tab. Scroll to the bottom and look for the “Maps” button. Keep in mind that you need data to access this map. For an offline solution, use the offline Google Maps feature and individually save location pins on your primary map.
Renting A Car in Shikoku

This region is all about the blending of the sea, mountains, valleys, and islands with art, spirituality, history, and culinary. While some can be found in the cities, most of it’s gems are nestled in areas that require a car.
We think that the best way to see Shikoku is with a rental car but it might not be for everyone. Let’s breakdown the reasons for and against so you can make the best decision. For those that end up deciding on renting a car, we also list out what we learned from our experience.
Why it makes sense to rent a car
- Can get you anywhere – Public transit including trains don’t have the best coverage around the island of Shikoku, especially when you talk about places such as Iya Valley and Nakatsu Gorge.
- Save time – Technically, you can visit everywhere with buses and trains but the coordination effort would be high and wasted time would be enormous.
- It’s cheaper than you think – Everyone thinks Japan is expensive but car rentals prices are very reasonable. 9 days cost ¥65,230 which comes out to $440 USD or $48.89 per day.
- Plenty of parking – You won’t encounter any situation where you can’t find parking
- Driving is easy – Sure, there are some trickier roads through the valley but overall, it’s just not a very busy place and so there’s barely any traffic and Japanese drivers are so courteous.
Why you shouldn’t rent a car
- Some challenging driving – The drive through Iya Valley and Nakatsu Gorge aren’t dangerous but there are sections of it that narrow down to one car-width. This may dissuade those that are not confident drivers.
- Left side – In Japan, you drive on the left side of the road. If you’ve never done it before, it’ll take a few days to get used to. Again, this shouldn’t hold you back but something to note for anyone that gets anxious easily.
- You have a guide – If you end up booking a tour or are able to connect various excursions together, it might not be necessary to get a car.
- Tiring – The biggest drawback of driving is that there are quite a few long stretches required on this itinerary (i.e. Kochi to Shimanto and Nakatso Gorge to Matsuyama). It’s definitely easier to have someone to do the driving for you so you can nap along the way.
- Budget travel – If you’re looking to squeeze the most out of your budget, you could combine the Shikoku Rail Pass (buy here) where it’s ¥20,000 for 7 days plus the cost of local buses.
Advice on renting a car in Shikoku
- IDP – You need an International Driver’s Permit (IDP) to rent cars in Japan. Make sure you get one from your home country before you come here. In Canada, that means dropping by a CAA and in the United States, AAA.
- ETC – When renting a car, you’ll have an option to rent an ETC card with your vehicle. This is an IC card that’ll allow you to use the ETC (Electronic Toll Collection) lane on expressways that have tolls. This allows you to drive right through the gate without stopping. For this Shikoku itinerary, there are tolled highways in and out of the main cities. If you don’t want to deal with the stress of trying to avoid them, paying cash at toll gates, you should just pay it. ETC card rental is only ¥300.
- No ETC Passes – Shikoku doesn’t have any tourist-friendly, multi-day ETC passes (available in Sapporo) so no need to ask. This means that you’ll be paying each toll a-la-carte.
- Slow check-in – The car rental check-in process is very slow. For Times Car Rental, I had to fill out a new set of forms with my personal information, list of all hotels and their phone numbers (it’s fine if you don’t have them). After all was said and done, it took 45 minutes from arrival to driving off the lot. Luckily returning a car is much faster.
- No English – Don’t expect any of the car rental agents to speak English. Have your Google Translate app ready.
- Alternative booking sites – Booking through third-party platforms is perfectly safe and reliable. In fact, you can often find discounted rates through something like Klook. That said, we did not find any results for one-way rentals in Shikoku. Similarly, we tested RentalCars and DiscoverCars and while they have round-trip rentals, the could not display one-way results in Shikoku.
- One-way fee – If you do a one-way rental (i.e. Tokushima to Takamatsu), some companies charge a fee. In Times Car Rental’s case, it cost ¥6,000.
- Toll charges – When you return the car, they will be able to immediately pull the toll charges from the account. You’ll pay for these extra charges on your way out. For this particular 12-day Shikoku itinerary, I paid ¥9,690 in tolls.
- Insurance – They will offer insurance and it will be up to you whether you need it or not. If you have a credit card that includes car rental insurance coverage, make sure you charge the rental to your card and to decline their insurance package.
Car Rentals in Tokushima
The following are the companies that you’ll find in the city and also at the Tokushima Airport.
Ultimately, the company that had the cheapest price was Times Car Rental even after doing a quick search on Klook and RentalCars.
How to save money on car rentals in Shikoku
- For our specific dates, Times Car and Toyota were the closest in rates compared to the others so start your search there.
- Car rental coupon codes are not commonplace in Japan but they’re worth a try.
- It’s worth checking out the Times Car deals page which is the only company that does offer seasonal deals.
- Anecdotally, I found the best prices when searching through Klook or booking direct with Nippon, Times, and Toyota with car rentals all over Japan.
- It’s always a good idea to book your car as early in advance as possible even though Shikoku never gets too busy. From our experiences, prices only go up as supply dwindles.
5 Shikoku Travel Tips
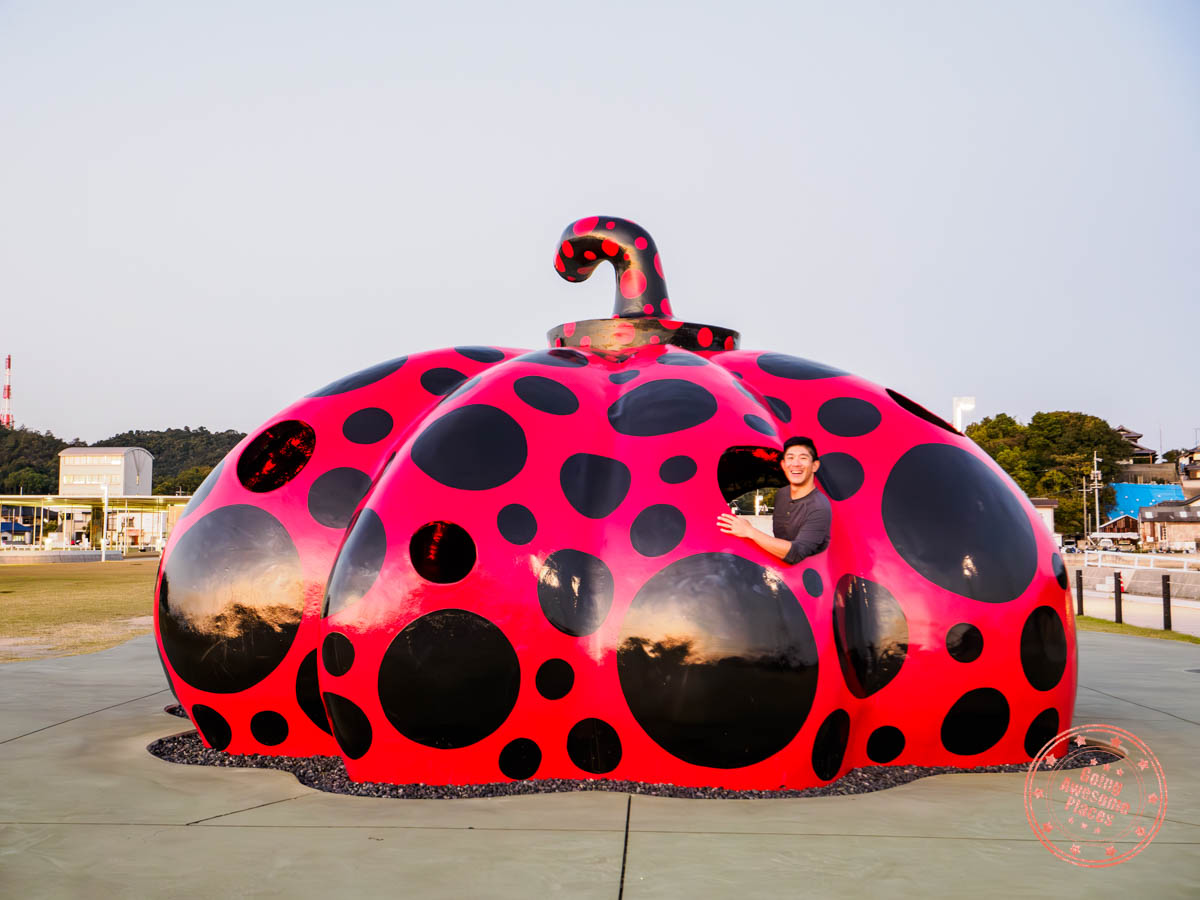
I learned so much from this trip to Shikoku. So far we’ve already covered specific tips for attractions, activities, hotels, restaurants, and car rentals but there are a few more general pieces of advice that I think you’ll be glad to know upfront instead of being surprised when you get here.
1 – Challenges of driving in the valley

The two places where you’ll have to be on your toes is in Iya Valley and the Nakatsu Gorge area.
The reason why it’s challenging is because in various parts of the valley, there are areas that narrow down to one single lane that has to be shared with both sides of traffic.
When you get to these sections of road, I took the approach of driving more slowly, flicking my high-beams if it was dark, utilizing the mirrors that placed at every bend in the road, and relying on strategically constructed pulloffs. I found that it also helped to not be the lead car, and instead, trail behind someone else so they can spot oncoming cars.
If you get into a situation where you’re stuck because you’re staring at an oncoming car and there’s nowhere to go, first assess your surroundings and see if you’re able to back up. There’s usually a wider part of the road built-in deliberately to help in these situations. The oncoming driver might also be more experienced and make the first move, in which case you can take their lead. Another tip is to fold in your side mirrors if you’re worried about a particularly tight squeeze. Watch our Shikoku video to get an idea.
That said, don’t read this as this being a treacherous drive at all. For the most part, the roads are single or double lane, there are stretches where you can pass cars, and everything is marked clearly. Roughly 20% of the road narrow down to one lane and the rest are perfectly normal.
2 – Go during the off season
This just about applies to every single trip but in Japan, you should be aware of some of their big holidays which are:
- Golden Week – Roughly around April 28 – May 8
- Obon Holiday – August 10 -16
Other spikes in domestic and foreign visitors are during these seasons:
- Sakura (Cherry Blossoms) season – Late March to early April
- Northern hemisphere summer holidays – July to August
- Fall colors season – Mid to late November
While Shikoku is certainly not as busy as other popular destinations in Japan, you’ll certainly see a relative swelling of tourists during these periods. This can mean large crowds and wait times at main sights, and accommodations get booked out.
Beyond this, weekdays are always better than weekends.
3 – Get used to using your translation app
Being the least visited parts of Japan, it should come as no surprise that your English won’t take you very far in Shikoku. You’ll come across the one odd person that will speak a little but a majority won’t understand a lick of English.
The good news is that technology has come a long way since our early days of travel blogging and there are tools like Google Translate that do a decent job at translating languages. It’s not perfect, but it can certainly help break the ice.
Similar to what we had to do with our limited knowledge of Spanish in our month in Chile, I downloaded the Japanese language for offline use and mostly used a combination of live translations through the camera when trying to read menus or signs, and one-off translations of English sentences to Japanese.
In Shikoku, there will also be many instances of trying to have longer conversations with someone and that’s where Google Translate’s “Conversation” feature. This tries its best to allow you to go back and forth between English -> Japanese and vice versa in rapid succession.
Unfortunately, this feature has a long way to go as it gets tripped up quite easily. To help, here are a few tips to take away:
- Speak simply and be clear and concise in your sentences. Avoid slang and idioms.
- The app takes longer pauses as an end of your part of the conversation so you’ll need to speak in one continuous thought.
- Often times, its the person you’re speaking to that will have the most issues so it’s worth explaining how the feature works and sharing your tips with them ahead of time (which will also need to be translated). Otherwise, it becomes one big frustrating mess.
4 – Expect to use more cash than you think
This is something we constantly preach across all of our Japan travel guides. Japan is much more cash-heavy than you expect it to be so don’t get caught off-guard.
In our itinerary above, we’ve tried our best to identify anything that is cash-only. As you read through it, you’ll realize that more places only take cash than you expect.
Based on our costs, we’d recommend at least $500 USD worth of cash converted to Japanese Yen.
5 – Prepare for changes in weather
Shikoku goes through dramatic climate changes depending on where you are and what time of year it is. We won’t breakdown every scenario but here’s why you want to be prepared:
- The valley areas are several degrees cooler than being on the coast.
- The southern part of Shikoku (i.e. Kochi) gets much more rain than the northern part of the island.
- You can get really hot days in the summer (extends into September) and while Iya Valley may be cooler, remember that lack of air condition in many places will mean interiors will be even hotter.
- There are two times that you’ll be on the boat – Takamatsu for the Naruto Whirlpools, and on the Naoshima Ferry. These can get cold and breezy.
- On Naoshima, you’ll be biking and if there are no clouds, exposed to a lot of sun so it can be one of the hottest days of your trip.
We recommend the following items to help you stayed prepared on your trip:
How Much Did This Trip Cost

When we put together our itineraries, one question that we always get is how much it costs. That’s why we’ve included these cost breakdowns to help give you an idea of what kind of budget you need for a vacation like this.
Below is a table of the costs converted to USD. Keep in mind that this does not include the flights.
| Category | Amount (USD) |
|---|---|
| Accommodations | $975 |
| Transportation | $679 |
| Food | $374 |
| Activity | $324 |
| Souvenir | $125 |
| Communication (including eSIM from Airalo) | $20 |
| TOTAL | $2,497 |
With a total spend of $2,497 USD, that’s a daily spend of $208 USD/person/day.
Comparing to the Far East Hokkaido trip, which was a $431/day, this trip was effectively half the price.
For other points of comparison, a week in Sapporo in the winter cost $318 USD/day, 1 month in Chile averaged out to $308 USD/day, 3 weeks in New Zealand was $353 USD/day, and 10 days in Egypt was $204 USD/day.
What To Pack for A Trip To Shikoku
We’ve covered some of this in our 5 Shikoku Travel Tips but we believe that they key for a trip like this is to remain as versatile as possible when it comes to clothing and gear.
This list isn’t meant to be comprehensive but we’ll list out some of the more important pieces and why. The links are mainly to mens products but you’ll be able to find equivalents. You’ll also notice that we wear a lot of Arc’teryx gear – not because we’re sponsored by them or because they’re from Canada, but because we love their quality and functionality.
Clothes
- Jacket – Arc’teryx Beta Shell – It’s a windproof and waterproof layer that you can wear on its own or in combination with the other layers. This is something you’ll want handy because you never know when you might encounter a rainy day.
- Waterproof pants – Arc’teryx Beta Pant – Along the same lines, you don’t want rain to ruin your day.
- Mid-layer jacket – Arc’teryx Atom Hoody – A great all-purpose jacket that provides warmth, feels incredibly soft, and packs down to a small size.
- Active fleece – Delta Hoody – This is a thin fleece that is your go-to long-sleeve when it’s just not warm enough to wear a t-shirt. It also layers well with everything else.
- Travel pants – Outdoor Research Ferrosi Joggers – These are seriously the most comfortable pants and perfect for travel with their zippered back pocket, elastic cuff hem, elastic waist, and quick-drying material.
- Shoes – Altra Lone Peak 7 – The number keeps incrementing every year but these have consistency been awesome for travel because they are light, provide tremendous traction, and dry very easily even though they are not waterproof. I’ve really come to enjoy zero drop shoes but they might not be for everyone.
- Active t-shirt – Cormac Crew Shirt – These high-performance tees are life changing. They have the qualities of a quick-dry shirt but is ridiculously light and breathable.
- Long-sleeve sunshirt – Outdoor Research Echo Hoodie – Ultralight long-sleeve fabric that’s meant to be used during warm weather but gives you full sun protection.
- Hat – Ciele GOCap – These are light, quick drying, packable, and fun-colored hats that are great for travel.
- Sunglasses – Maui Jim – The current model I’m wearing is discontinued but you can’t go wrong with anything they have. They also have the best lenses on the market according to our optometry friends.
- Swim trunks – Any swim wear – This one’s easy to forget but you’ll need it for your canyoning excursion.
Gear
- Luggage – Db Journey Ramverk Luggage – Chose the medium size of this niche brand mainly because they use one of the best and largest wheels on the market (60mm Hinomoto) which makes them silent and so easy to move around.
- Backpack – Shimoda Action X50 V2 – The ultimate photography backkpack for active travellers.
- Messenger bag – Everyday Sling – The 3L and 6L slings are amazing for travel, especially on days you don’t want to carry a full backpack but still want your camera with you.
- Travel towel – Microfiber Towel – We always recommend having these in your suitcase. These can also double as an onsen towel. That said, every accommodation was good about having towels available. The only exception is Hotel Iyaonsen where you needed to have your own. Most likely, you’ll just repurpose a free onsen towel from another location.
- Packing cubes – Eagle Creek Pack-It Cubes and Compression Cubes – Keep organized in your suitcase.
- Sunscreen – Sun Bum SPF50 for face and body – Make sure you’re protected every day.
- Bug spray – Repel 100 – I did not encounter any bugs in October but other seasons may be different.
- Reuseable tote – Peak Design Packable Tote – Super handy when shopping, have a lot of loose things that temporarily need to be moved together, and to keep all your snacks together in the car.
Gadgets
- Tripod – Peak Design Carbon Fiber Travel Tripod – This is our go-to tripod for our travels and we’ve reviewed it extensively.
- Camera – OM System OM-1 – This is honestly the best camera system if you love to travel, need something rugged for adventures, and shoot wildlife.
- Lens – OM System M.Zuiko Pro 8-25mm – I had to be selective with my lens choices for this trip and ended up using this one the most.
- Powerbank – VEEKTOMX 10000mAh – So good that I travel with 2 of these now with one set up in the backpack and another in my pocket if I need it. What’s important with this one is that it’s thin, small, and can properly quick charge.
Closing Thoughts On 12 Days In Shikoku
Shikoku won’t be on your radar but really should be. It’s the kind of place where the name doesn’t necessarily stand out from the travel pamphlets (if they still make those) but is the type of place where you can fittingly say “if you know, you know”.
These 4 thoughts encapsulate what makes this such a special place.
You can have it all to yourself – I loved my Golden Route experience 10+ years ago but going back to places like Tokyo, Osaka, and Kyoto this year, I’ll be honest, some of that joy was sucked away by huge hoards of tourists and needing to strategize around it. Shikoku was the polar opposite experience where I never had to worry about crowds and I could appreciate each place with intention and peace.
Authentic experiences – Shikoku is more than just sightseeing but there are so many ways where you can get your hands dirty. From knife-making to indigo dyeing, there are so many experiences that will give you a deeper appreciation of how serious they take their respective craft.
Beautiful blend of food, nature, art, and religion – There’s a zen-like quality of how well everything blends and interplays with each other in Shikoku. More than anywhere else I’ve been to in Japan, there’s a completeness to what you can see, do, and eat in Shikoku.
Amazing people – Don’t get me wrong, there are amazing people all over Japan but consistently, language barrier or not, it felt easier to make deeper connections here. Thanks to the freedom of pace and going to places that don’t get as many visitors, locals seemed to be more open to sharing their story.
Perhaps what it all comes down to is that strong sense of authenticity that permeates throughout Shikoku. It’s a feeling and vibe that doesn’t always come through in the marketing but I can tell you that it’s unlike anywhere else I’ve been.
If we’ve done a good enough job of convincing you, our hope is that you’ll make Shikoku part of your upcoming trip to Japan.
Frequently Asked Questions
The beauty of Shikoku is that it’s beautiful all-year round. While it’s never too busy, you certainly want to try to avoid big holidays and festivals. Similar to other parts of Japan, cherry blossom season and the autumn leaves are great times to go for the most scenic foliage.
Shikoku is the least visited of the main islands of Japan and that alone makes it unique because it retains a raw and authentic quality to it, combining well-preserved architecture, rich cultural heritage, bountiful natural wonders, and is steeped with a sense of mystery because it’s a place few get to experience.
The best way to see Shikoku is by car. The road infrastructure on the island of Shikoku is very good and cuts through its many interior valleys and mountains. That said, it can be challenging for those that are driving on the left-hand side for the first time and certain stretches where you share the road to both sides of traffic on a single lane in the mountains.
While Shikoku is the smallest of the 4 main islands, it has a lot to explore. As a result, we recommend a minimum of 8 days to see Shikoku, and ideally 12 days.
For tourism, Shikoku is best known for the Shikoku Pilgrimage route where you visit some or all 88 Buddhist temples on the island. Thanks to its many bridges connecting to island, it is also a well-known place for cycling enthusiasts. Other things Shikoku is known for are mikan oranges, the Awa Odori Dance, Naoshima Island, Sanuki udon, and olive wagyu.
Yes, you can rely on trains and local buses to get around the island. Many utilize the Shikoku Rail Pass which is exclusive to foreign visitors that is valid on JR trains and also regional train companies such as Kotoden, Iyotetsu, Tosaden, Tosa Kuroshio Railway and Asa Kaigan Railway. It also gives you free access to ferry to Shodoshima and the the buses on the island.
This Shikoku itinerary occurred in the middle of October to give you an idea of the time of year and season.
Shikoku is very pleasant in October. It’s a relatively dry month and is mostly t-shirt weather. The exception is in the valleys and mountains where it’s generally cooler and can get chilly at night. Make sure to have a sweater for these areas of Shikoku.
The Shikoku Pilgrimage route or Shikoku Henro is an amazing experience and a once-in-a-lifetime experience. That said it’s not necessarily for everyone. For those that aren’t as interested in the spiritual aspect of it or interested in walking for long stretches, and want to see a broader scope of what makes Shikoku special, a road trip of the island might serve you better.
Read More Japan Travel Content
Best Place To Book Hotels in Japan
- After considerable testing between Booking.com, Expedia, and Agoda, ultimately Agoda is the cheapest and has the advantage in terms of having more inventory of hotels in Japan.
Travel Resources For Your Next Trip
If you’re in the process of planning your trip and putting together your itinerary, these are genuinely the best resources that the Going Awesome Places team stands by 100%.
Credit cards: Don’t get burned by hidden fees on top of terrible exchange rates. When we travel now, we use the Wise Card. Simply load it with the currency you need before you go and use it as a regular VISA or their digital wallet card. Use their free app to track how much you have and top up when you need to.
Flights: Of all the booking search engines, Skyscanner is the most helpful and easy to use thanks to their Everywhere feature. Kayak is also another that’s we will often check as well.
Car Rental: If you’re looking to save money, these car rental coupon codes will be a true game-changer. Otherwise, DiscoverCars and RentalCars are great places to start.

Airport Parking: You’ll need a spot to leave your car at the airport so why not book a spot at a discount. Use code AWESOME7 to get at least $5 off at Airport Parking Reservations or Park Sleep Fly packages.
Data: We’ve been a huge fan of wifi hotspot devices like PokeFi because their rates are so good and you can use it globally but recently, we’ve really loved using eSIMs. The best one is Airalo. Save money by getting region-specific eSIMs and use referral code WILLIA9500 to get $3 USD credit on your first purchase. Ubigi is another one that we’ve had success with where they uniquely offer 5G coverage. Use code AWESOME10 to save 10% on your first order.
Hotels: Our go-to is Booking.com because they have the best inventory of properties including hotels and B&Bs plus they have their Genius tier discounts. The exception is Asia where Agoda always has the best prices. TripAdvisor is also useful for reviews and bookings.
Vacation Rentals: Your first instinct will be to check Airbnb but we always recommend checking VRBO as well if you’re looking for a vacation rental.
Tours: When planning our trips, we always check both Viator and GetYourGuide to at least see what’s out there in the destination that we’re going to. They often have different offerings and prices so check both.
Travel Insurance: Learn how to buy the best travel insurance for you. This isn’t something you want to travel without.
- Insured Nomads – Popular insurance provider for frequent travelers and comes with great coverage and special perks.
- RATESDOTCA – Search engine Canadians looking for the cheapest insurance including multi-trip annual policies.
- SafetyWing – A perfect fit for long-term nomads.
- Medjet – Global air medical transportation.
- InsureMyTrip – Best for seniors, families, and those with pre-existing conditions.
If you need more help planning your trip, make sure to check out our Travel Toolbox where we highlight all of the gear, resources, and tools we use when traveling.
This trip was in partnership with Visit Shikoku but all opinions are our own.


