
Disclosure: This post may contain affiliate links, which means I may earn a commission if you click on the link and make a purchase.
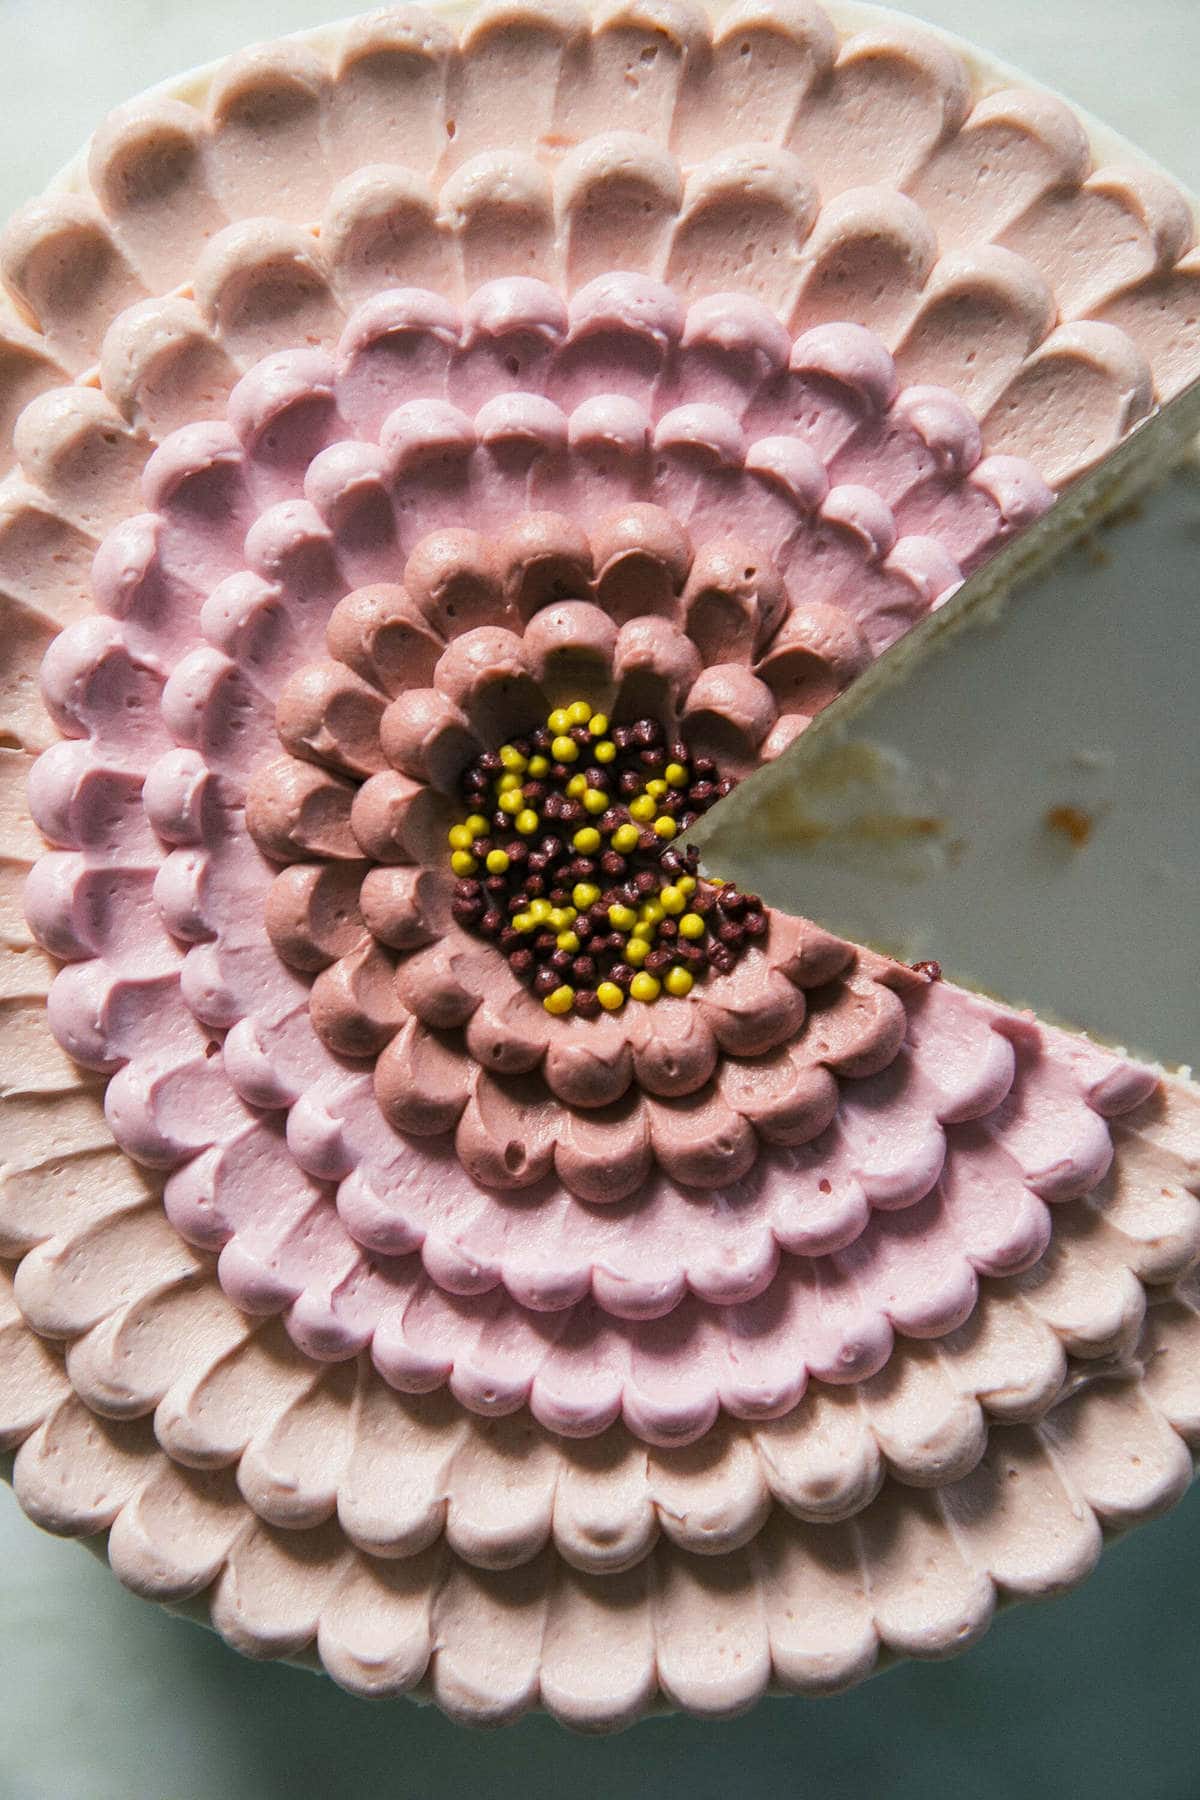
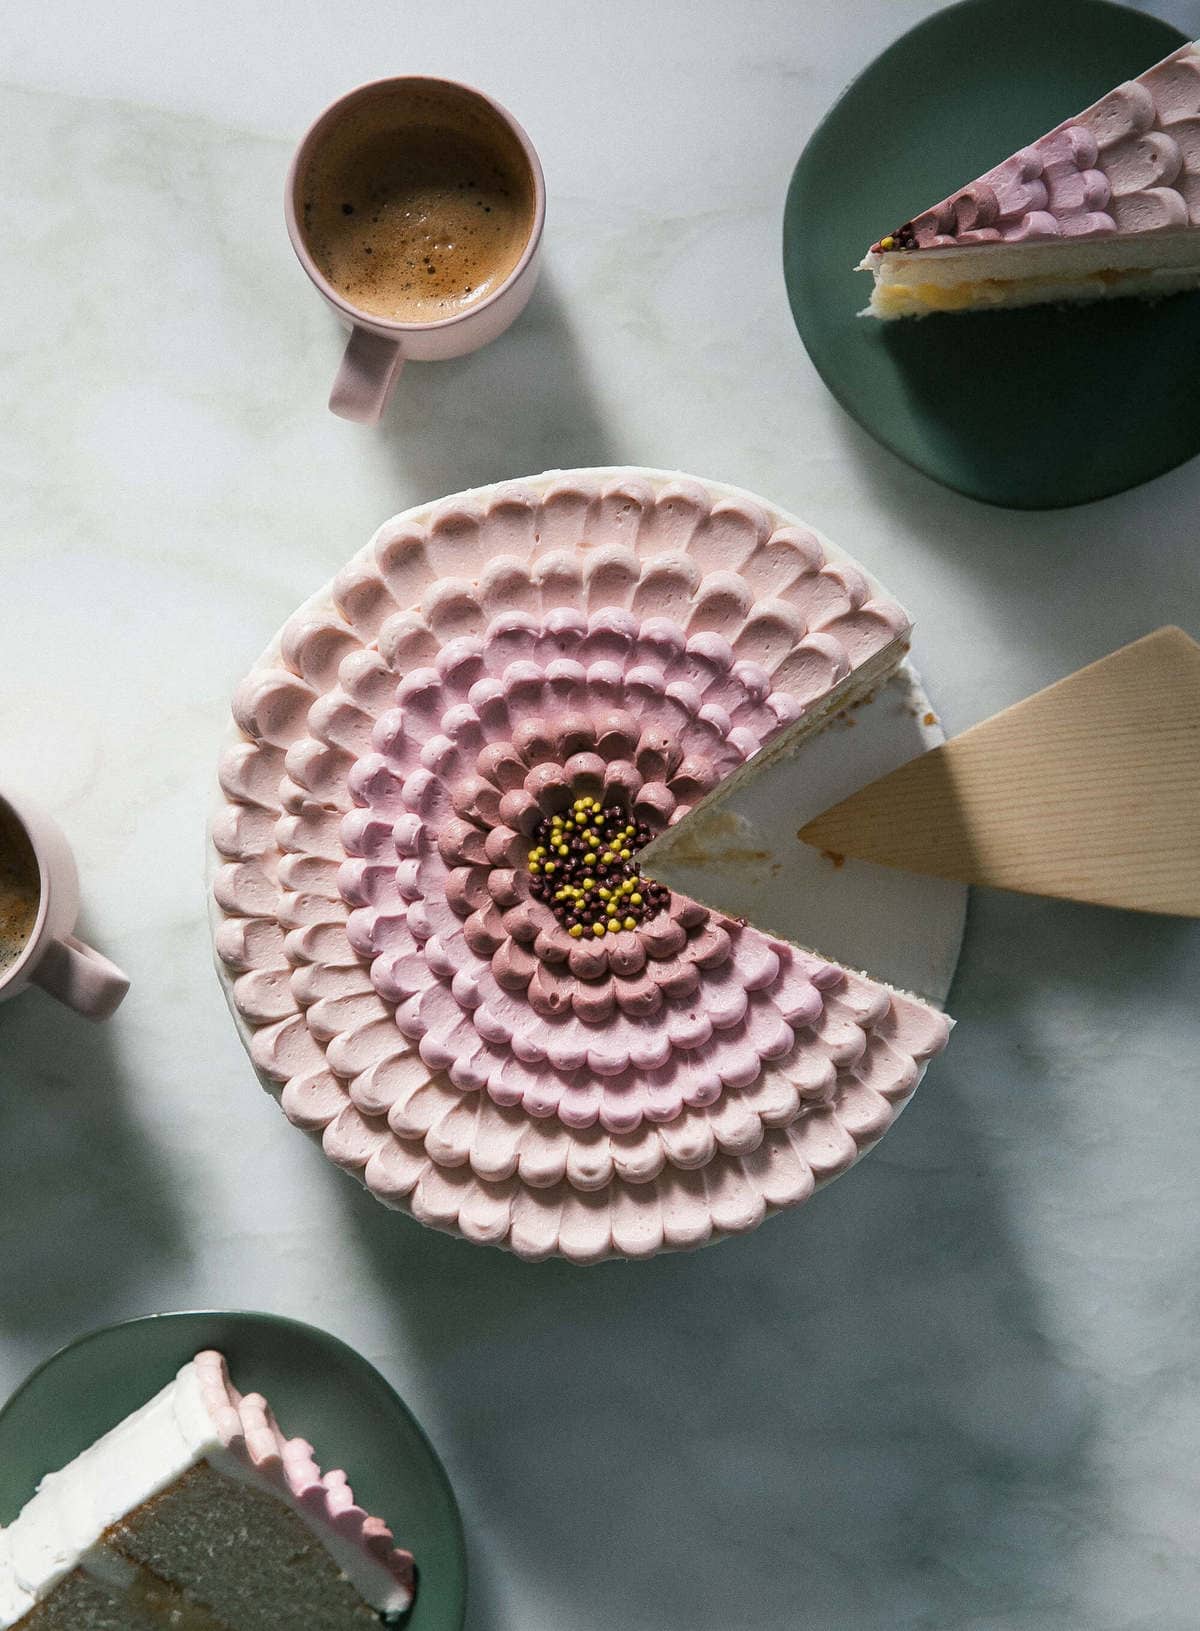
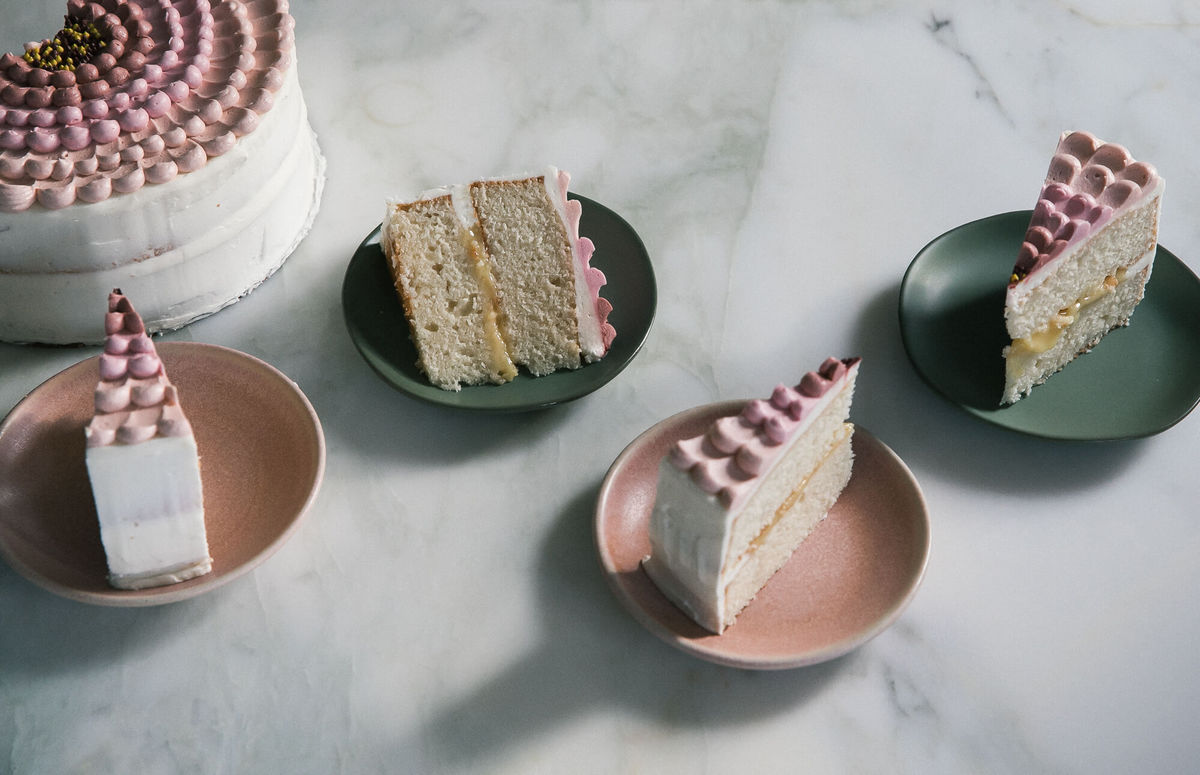
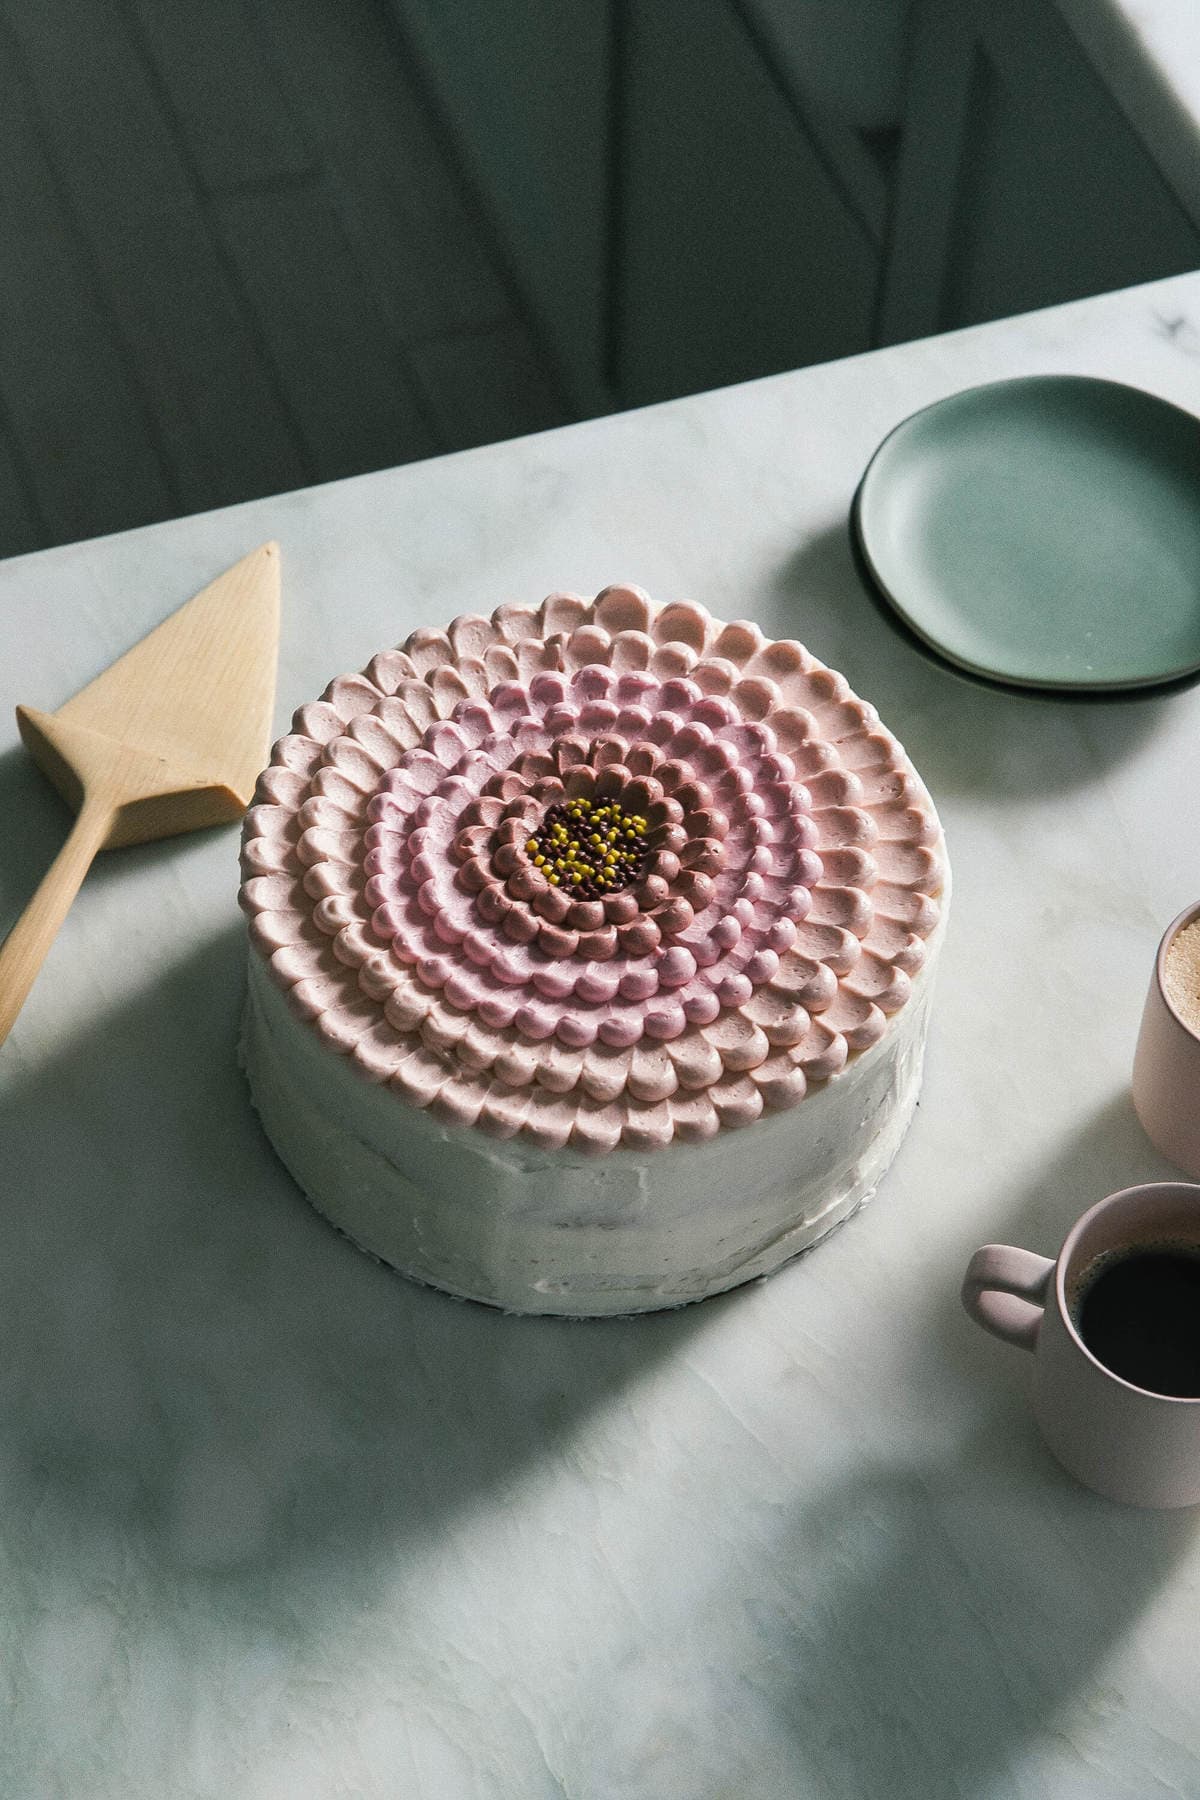
This Lemon Coconut Cake is a two-layer coconut cake, layered with delicious lemon curd and topped with frosting. The petal effect on the cake makes it look like a gigantic flower.
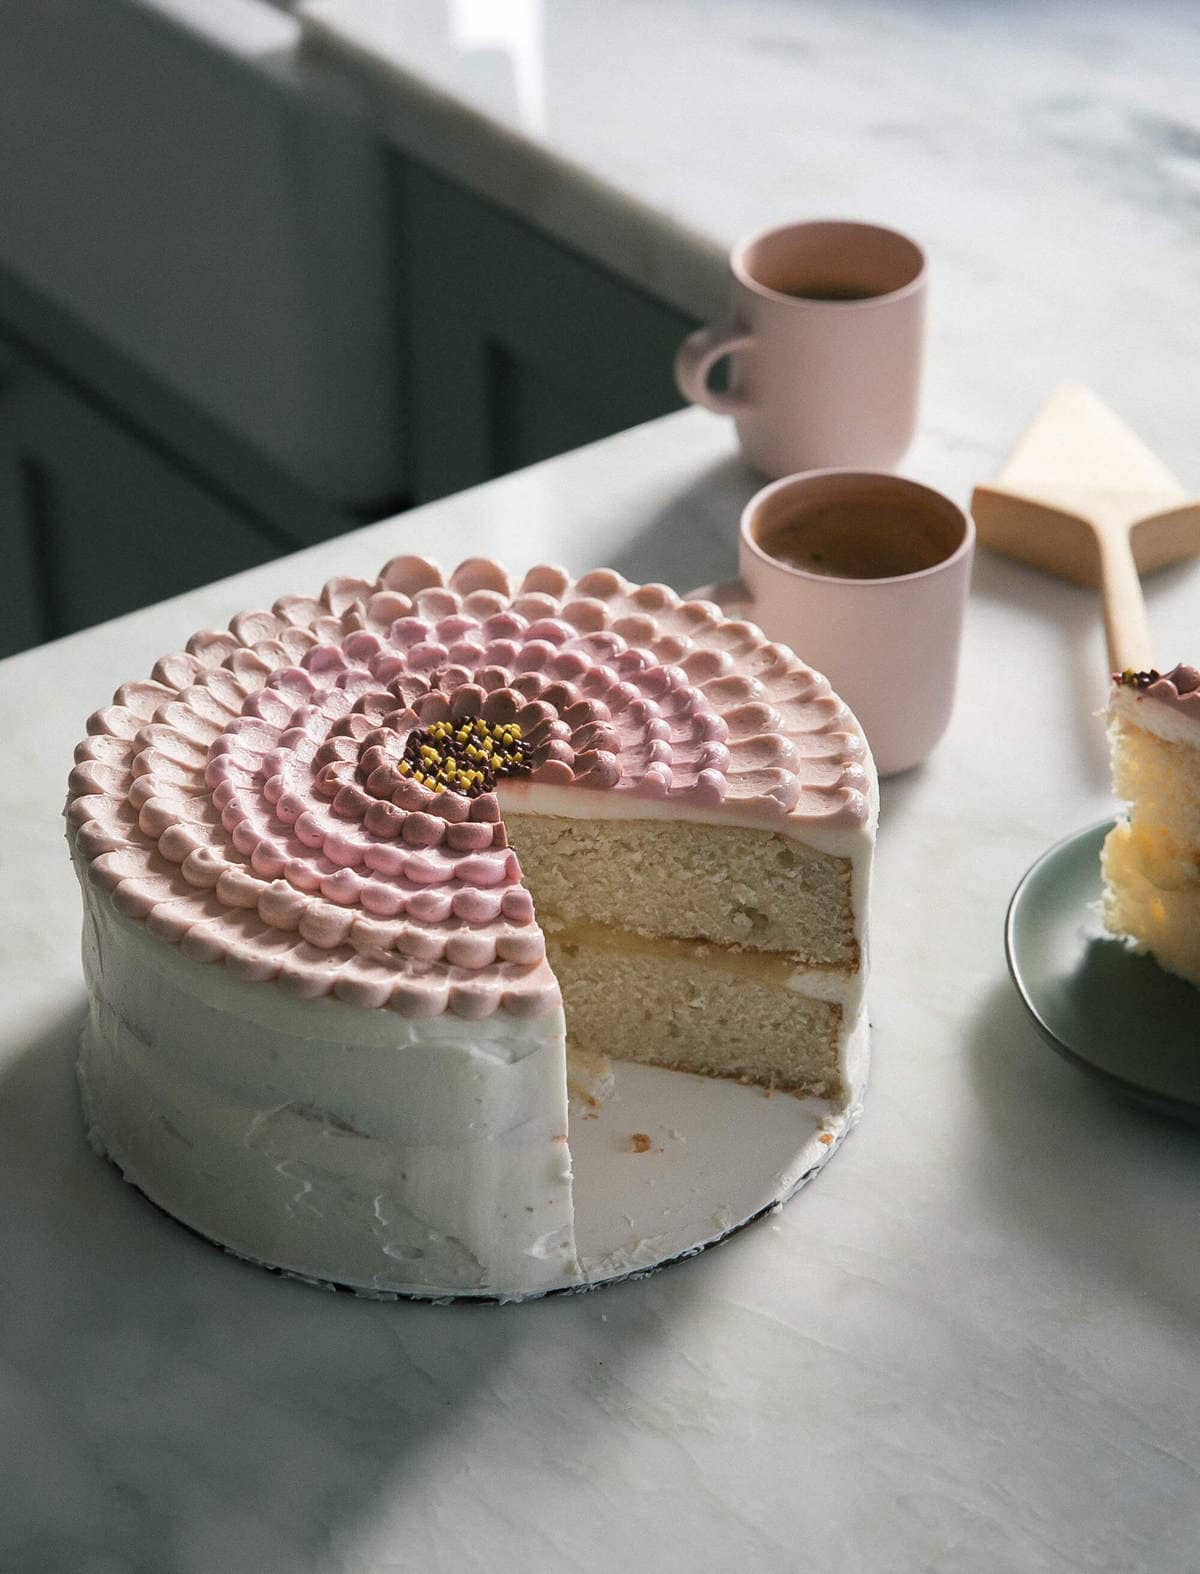
This lemon petal cake has been on my to-make list for a looooong time.
While this cake is a test in patience (yes, admittedly it takes some time), the topping is actually super easy to do. No real special skills needed. The thing you have to have is a small spoon OR better yet, a small offset spatula.
And of course, some food coloring gels.
I love baking cakes. Everything from my mini strawberry cake, lemon cake to more layer cakes like my zucchini chocolate cake.

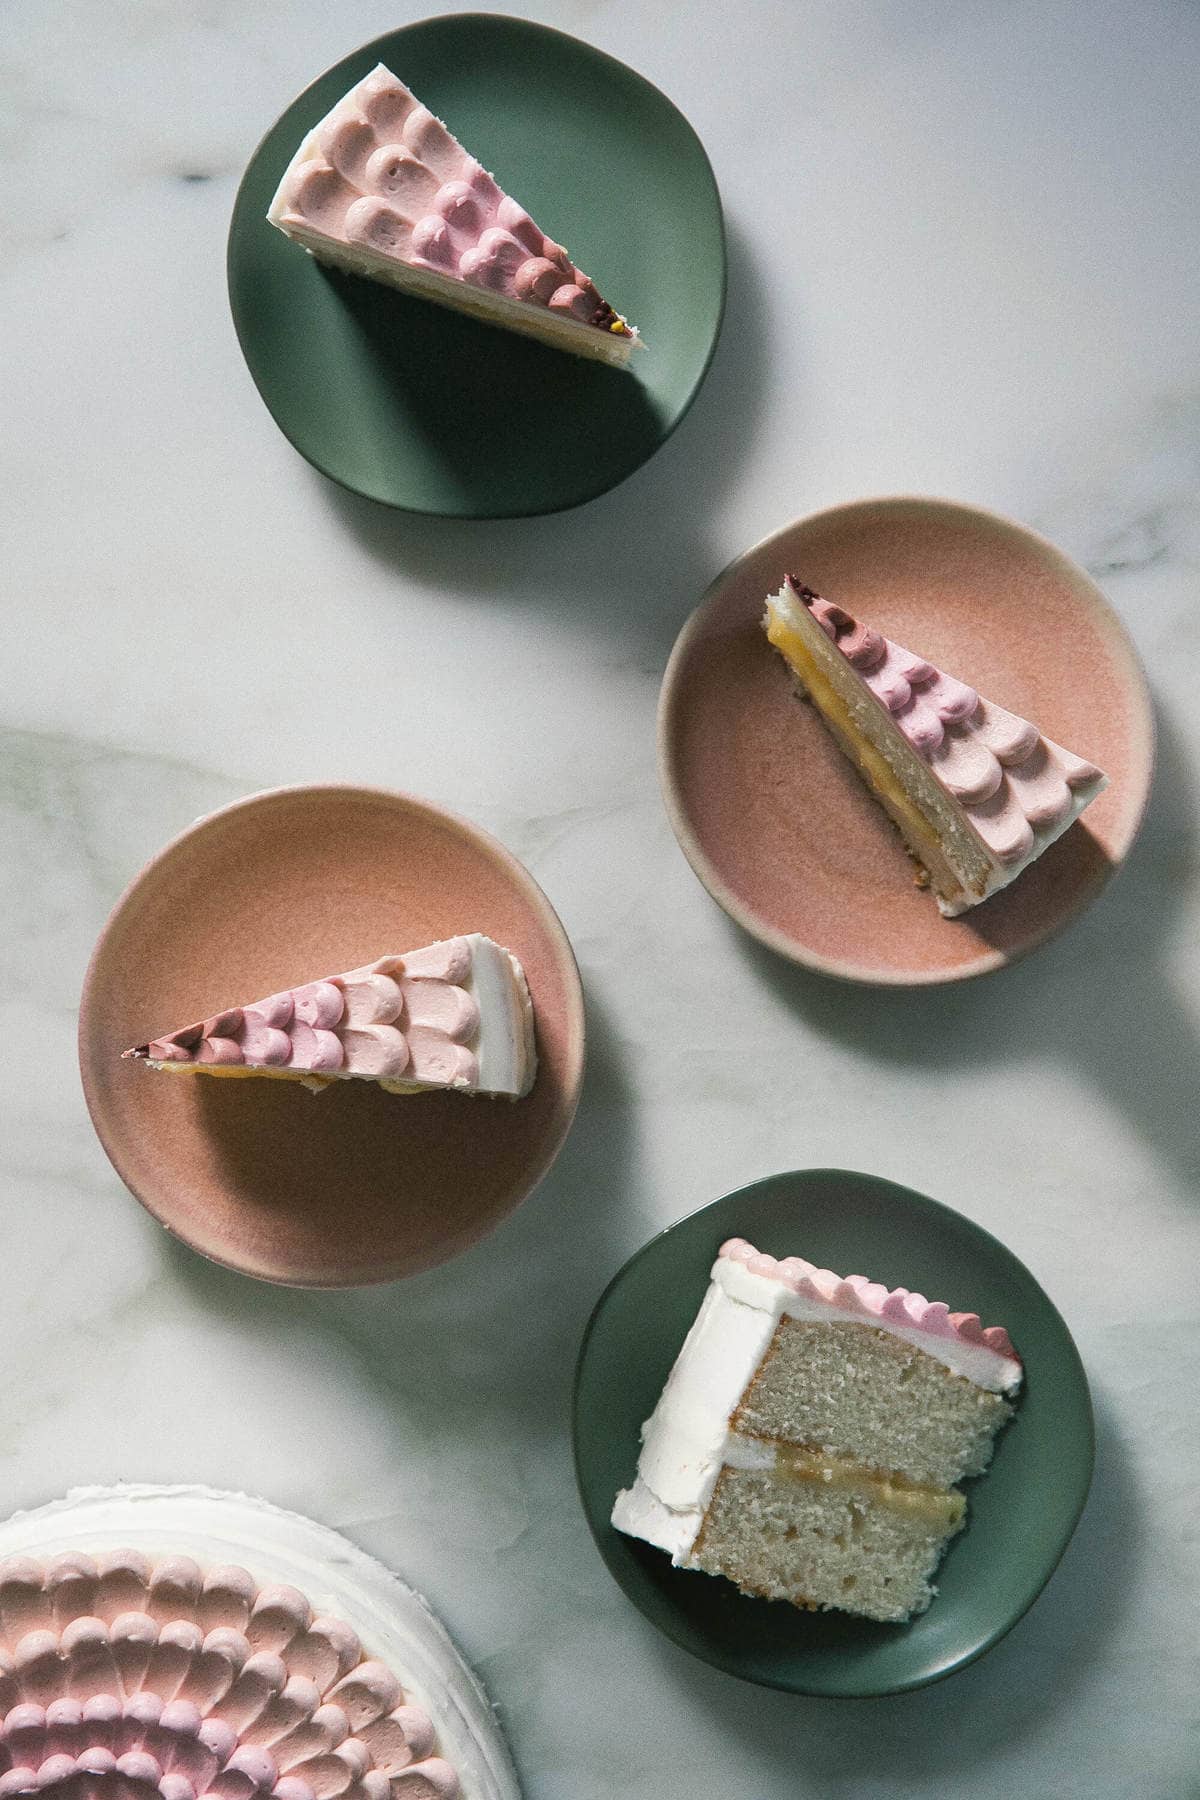
This Lemon Coconut Cake Has Three Different Elements:
- Cake layers: toasty coconut flavored cake layers
- Lemon curd: bright and tart, goes perfect with the coconut flavor.
- Buttercream: rum flavored!
How to Make Lemon Coconut Cake
- Make the curd. This is the lemon portion of the cake, it seems daunting but it’s really easy! It comes together quickly and keeps in the refrigerator if you want to make it a couple days ahead (you can also buy a high quality lemon curd if you wanted to also).
- Make the coconut cake. Prepare your cake pans by greasing them and lining them with a parchment circle. Cream together the butter oil and sugar with the coconut extract (very important ingredient!), then alternately add the dry and wet ingredients. Divide the batter between the pans and bake until a skewer comes out clean.
- Make the buttercream. Cream the butter then slowly add the powdered sugar until it’s all combined then beat on high speed with the heavy cream and rum.
- Assemble! Place a cake layer on your cake stand then pipe a “dam” of frosting around the edge. Add the lemon curd inside evenly then add the second layer of cake and frost the outside with the remaining buttercream.
How to Decorate this Lemon Coconut Cake!
- I used a small round tip. Luckily I had a few of the same size. So I divided the three different mauve colors into three different piping bags.
- I started from the outside, adding small dollops all the way around, in one even circle.
- Using a small offset spatula, and swiped the dollop inward, toward the center.
- I repeated this step, giving each color frosting two rows of dollops/swipes. These dollops and swipes make the “petals.”
- When I got to the center of the flower, I added the yellow and burgandy colored frostings to piping bags and snipped off a teeny amount off the ends. Then I piped on teeny dollops of these two colors, in a random way.
Recipe Tip
Not going to lie, this cake is a bit of a labor of love. Between the lemon curd, cake layers and buttercream, there’s a good amount of things to make, here’s my plan when I make it:
- Make the Lemon Curd the day before, even a few days before! It keeps well in the fridge so you can do this up to 3 days ahead.
- Make the frosting the day before. Make and tint all the buttercream the day before while the cakes bake then store in separate containers in the refrigerator. Bring to room temp and stir well before transferring to piping bags to decorate.
- Make the cake the day before. Bake the cakes, remove from the pan and let cool completely before wrapping in a couple layers of plastic wrap and storing at room temperature.
This cake is ambitious for sure. But of course, you’re welcome to skip the decorating and you can make the coconut, lemon and rum flavored cake!
Recipe FAQs
I divided the frosting into a few different bowls and wanted to create an ombre effect so I decided to make a deep mauve color, and then created three different lighter versions of that same color. As well as a yellow color (for the center of the flower) and a burgandy color.
If you tried this Lemon Coconut Cake Recipe or any other recipe on my website, please leave a 🌟 star rating and let me know how it went in the 📝 comments below. Thanks for visiting!
To Make the Lemon Curd
-
To a small saucepan, placed over medium heat, simmer the lemon juice until it reduces by half (to about 1/3 cup), about 3-5 minutes. Set aside to cool slightly.
-
*In the stainless steel bowl (note: you’ll use this bowl as a makeshift double-boiler later) of your stand-up mixer, add the softened butter and sugar and beat until light and fluffy, about 2 minutes. You can also use a glass or stainless steel bowl with an electric hand mixer.
-
Add the egg yolks, beat the mixture together, until they’re well incorporated. Stir in the salt, and then in a few batches, add the lemon juice. The mixture will look curdled and you might scratch your head and wonder if it’s right, it will be!
-
Rinse out the small saucepan you used earlier, and fill it with a few inches of water. Bring the water to a simmer and place your stainless steel bowl of curd mixture on top. Stir constantly, and heat the curd slowly enough that the sugar has time to dissolve and the whole mess becomes cohesive; this step usually takes about 10 minutes. Pull the curd from the heat, when it is just thick enough to coat your spoon and until a thermometer reads 166 F. The curd will thicken as it cools.
-
I ran the curd through a sieve into a chilled bowl a few times just to ensure it was silky smooth. I highly recommend this step! Transfer the curd to a container a keep in the fridge, in an airtight container, for up to a week.
To Make the Coconut Cake Layers:
-
Preheat oven to 350 degrees F. Line two 8-inch cake pans with rounds of parchment and grease the sides with cooking spray or flour and butter. Set aside.
-
In a large measuring cup, measure out the milk and add the egg whites. Whisk together and set aside. To a medium bowl, whisk together the all-purpose flour, baking powder and salt. Set aside.
-
To the bowl of a stand-up mixer (or using a large bowl and an electric hand mixer), add the butter, oil, coconut extract and sugar. Beat until fluffy, about 2 to 3 minutes. Next, rotating between the milk/egg white mixture and the dry ingredient, add, ending and beginning with the liquid mixture. Beat for an additional 20 seconds, until everything is combined and cohesive. Give it a manual stir with a spatula just to ensure all of the flour at the bottom of the bowl is properly combined.
-
Divide the batter amongst the two cake pans and using a spatula, even out the top and spread the batter to the edges of the cake pans. Transfer to the oven to bake for about 30 to 35 minutes, until a skewer inserted into the center comes out clean. Remove from the oven and allow to cool for about 5 to 10 minutes in the pan before inverting them onto cooling racks.
To Make the Buttercream:
-
To the bowl of a stand-up mixer, with the paddle attachment, add the butter. Beat for about 30 seconds or so just until the butter is mostly smooth. Add the sifted powdered sugar and salt. I like to cover my mixer with a clean kitchen towel so the powdered sugar doesn’t spill out. Turn the mixer to low and mix for about 30 seconds. Turn the speed up to medium speed and beat for an additional 30 seconds.
-
Pour in the heavy cream and rum and beat on high for 2 minutes, until the buttercream is light and fluffy.
To Assemble the Cake:
-
Place one cooled cake layer on a cake board. Transfer about 1 cup of white frosting to a piping tip. Create a barrier to the top of the first layer of cake. Pour about 1 cup of lemon curd to the center and using a spatula, spread it into one even layer. Place the second cake layer on top. Add a crumb coat of white frosting to the cake and smooth the top and sides. Transfer the cake to the fridge to chill for about 20 minutes.
-
Meanwhile, divide the remaining frosting into three different bowls. Then to two other small bowls, add about 2 tablespoons each (this is going to be the center colors). For the center, I made them burgundy (black and red food coloring gel, about 1 drop each) and the other bright yellow (1 drop of yellow). For the three different colors of mauve, I added about 1 drop of fuschia + 1 drop of black. I played with these adding a bit at a time, until I reached 3 different shades, going from darker to medium to light.
-
Add the three different shades of mauve to different piping bags with #10 tips attached. To the top, starting with the outside, and starting with the darkest color, add one row of dots all the way around the top of the cake. Using a small offset spatula, press the dot down, making a swiping motion. Repeat with the same color. Next, move onto the medium color. And repeat with two rows. Next, move onto the lightest color, repeating with two rows.
-
When you reach the center, you should have a small circle that’s empty. Transfer the burgundy and yellow color of frosting to two small piping bags, snipping off the tips. Make a ton of teeny dots of each of the color to the center, mimicking the center of a flower. Transfer to the fridge to chill for about 10 minutes before slicing.
Serving: 8g | Calories: 781kcal | Carbohydrates: 87g | Protein: 10g | Fat: 45g | Saturated Fat: 28g | Cholesterol: 184mg | Sodium: 284mg | Potassium: 199mg | Fiber: 1g | Sugar: 53g | Vitamin A: 1435IU | Vitamin C: 9mg | Calcium: 80mg | Iron: 2mg
Nutrition information is automatically calculated, so should only be used as an approximation.
*This cake was originally published on February 27th, 2019. It has since been republished and updated with new copy.
Discover more from reviewer4you.com
Subscribe to get the latest posts to your email.


